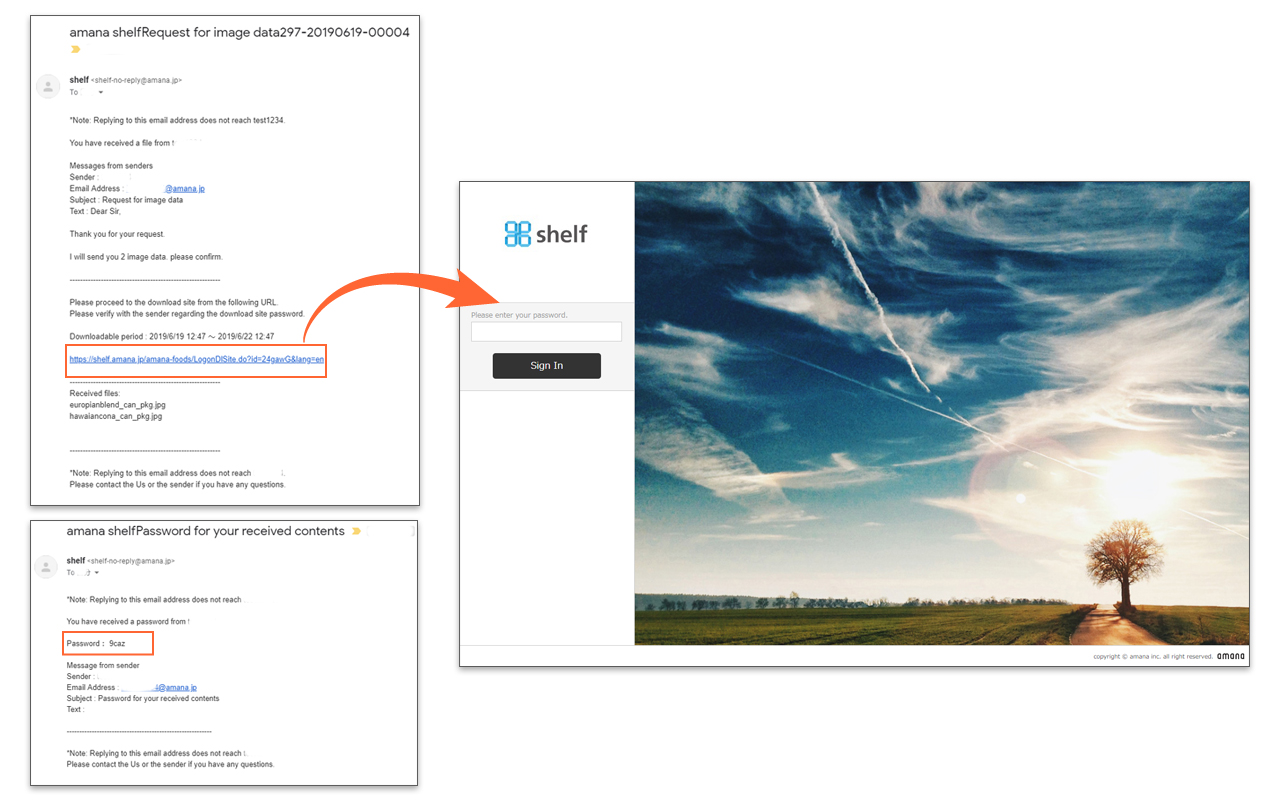
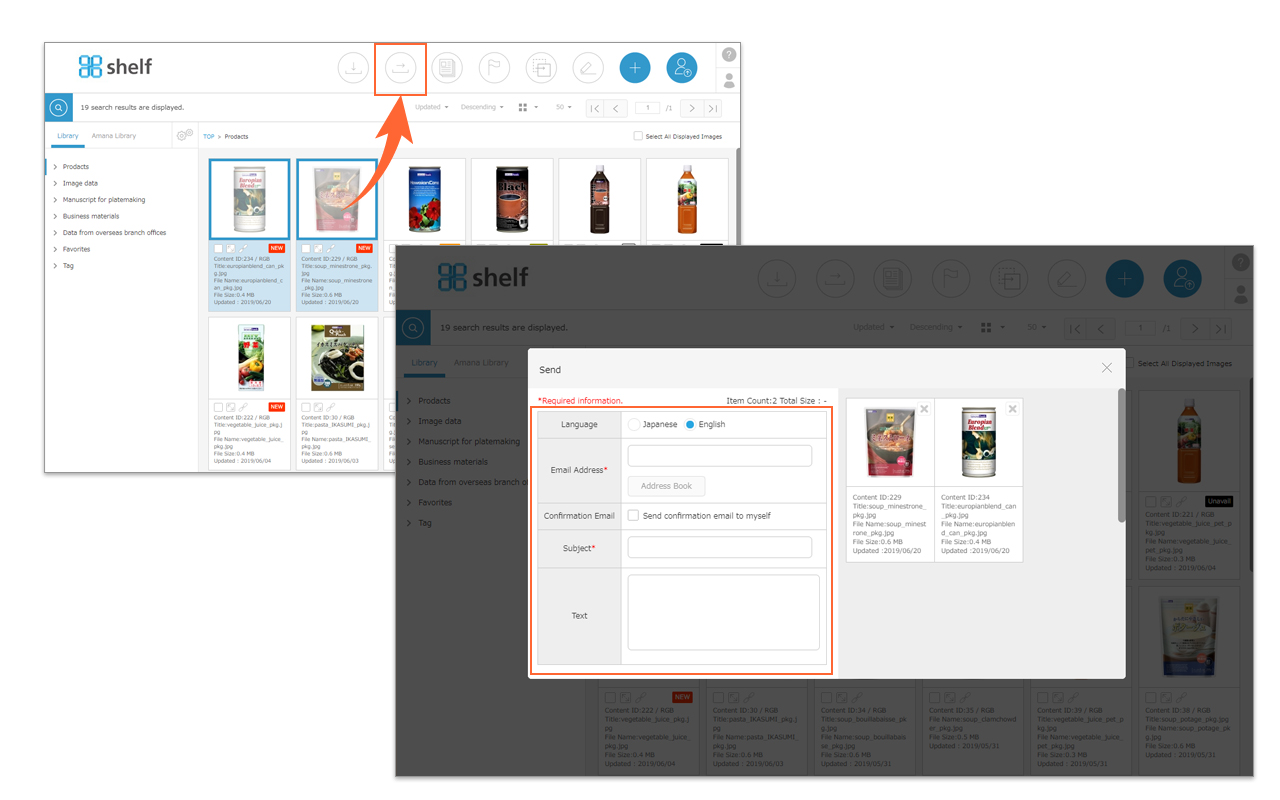
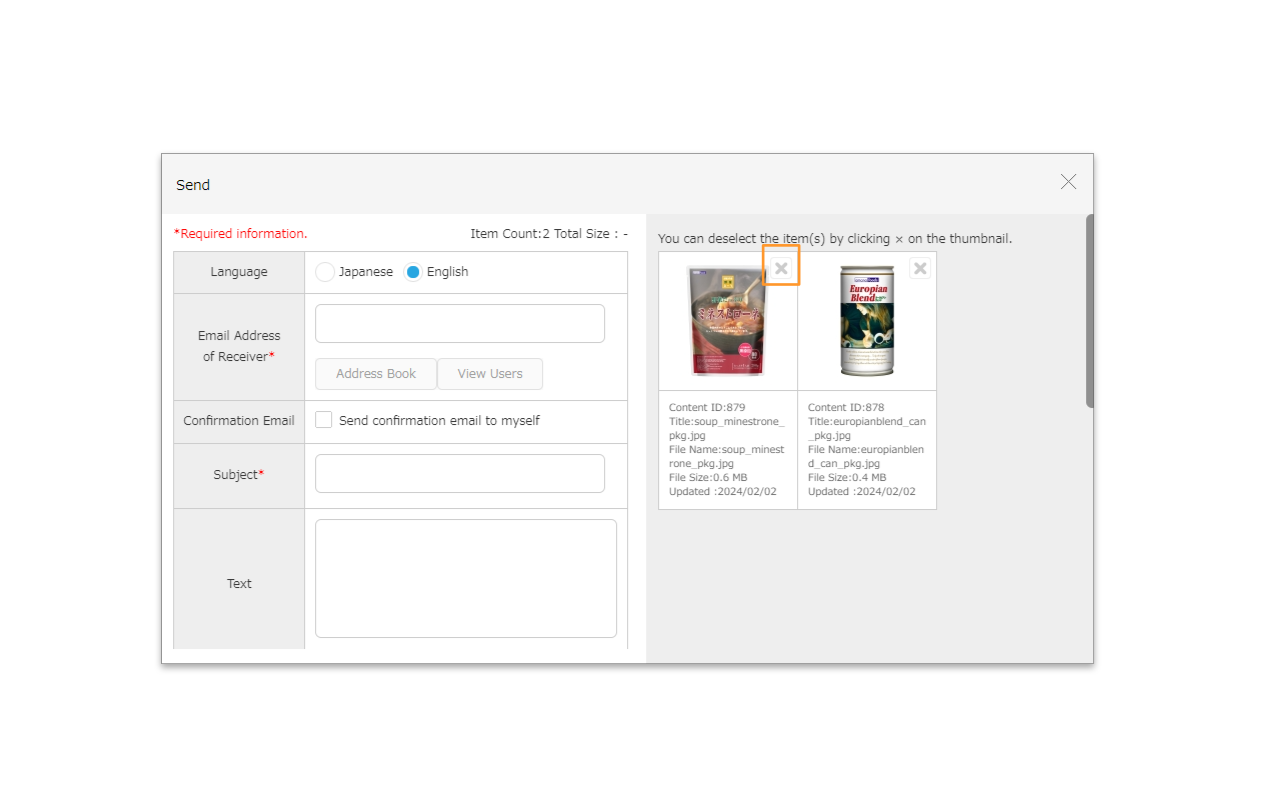
Forward Request
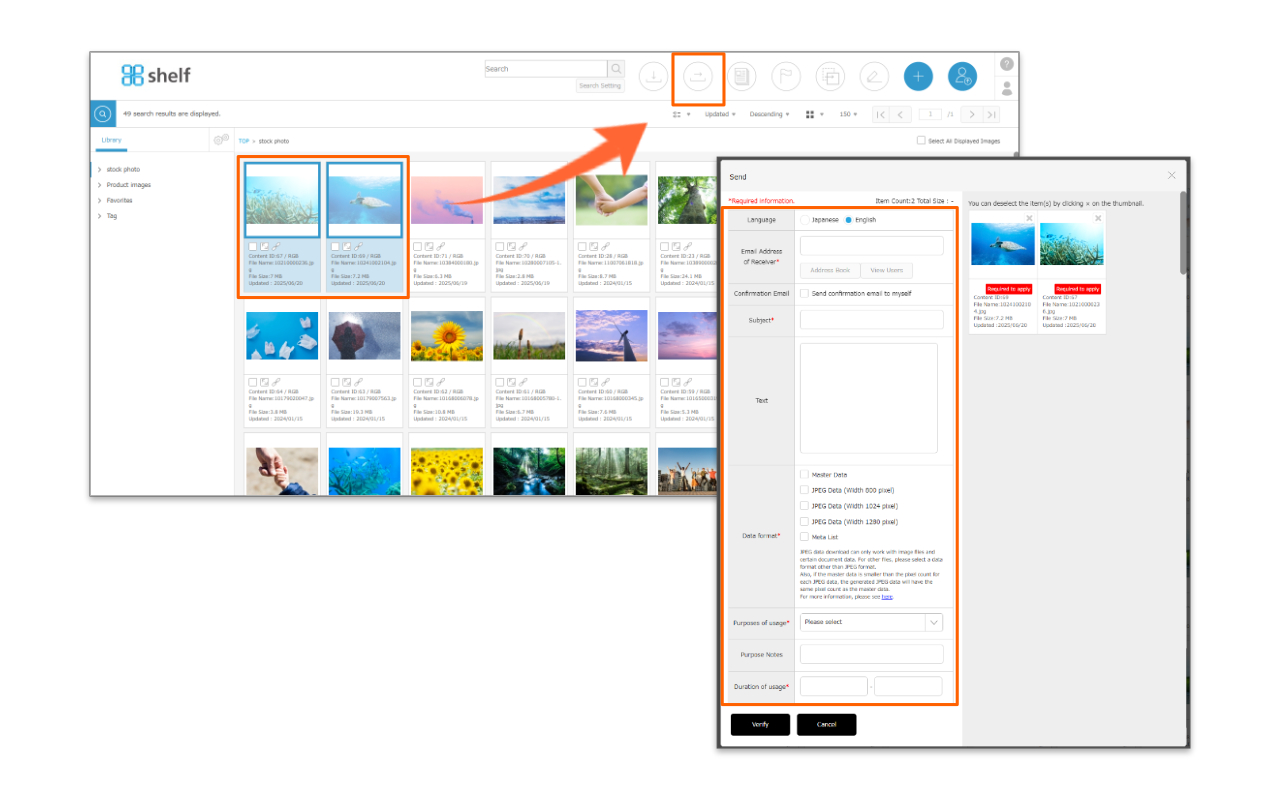
* The fields to be entered can be changed per site, so certain information above may not apply.
* Forward Requests can not be made if a forward request authorizer has not been set. In this case, please contact your administrator.
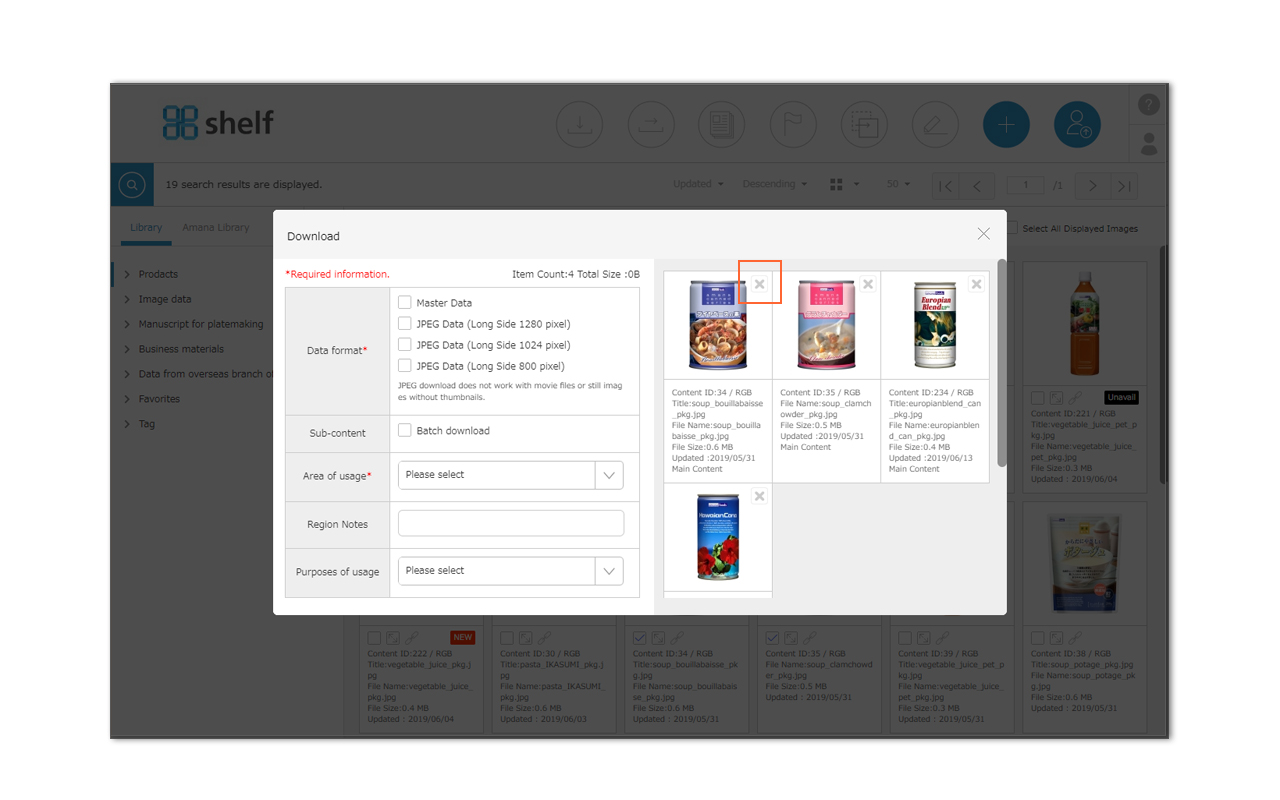
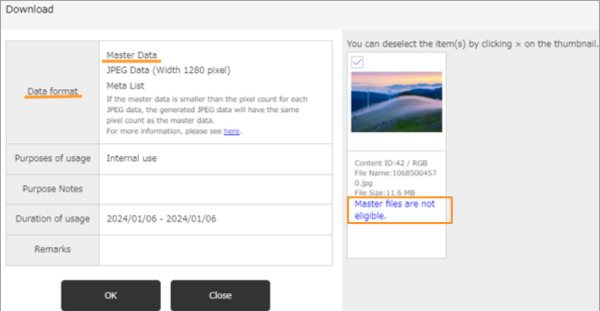
*If you see a link button like the one below, you may not be able to submit download request for master content with this action (Meta list and JPEGs are available for download).
For details, please refer to here.

【Approving/Rejecting Requests】
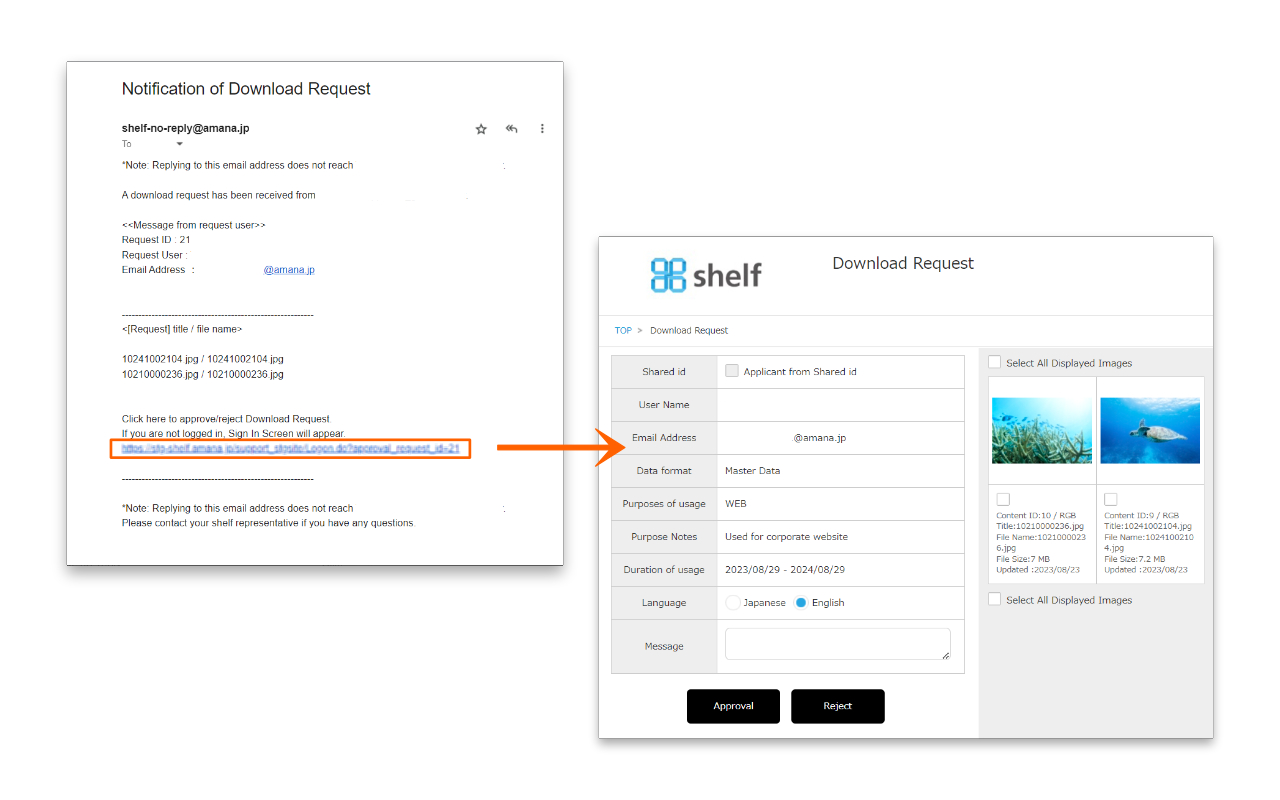
- An email informing of the request will be sent to the authorizer.
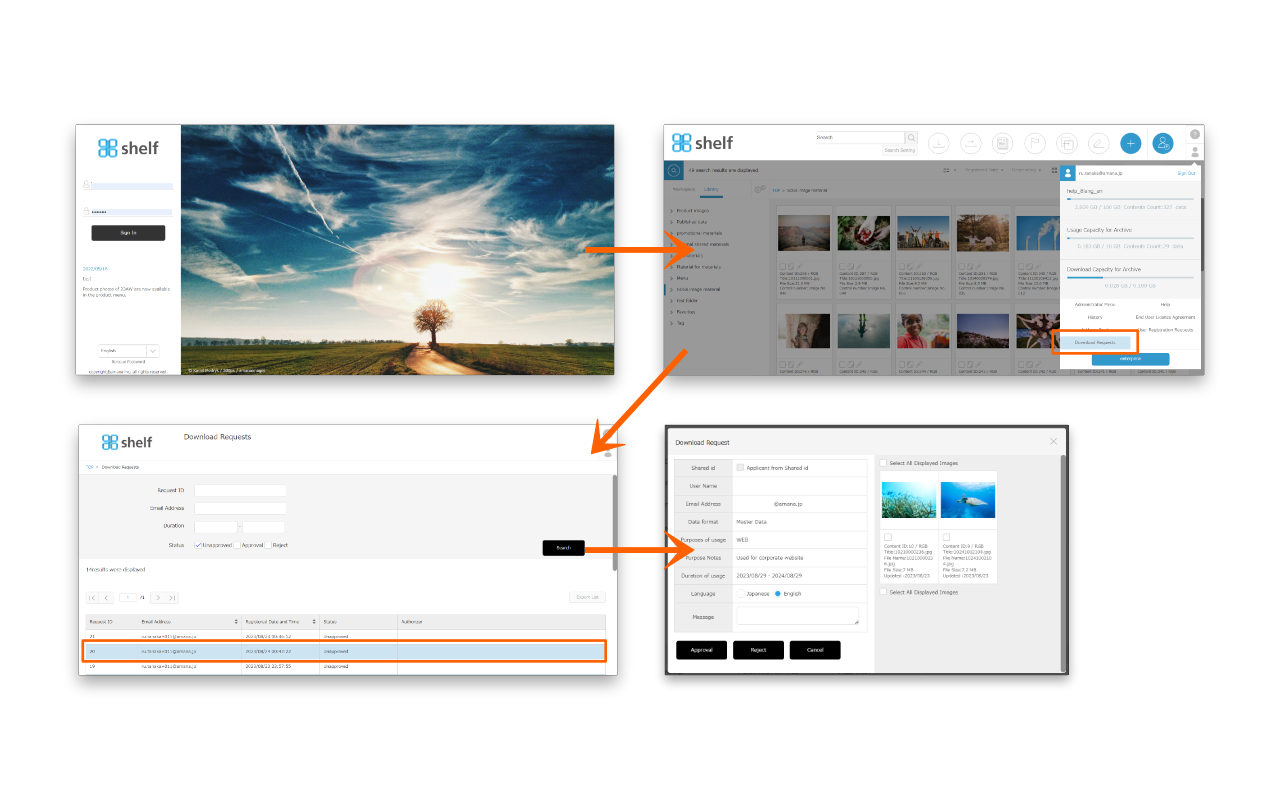
The authorizer will click on the URL in the notification email to open the details page of foward request.
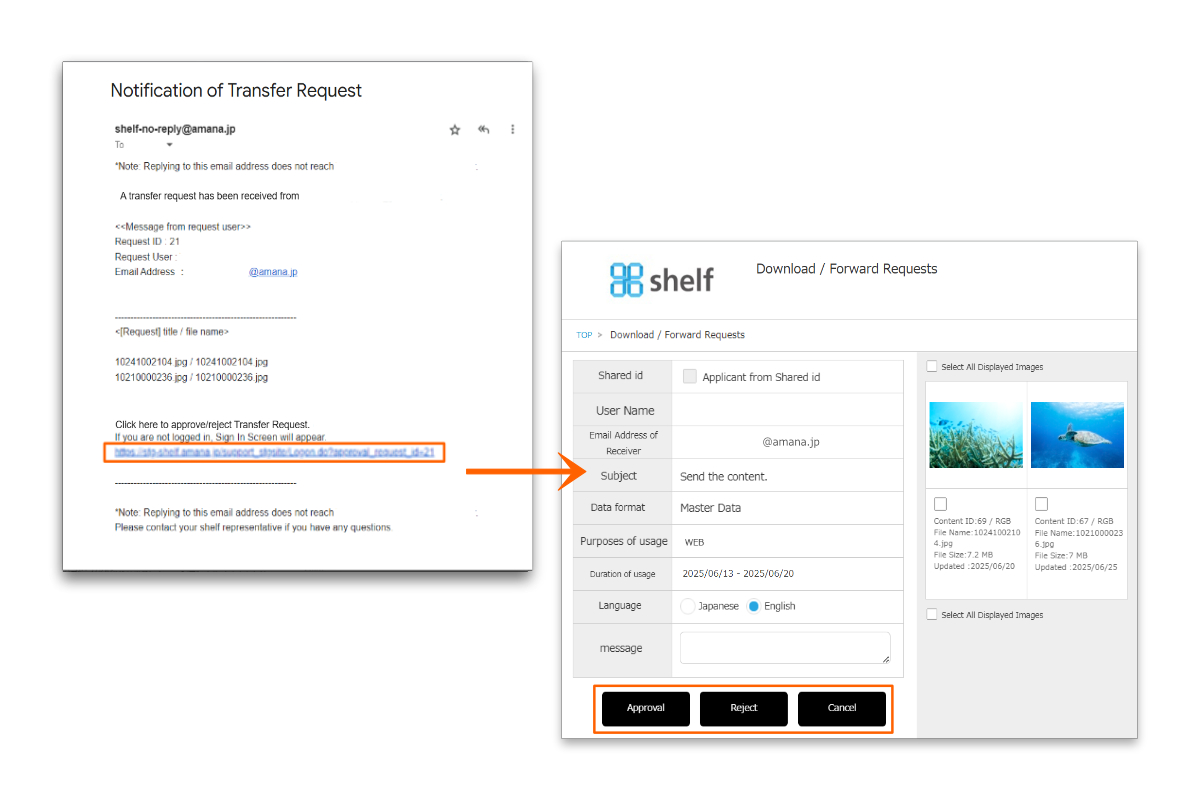
Or they will need to sign in to the site, click on User Menu person icon in the upper right corner of the screen, then click on Forward Requests. Please then Click on each request in the list to open the details.

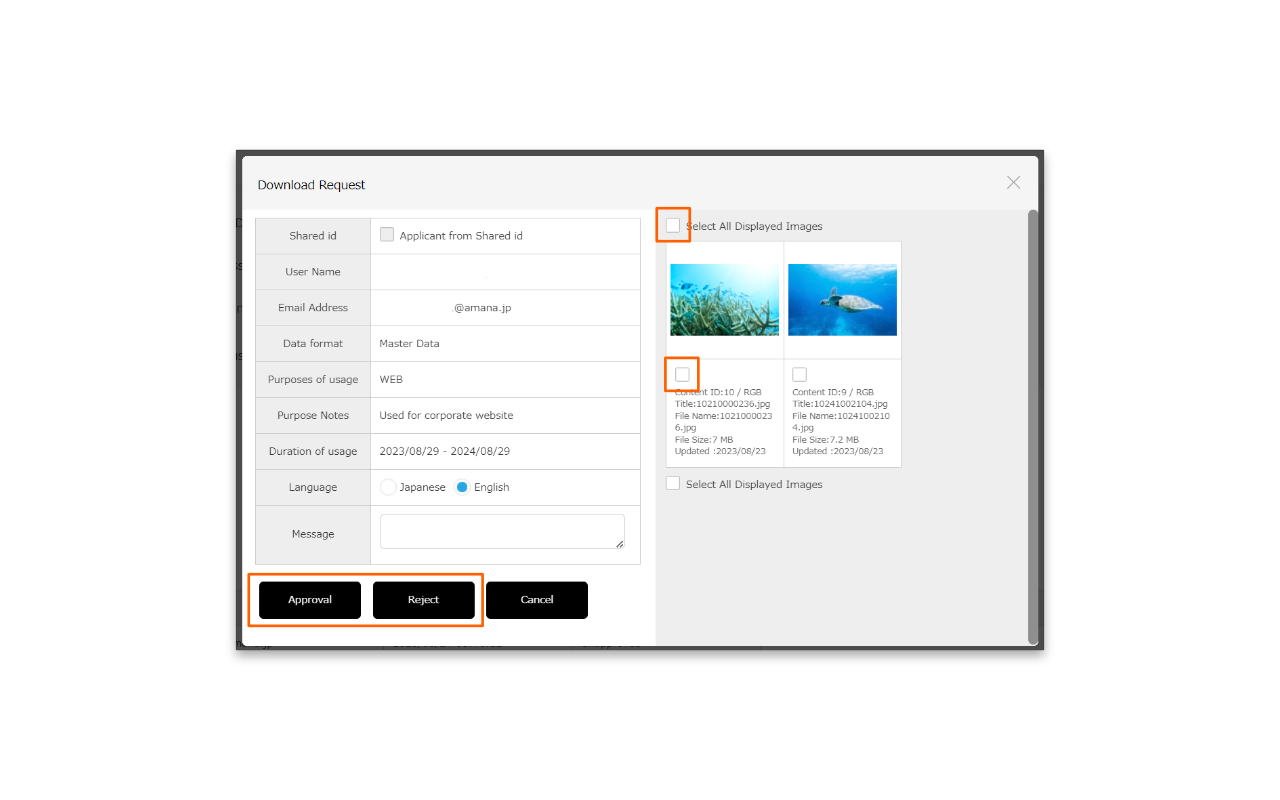
- Review the details of the forward request.
Select the checkbox for content forwards you want to authorize. then click Approve. Likewise, to reject requests which cannot be approved, select the content and click Reject.
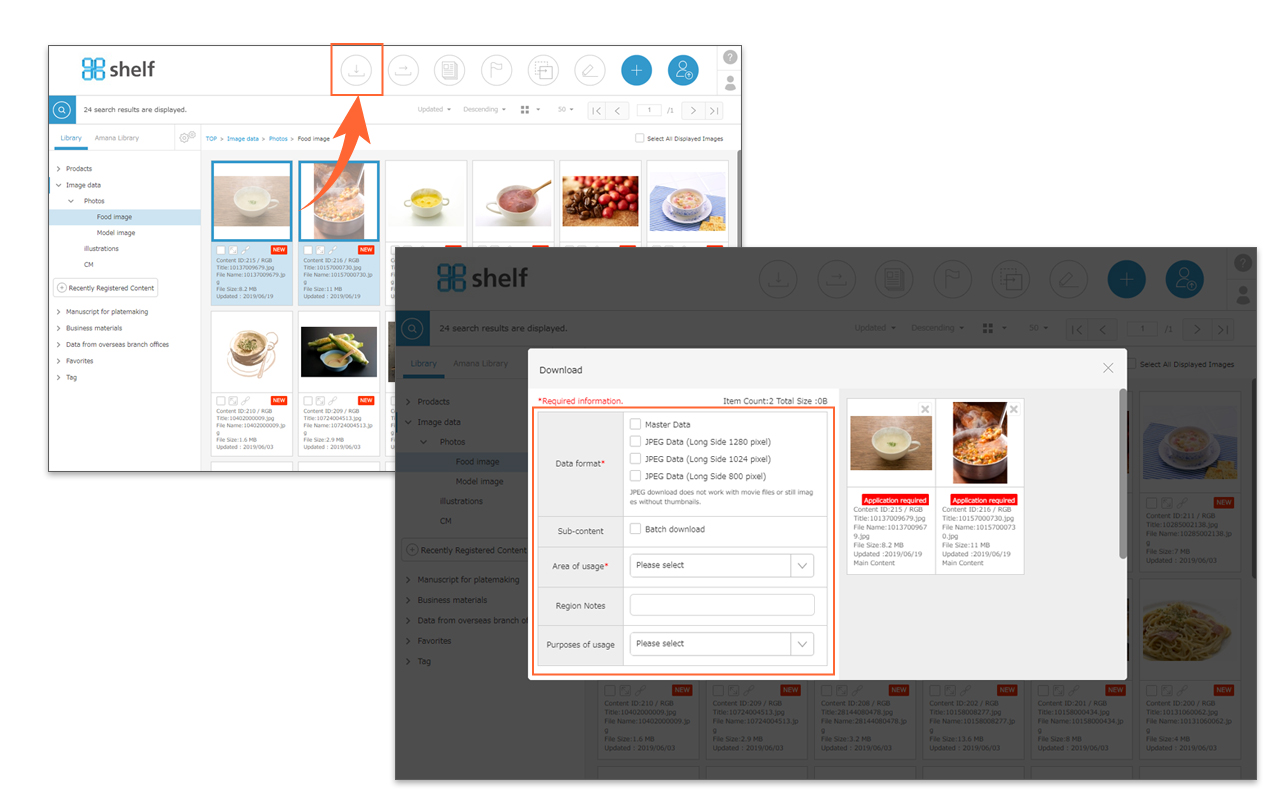
Check [Select All Displayed Images] on the thumbnail to select all images.

* Users without the relevant permissions cannot perform this action. For more information please contact your site administrator.
* Approving/rejecting for Forward Requests can be made from smartphones.
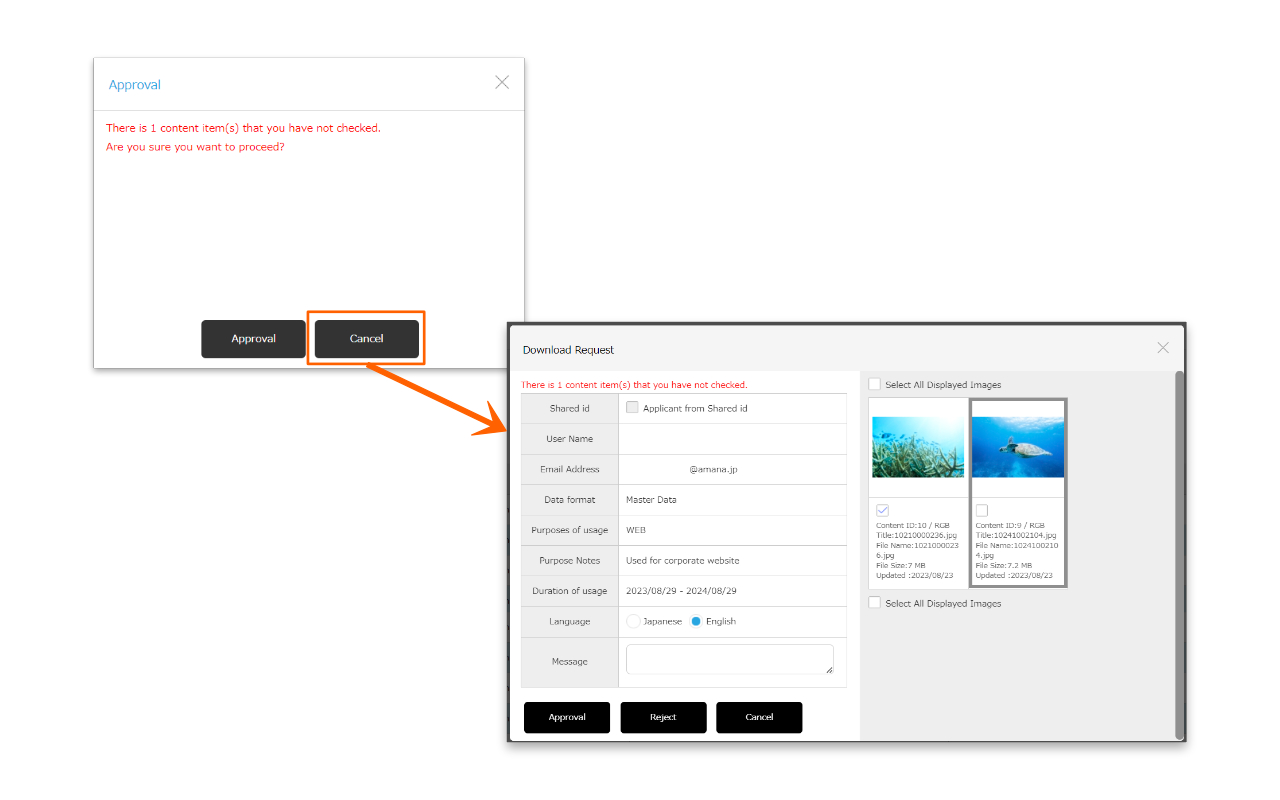
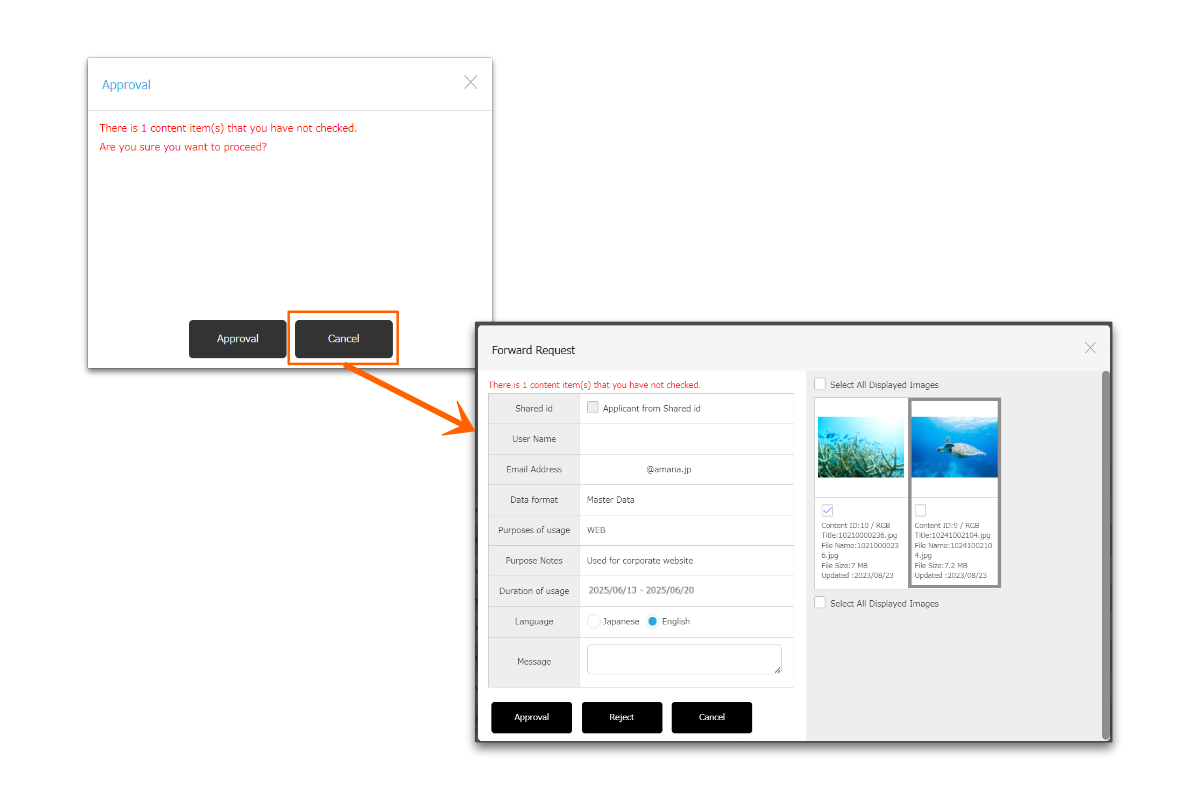
* If you leave some of the content unapproved, you can approve/reject the leftover content again from the list with the same Request ID.
* If there are unselected contents, a confirmation message will be displayed. If there are no problems, click the “Approve” or “Reject” button. If you want to change your selection, you can click [Cancel] to return to the forward requests details screen.
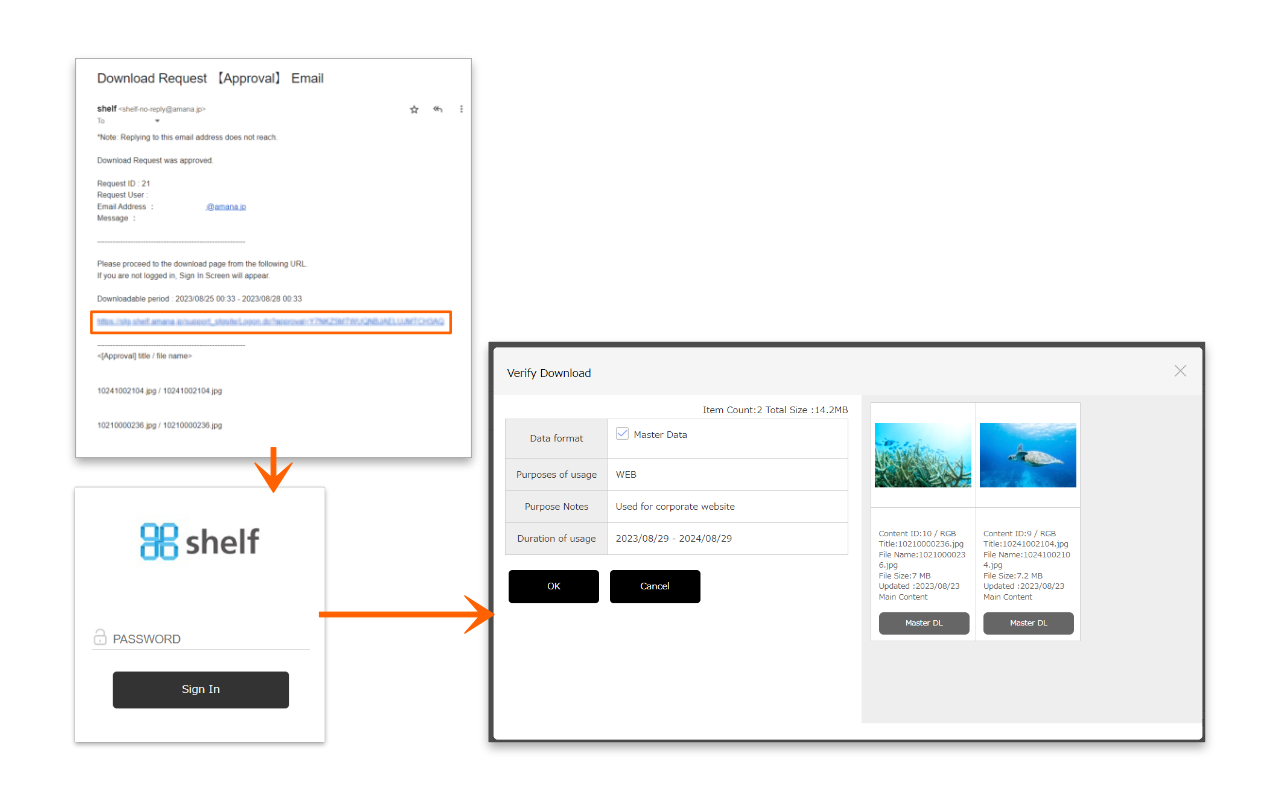
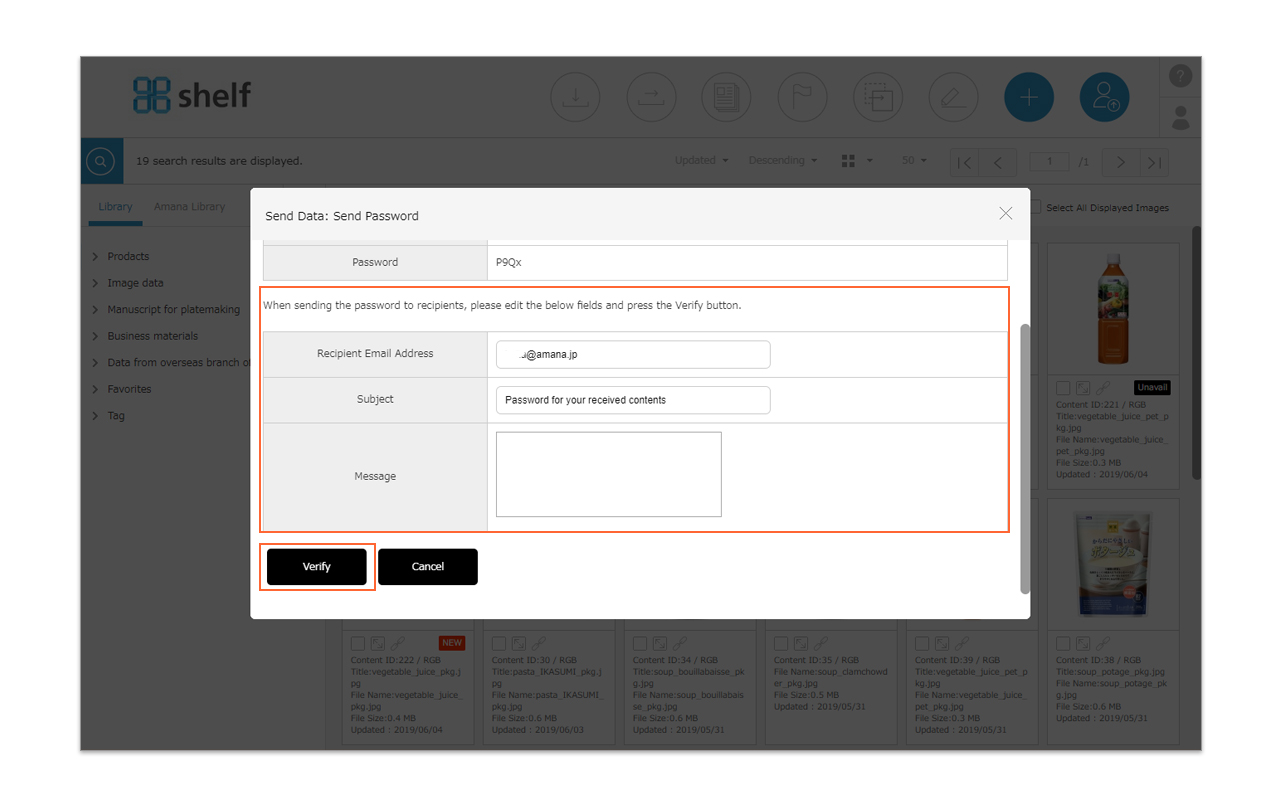
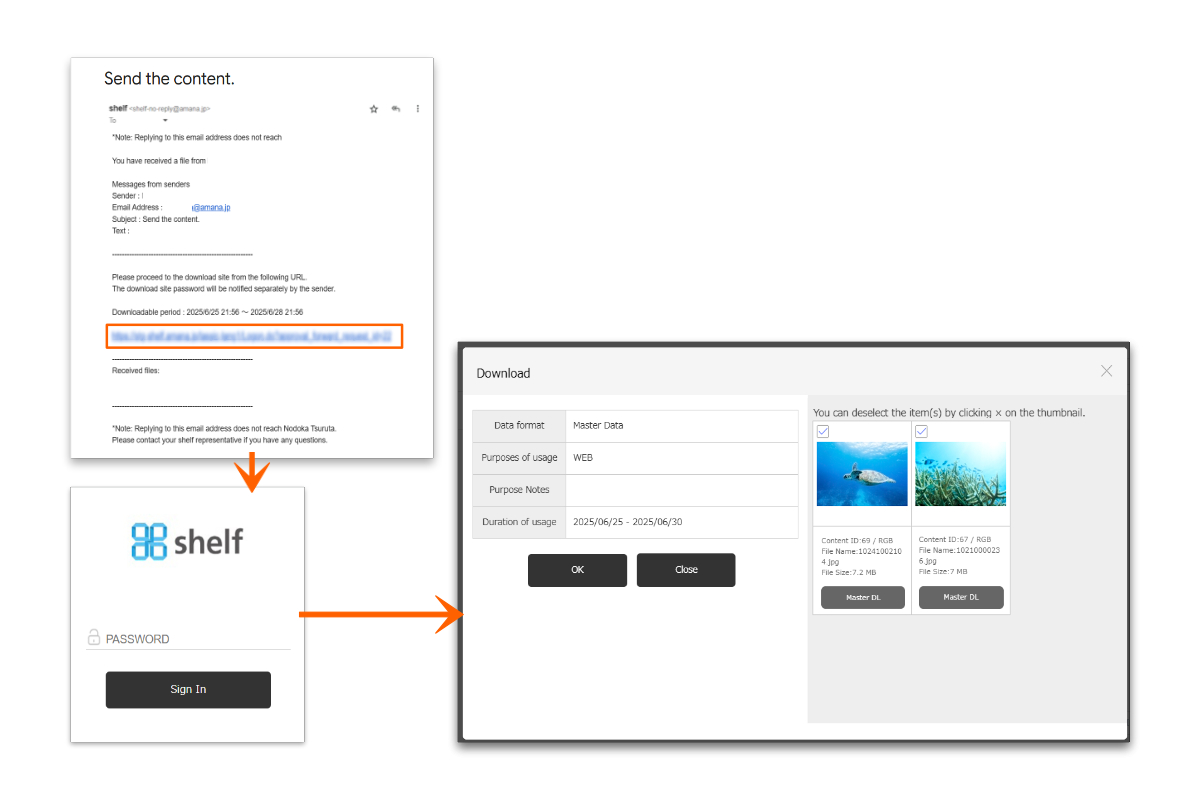
- An email informing of the approval/rejection will be sent to the requester.
If approved, a download URL and password will be sent to the forwarding address.
* Approval/rejection notifications will be sent to the sender’s email address if it was provided during the application.If not, it will be sent to the email address linked to the ID being operated.
* The default subject and text of the forward requests email will be sent in Japanese if the request is submitted through Japanese site, and in English if the request is submitted through other language sites.
* The default subject and text of the forward approval email and the forward rejection email will be either Japanese or English, selected by authorizer when sending.
【Export of Forward Request history list】
The history currently displayed on menu page can be exported to a list as a txt file.
For details, please refer to Importing/Exporting Lists.
* In order to use the forward request feature, please contact your Shelf sales representative or Amana systems administrator.
*For more information on request settings, please see Forward Request Settings, Forward Request Authorizer Settings.