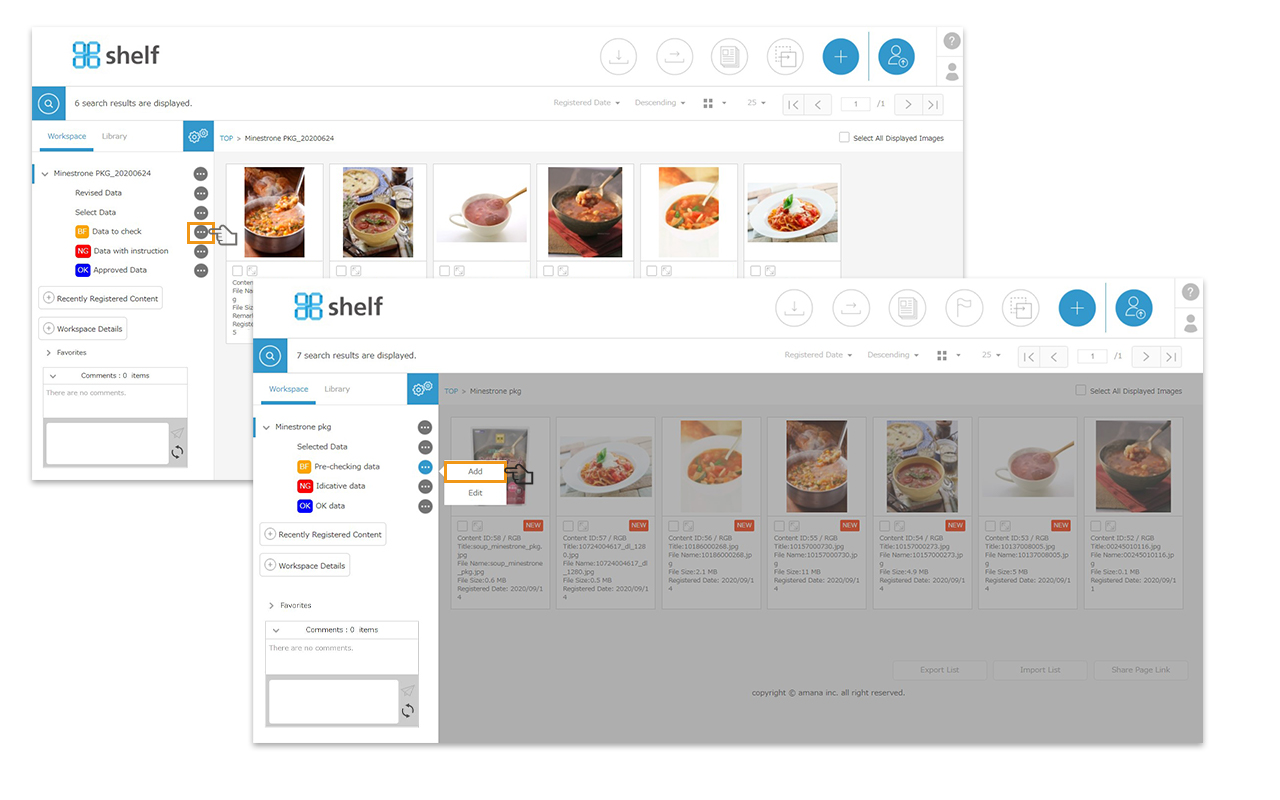
Create/Edit/Delete Workspace
Print
Create/Edit/Delete Workspace
【Create Workspace】
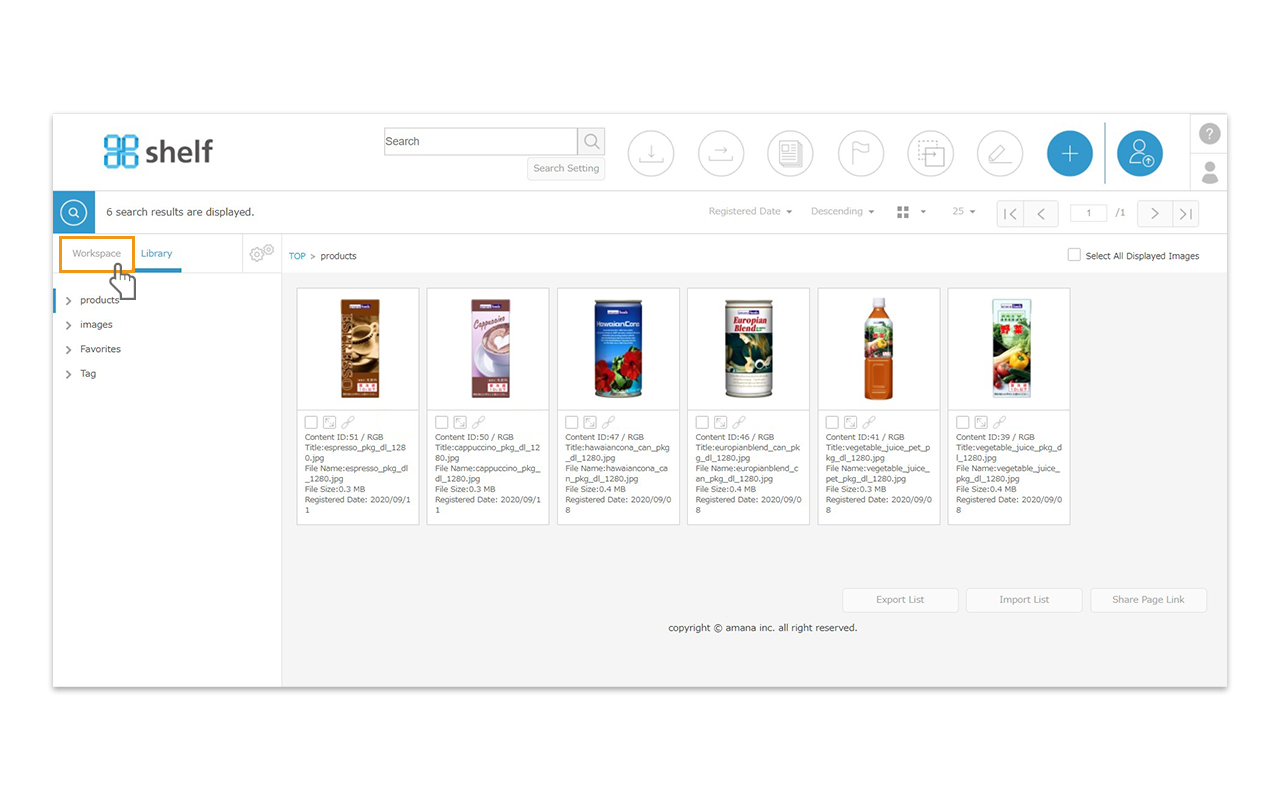
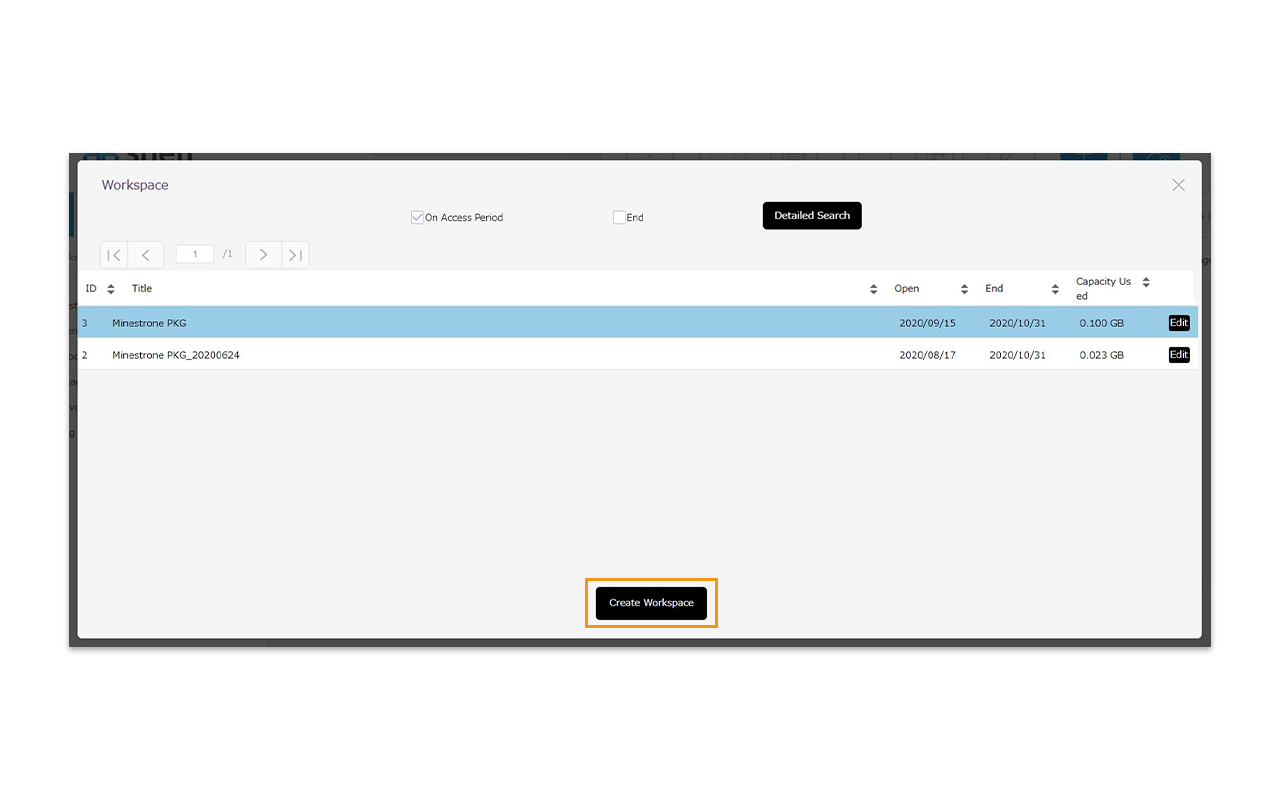
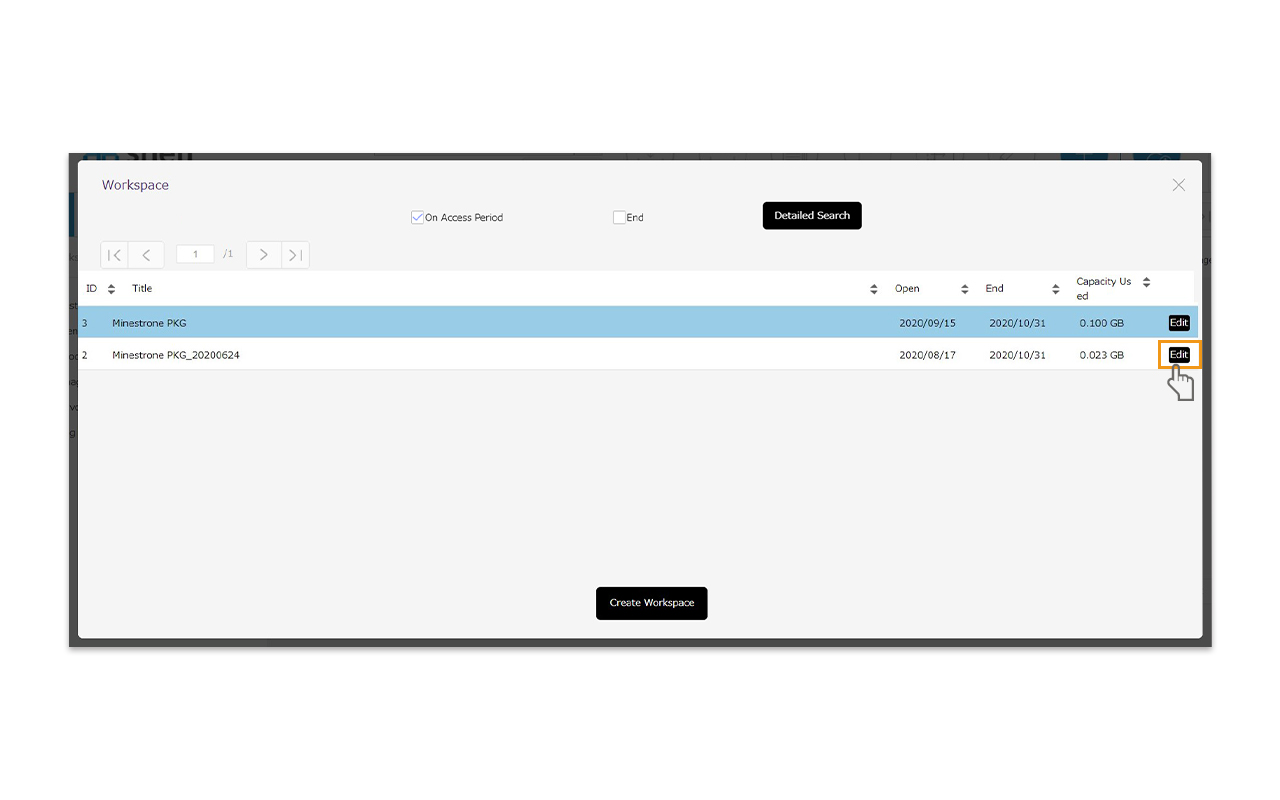
- Click the “Workspace” tab on the content menu page.
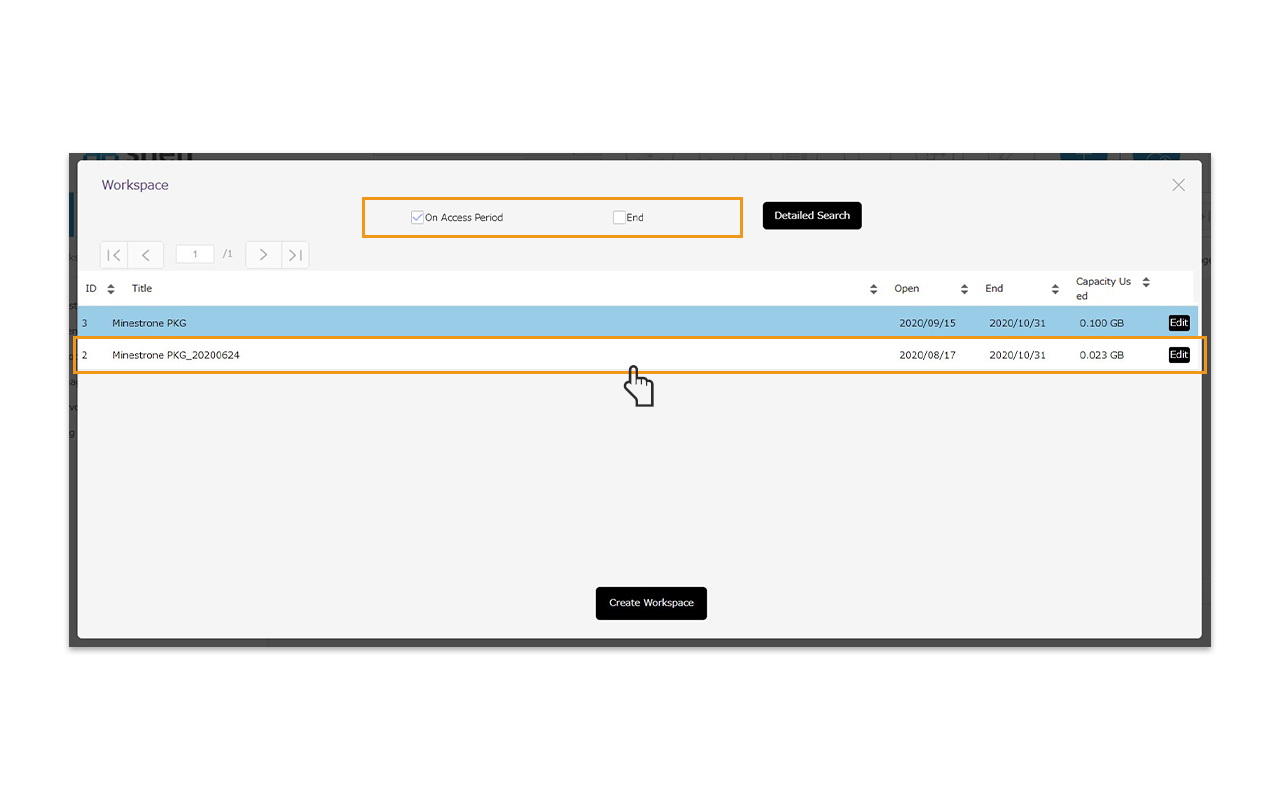
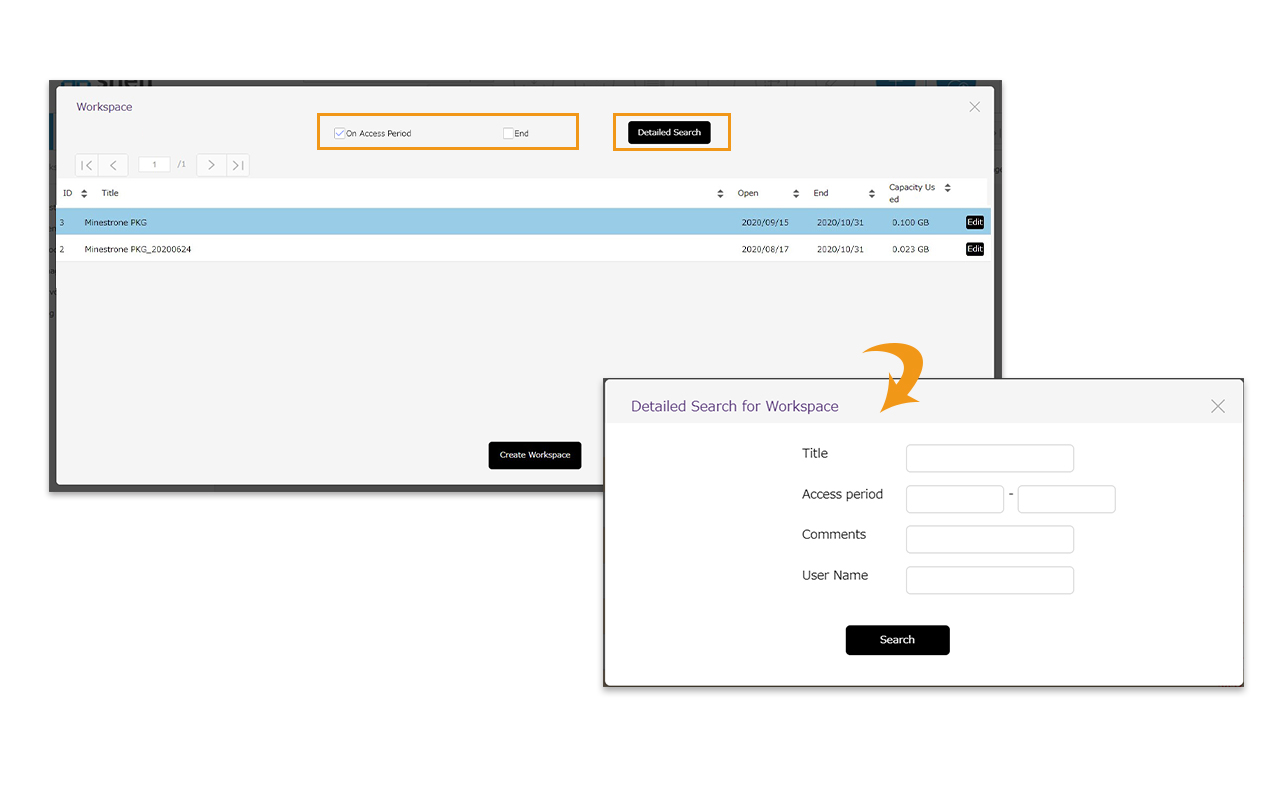
- When the Workspace window appears, click the “Create Workspace” button at the bottom.
-
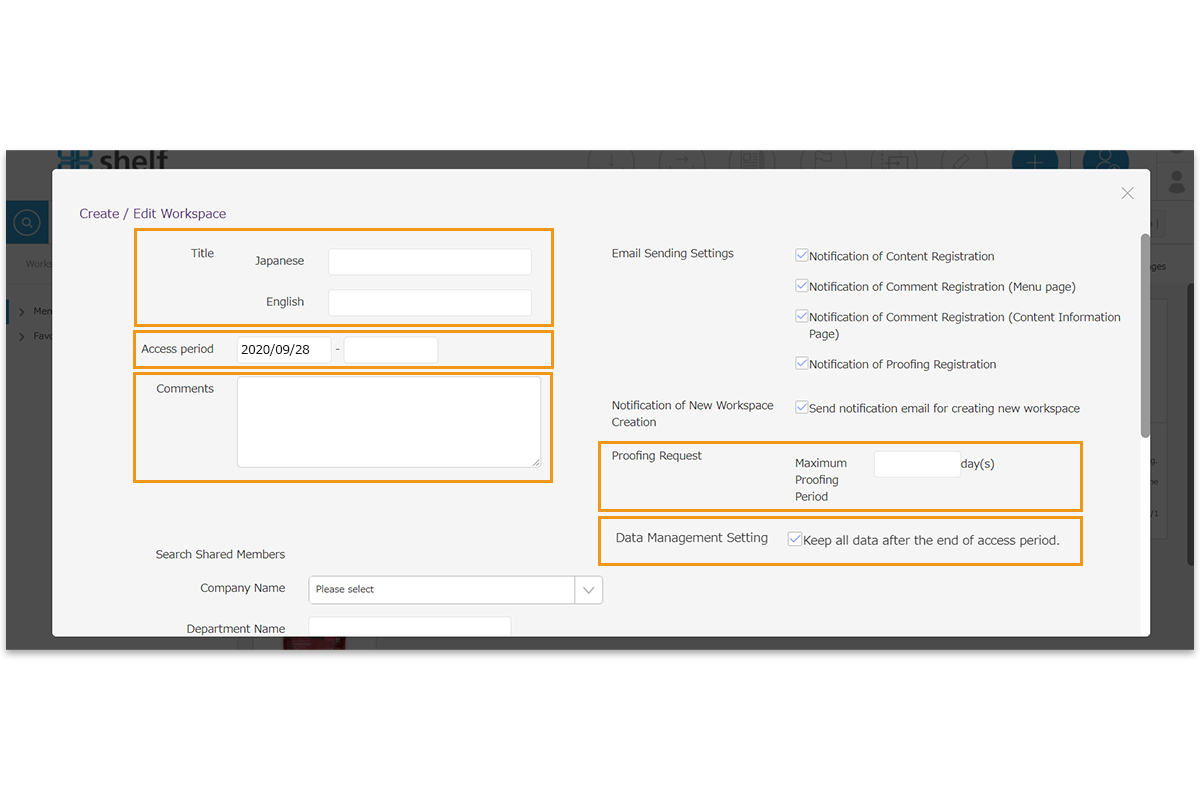
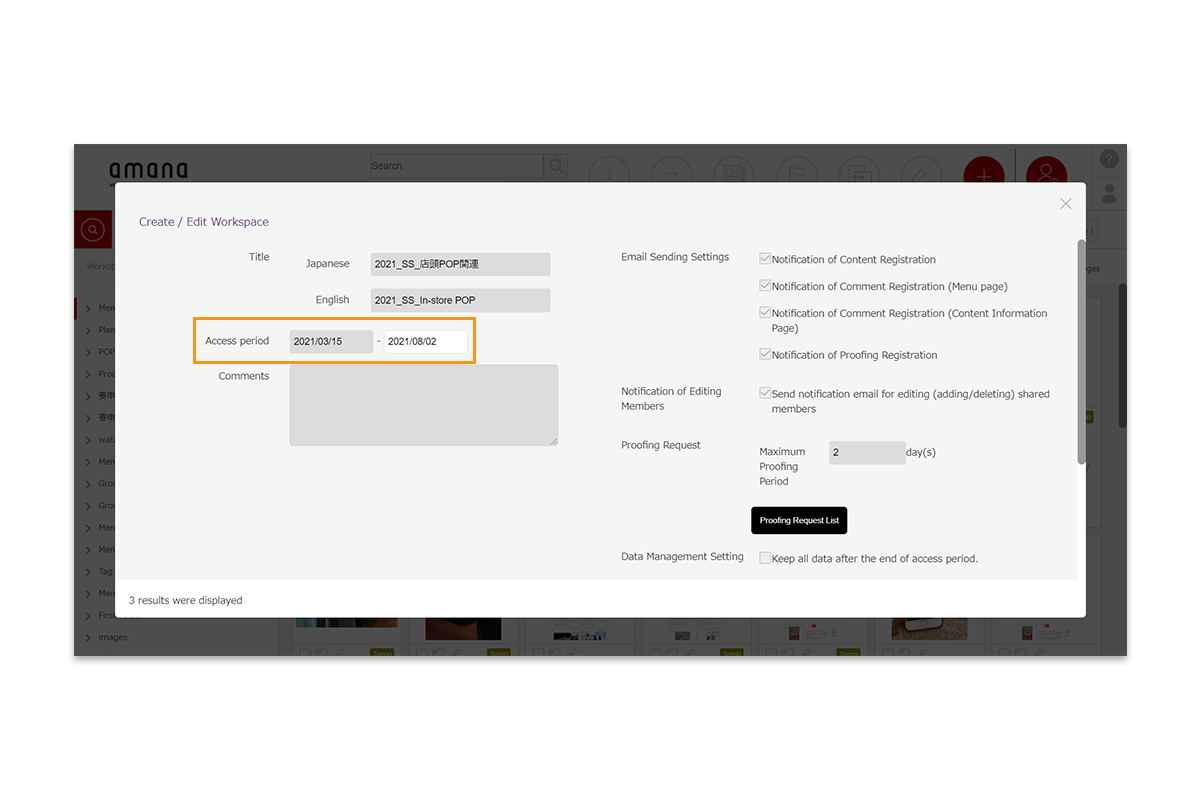
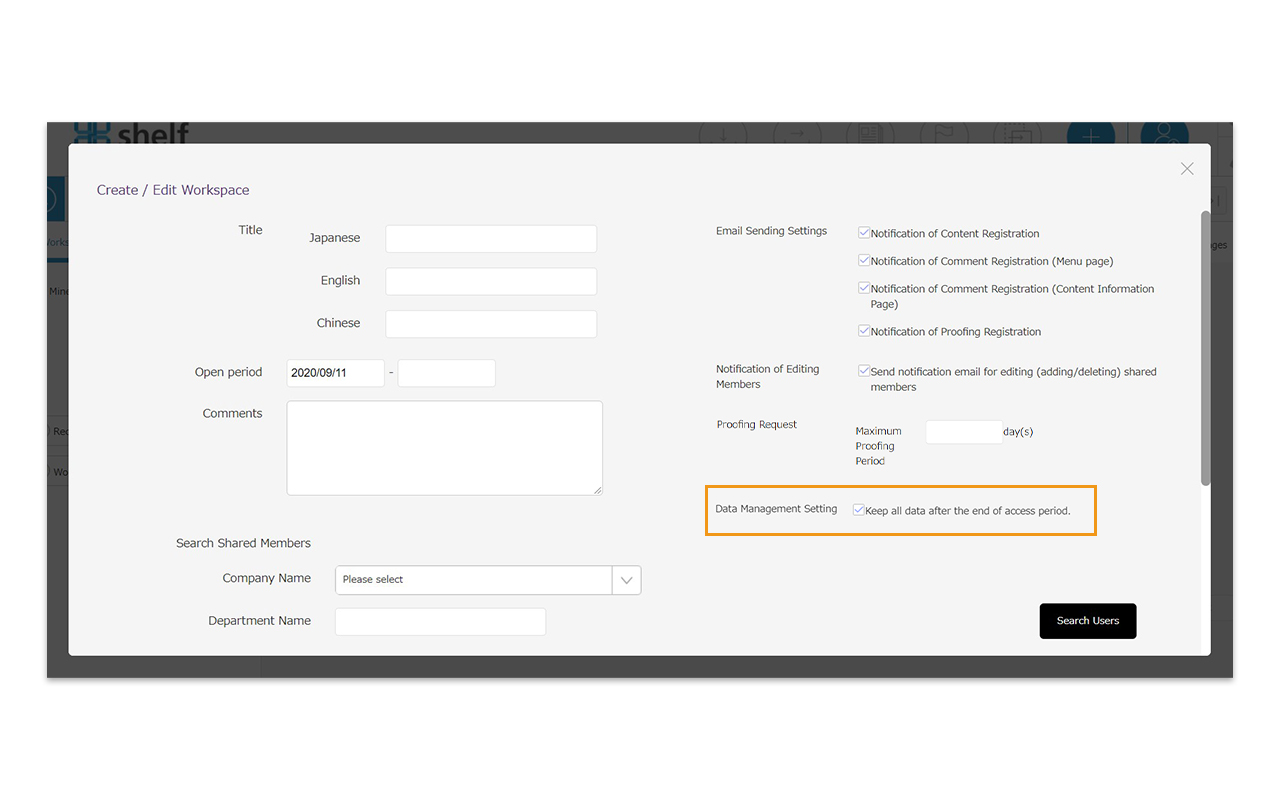
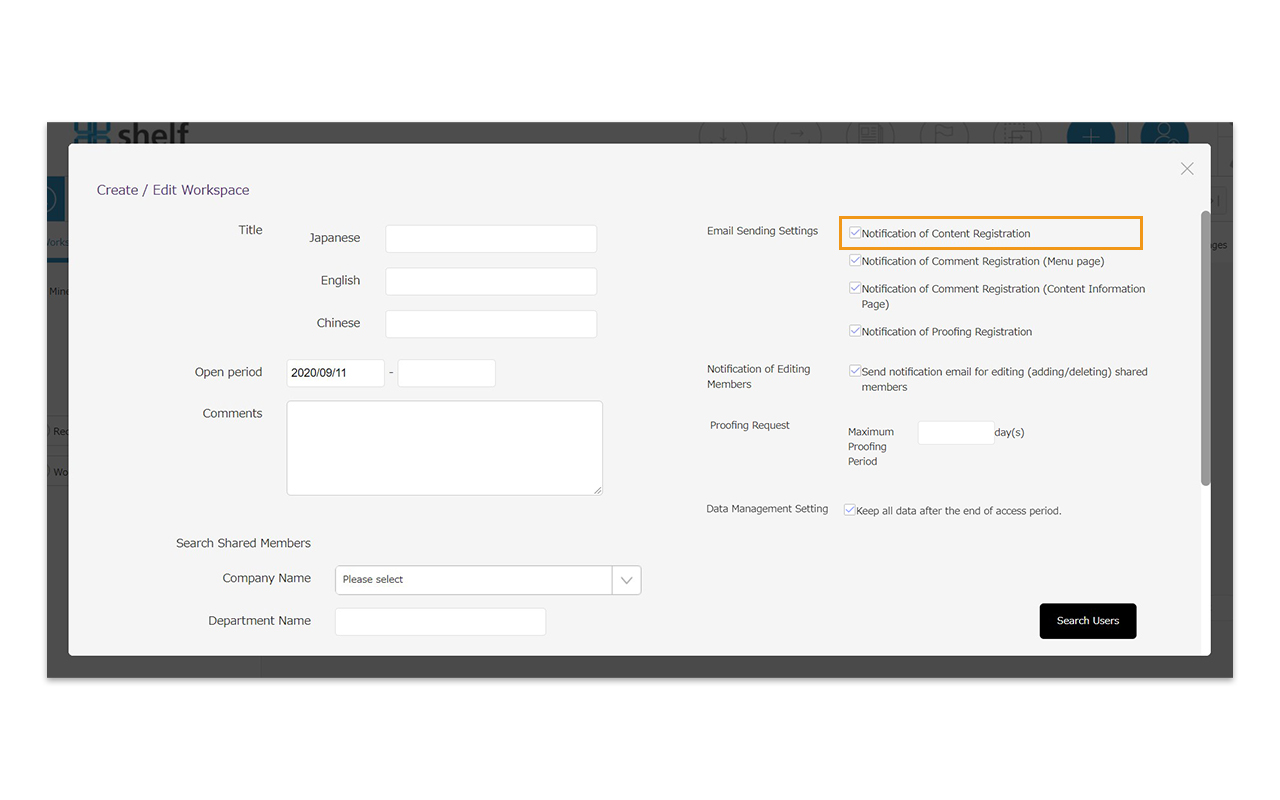
- Title/Open Period/Comments
The title and open period are required, and entering a comment is optional.
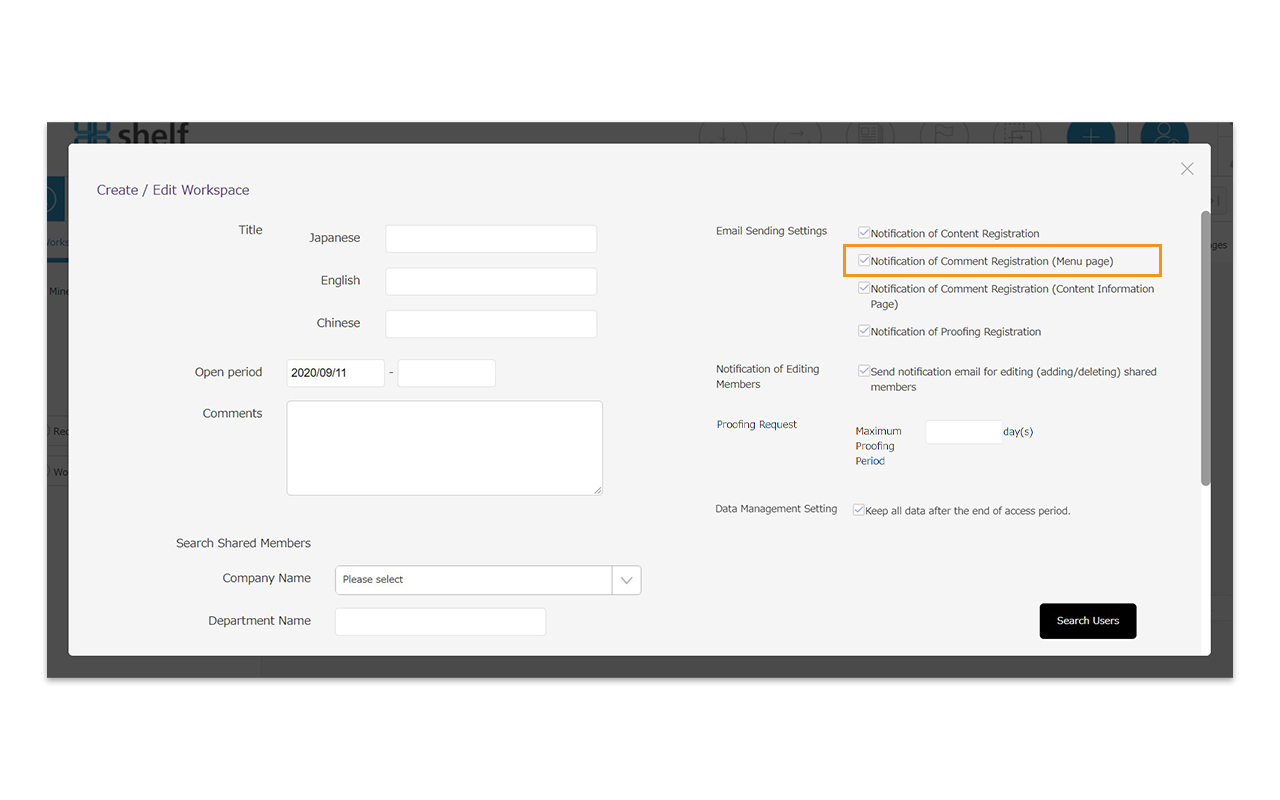
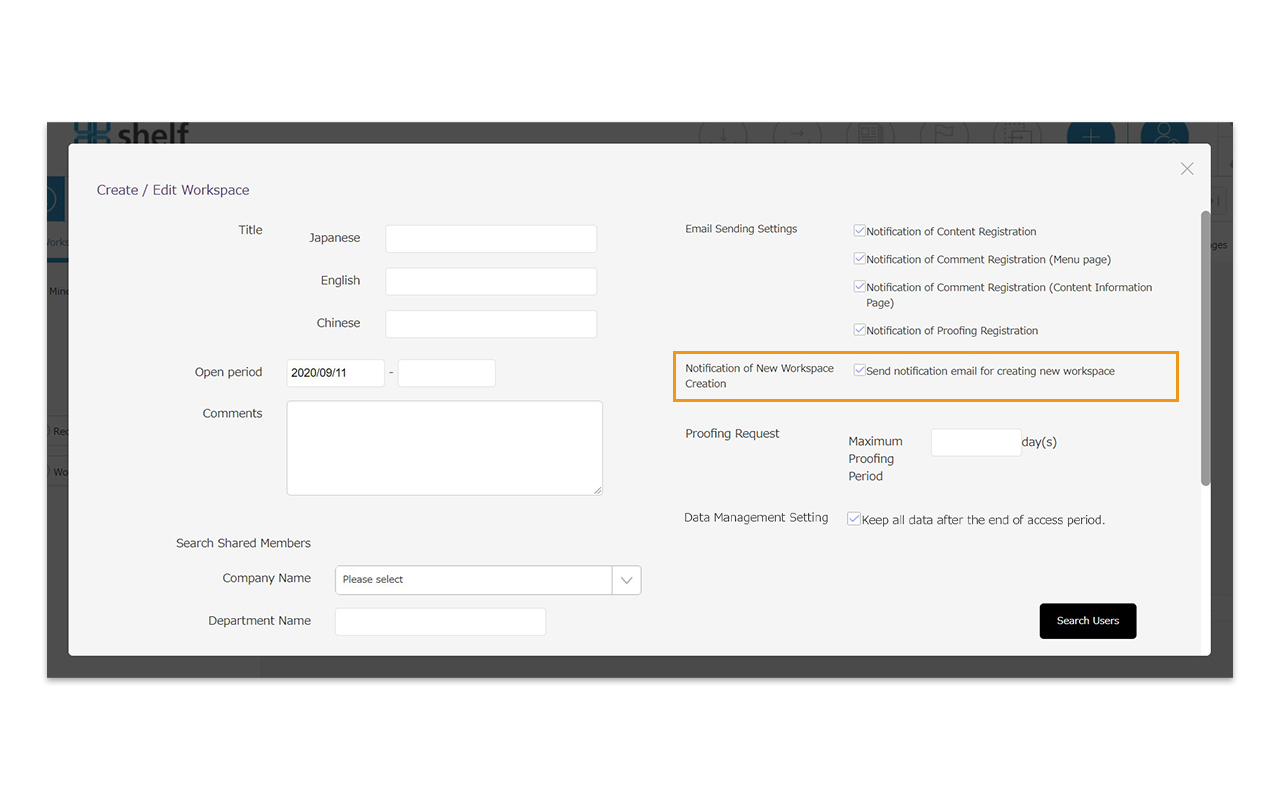
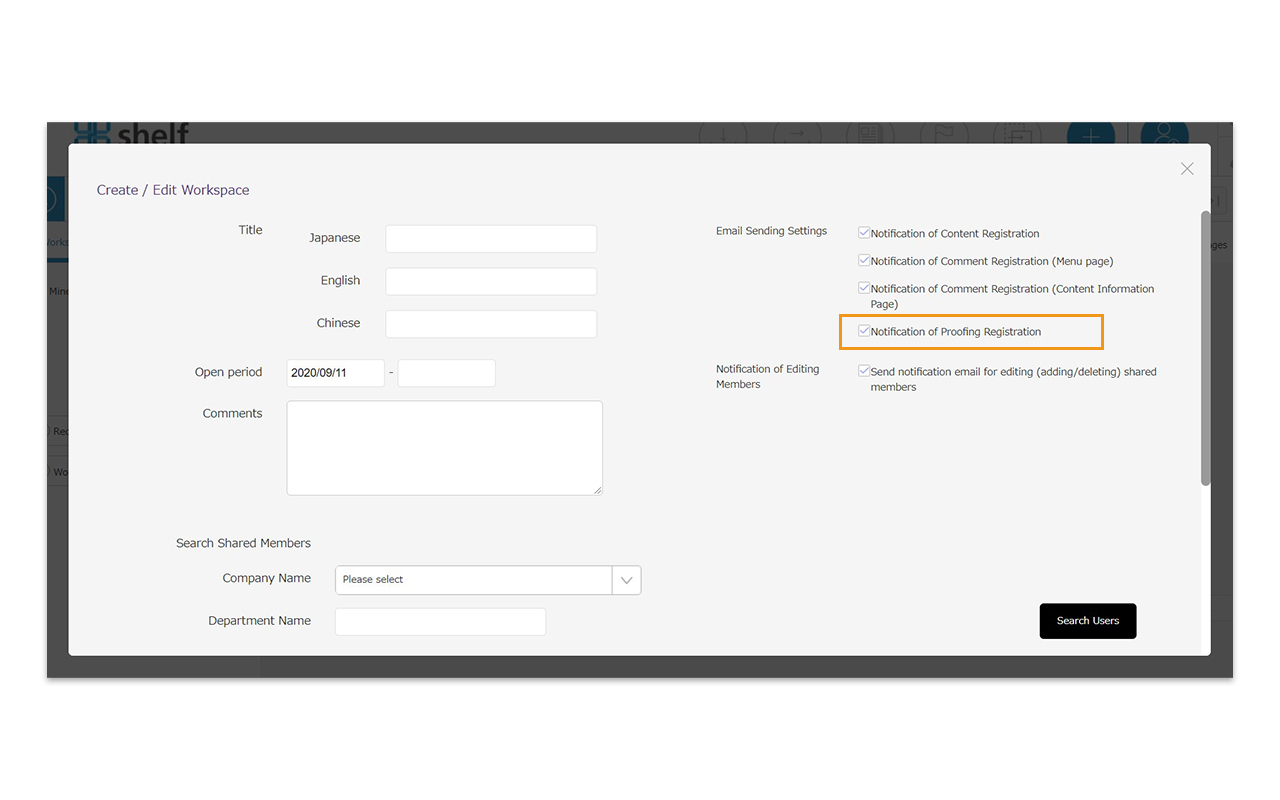
- Email Sending Settings/Notification of New Workspace Creation
If this setting is turned ON, notifications for new content or comments will be sent to members.
*Notifications for the creatioAn of a new workspace and the editing (adding/removing) of shared members will always be sent to the relevant users, regardless of this setting. Additionally, you can choose whether or not to send these notifications for each individual user by toggling their respective checkboxes.
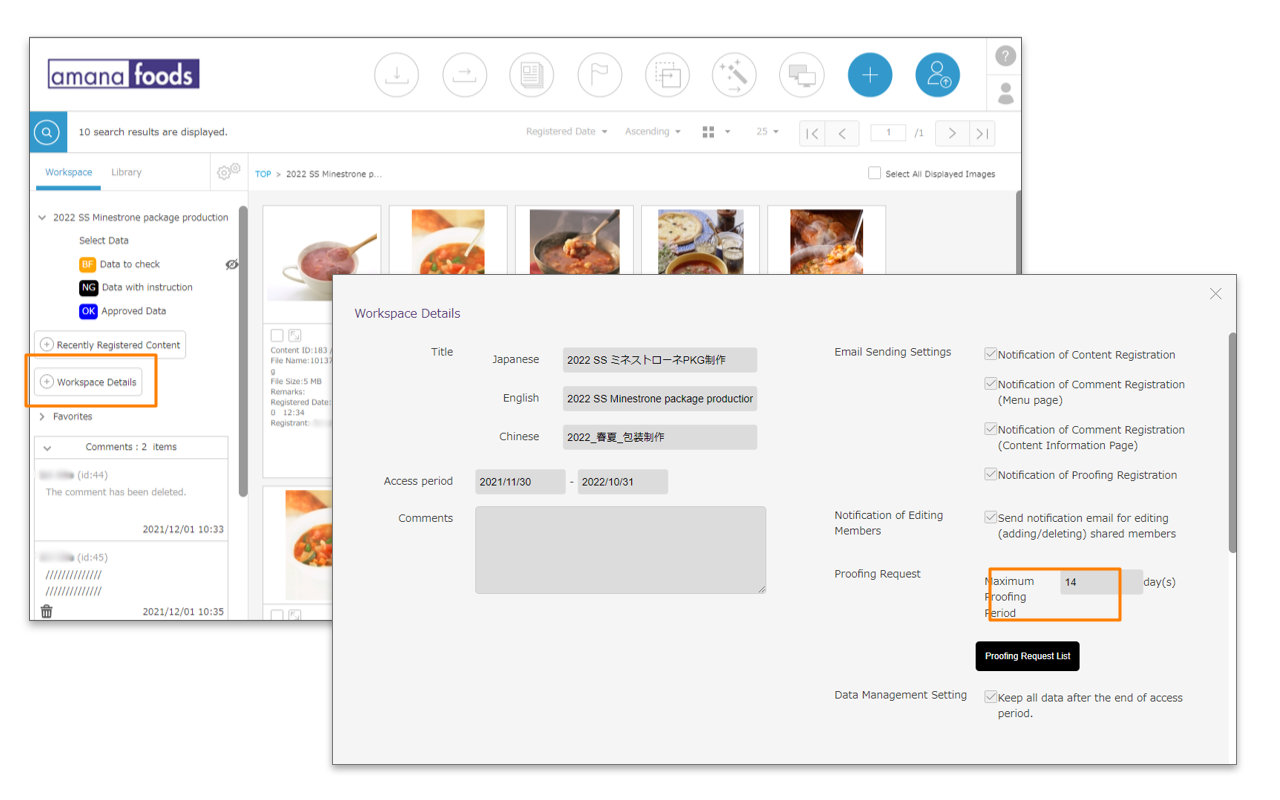
- Proofing Request
Enter the maximum number of days to set the maximum proofing period for the proofing request. Please refer to [Proofing Request to Non-shelf Users] for the details about the proofing request.
- Data Management Setting
If you check the “Keep all data after the end of access period.” checkbox in Data Management Setting, you will be able to access workspace even after one month from the end of the access period. The icon will be shown only for the content that is currently being requested for proofing, and will disappear when the request period ends.
If you do not check this box, workspace will be automatically deleted after one month from the end of the access period. For more details, please refer to [Delete Workspace].
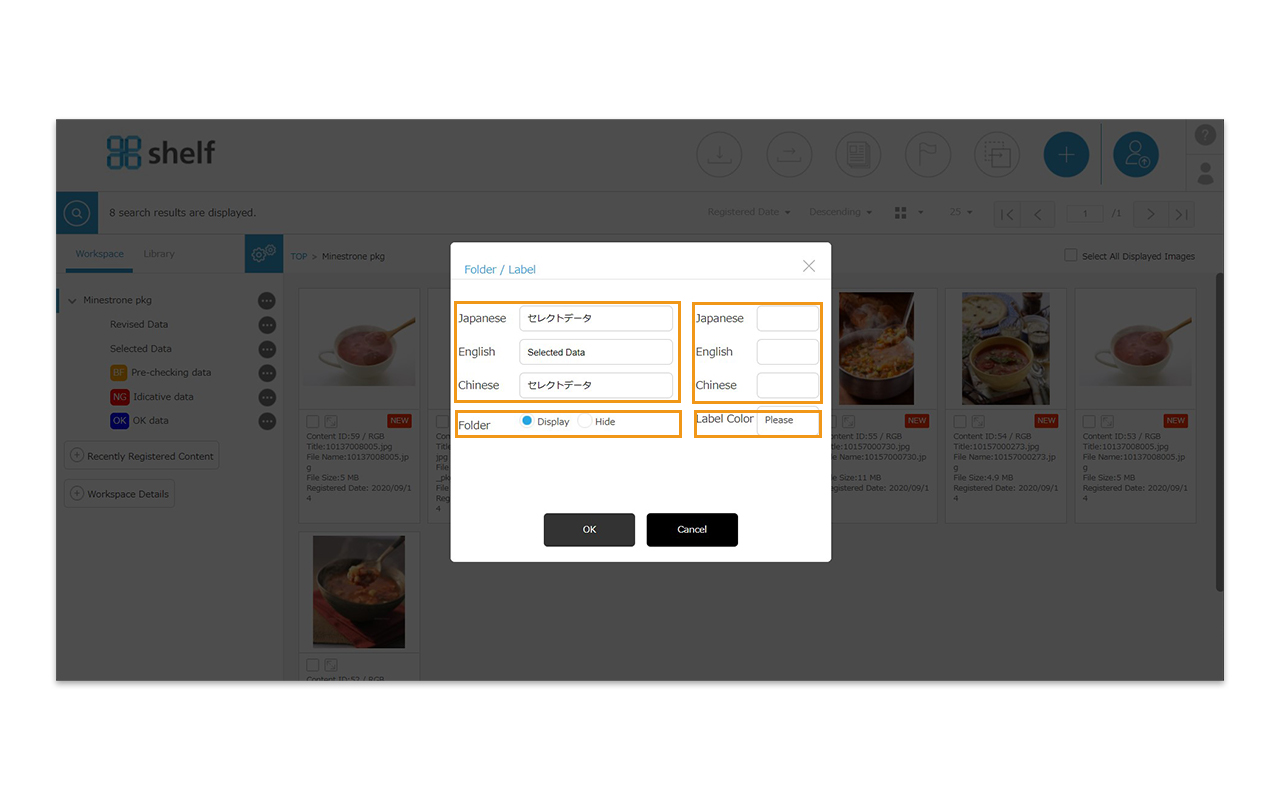
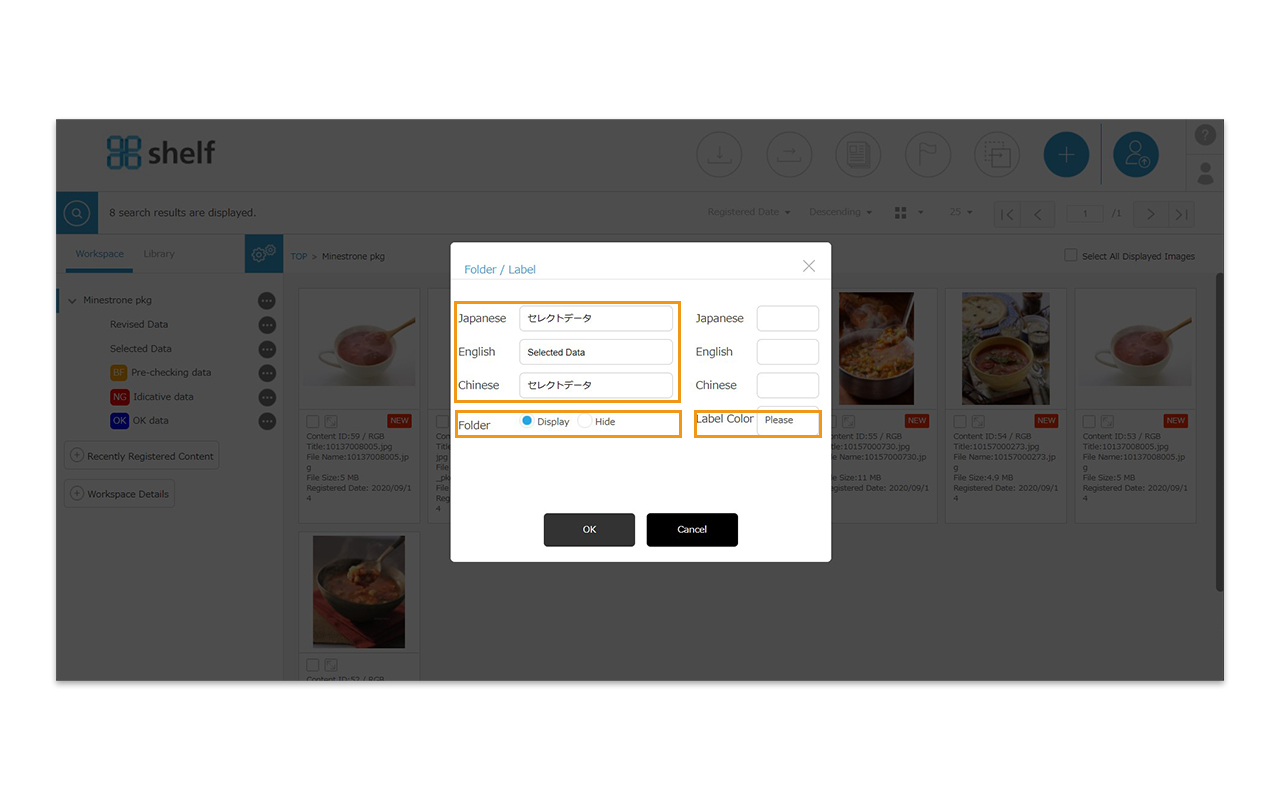
* For multilingual sites, Japanese/English setting fields are displayed for Title, and settings for two languages can be available.
If you log in to non-Japanese language sites, those set to [English] will be displayed. If you use the automatic translation function, a [Translation] button will appear, and clicking it will display the translated text. You can also modify the text.
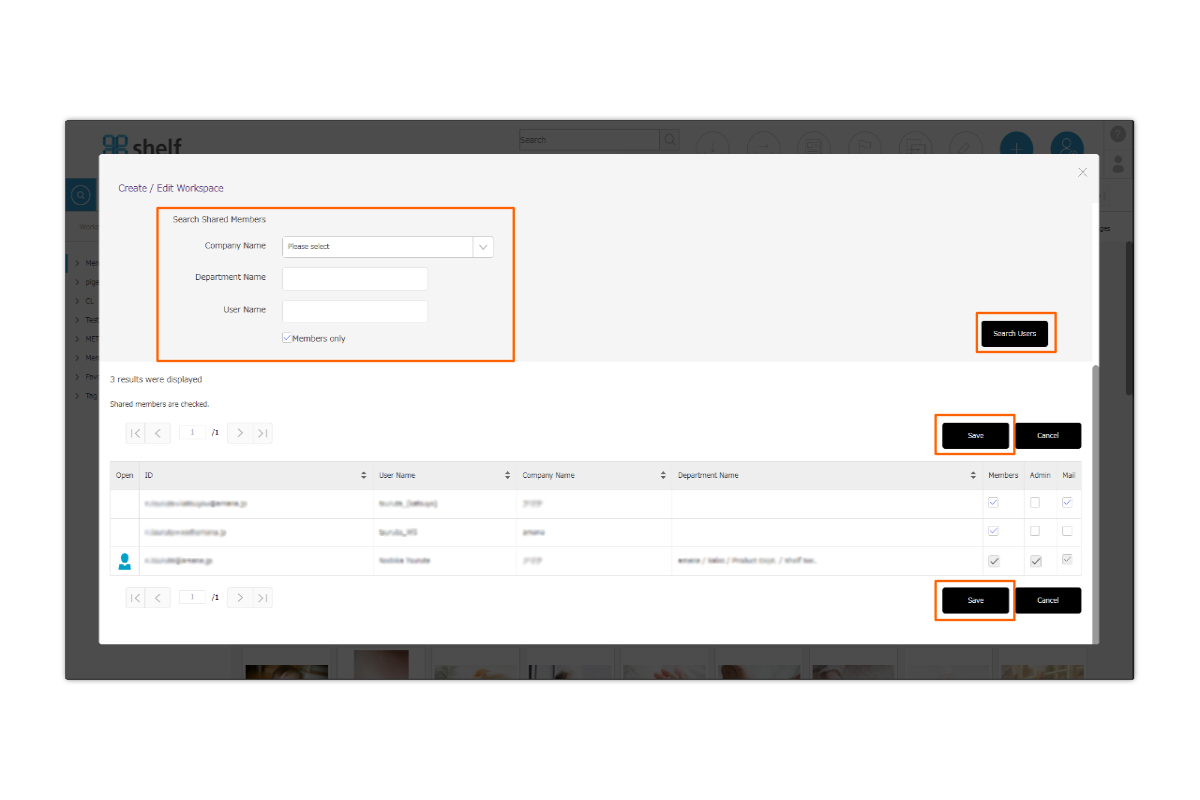
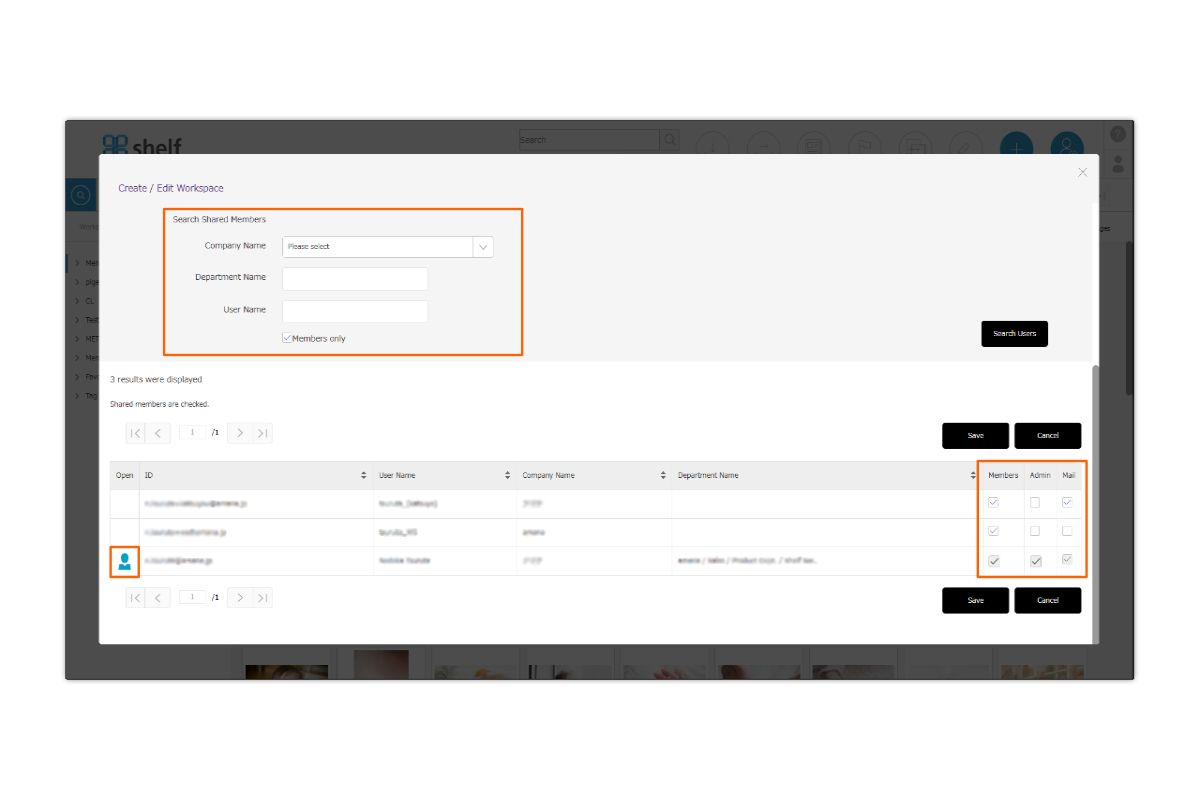
- Select a member and click the Create button to create a workspace. You can search for the members you want to register in Workspace with [Search shared members].
Tick the [Member / Administrator / Email] checkboxes on the right side of the search result list. Select the appropriate access
permission you want to give to each member. A workspace will be created upon clicking the [Create] button,
at which time a notification email will be sent to all registered members. (Please note that this notification will be sent regardless of the Email Sending Settings.)
*Workspace members can be selected from among the users who are initially registered in shelf and are allowed to use workspace. If the user you want to add does not display, please check [Library and Workspace Setting] under User Details in Manage Users.
* For multilingual sites, the search text will be in Japanese/English as set when registering as a user.
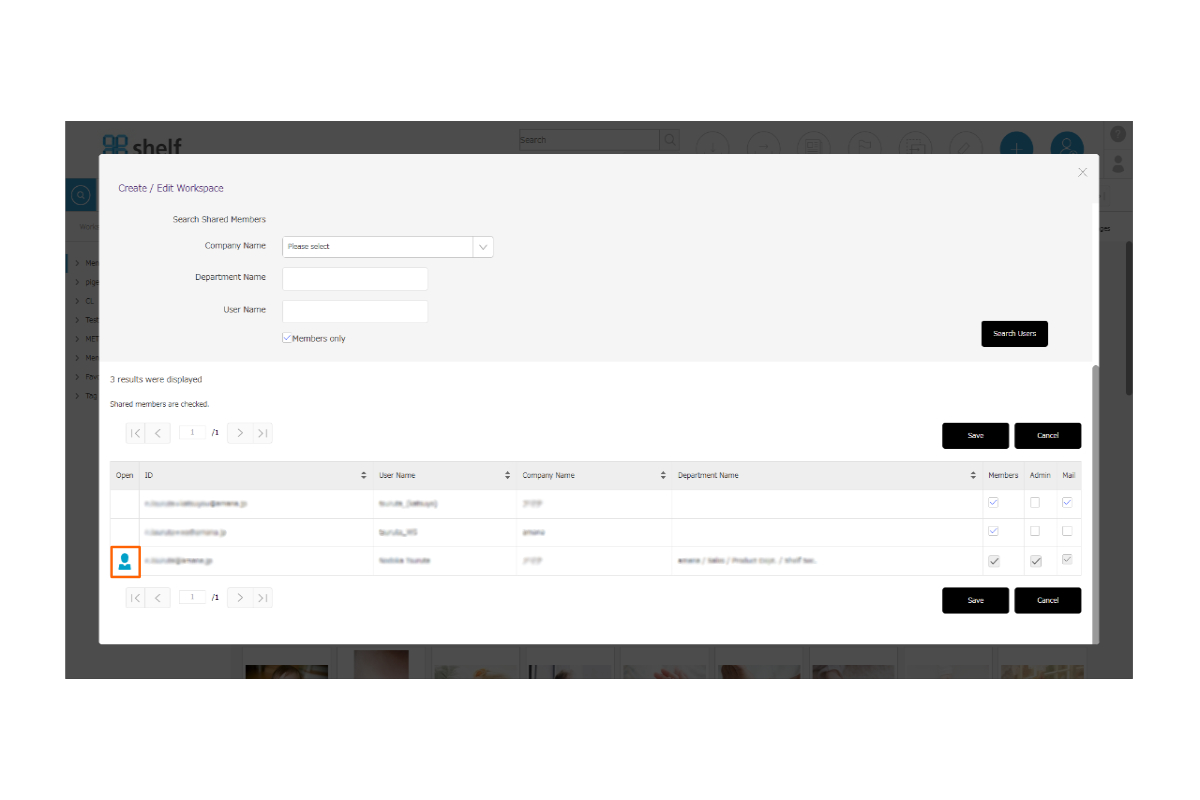
* [person icon] in the “Open” column is displayed to the workspace creator.
*Regardless of the User permission in the shelf, any member who checks the box for Administrator can make changes to their workspace information.
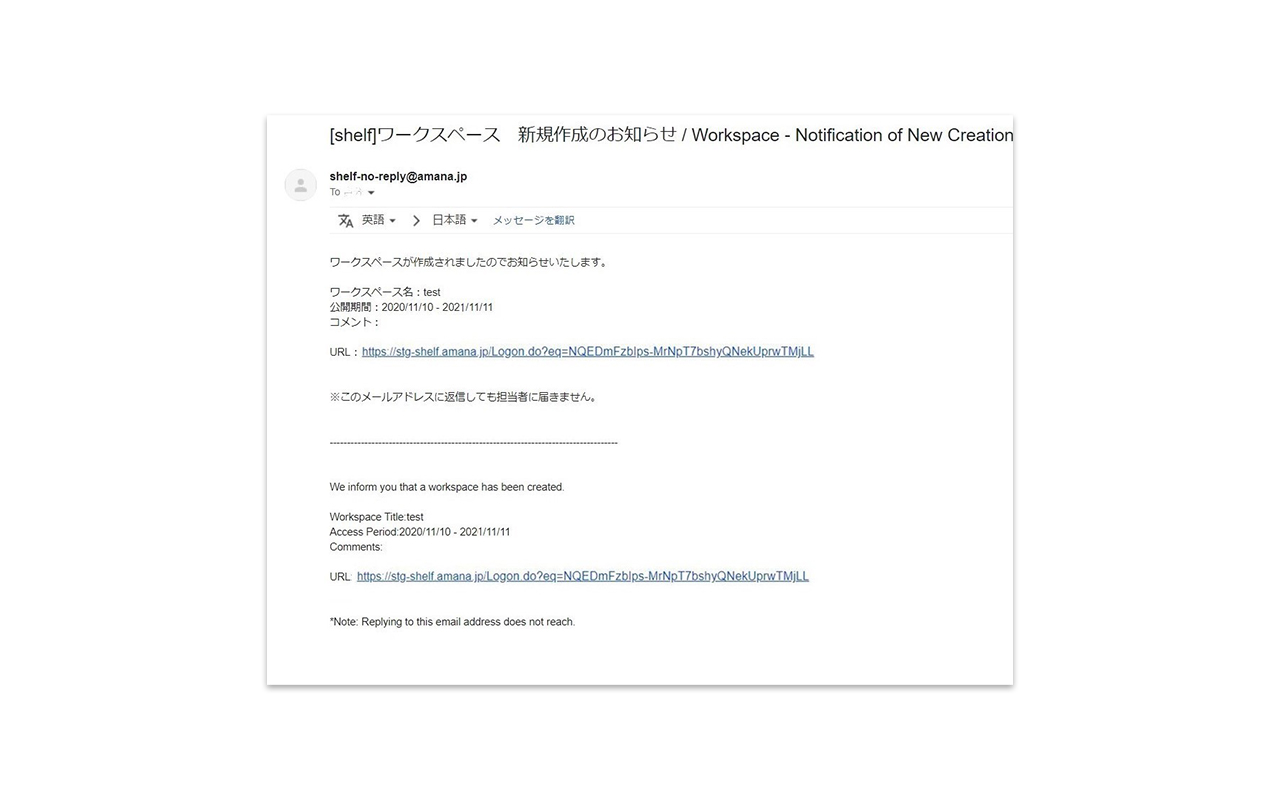
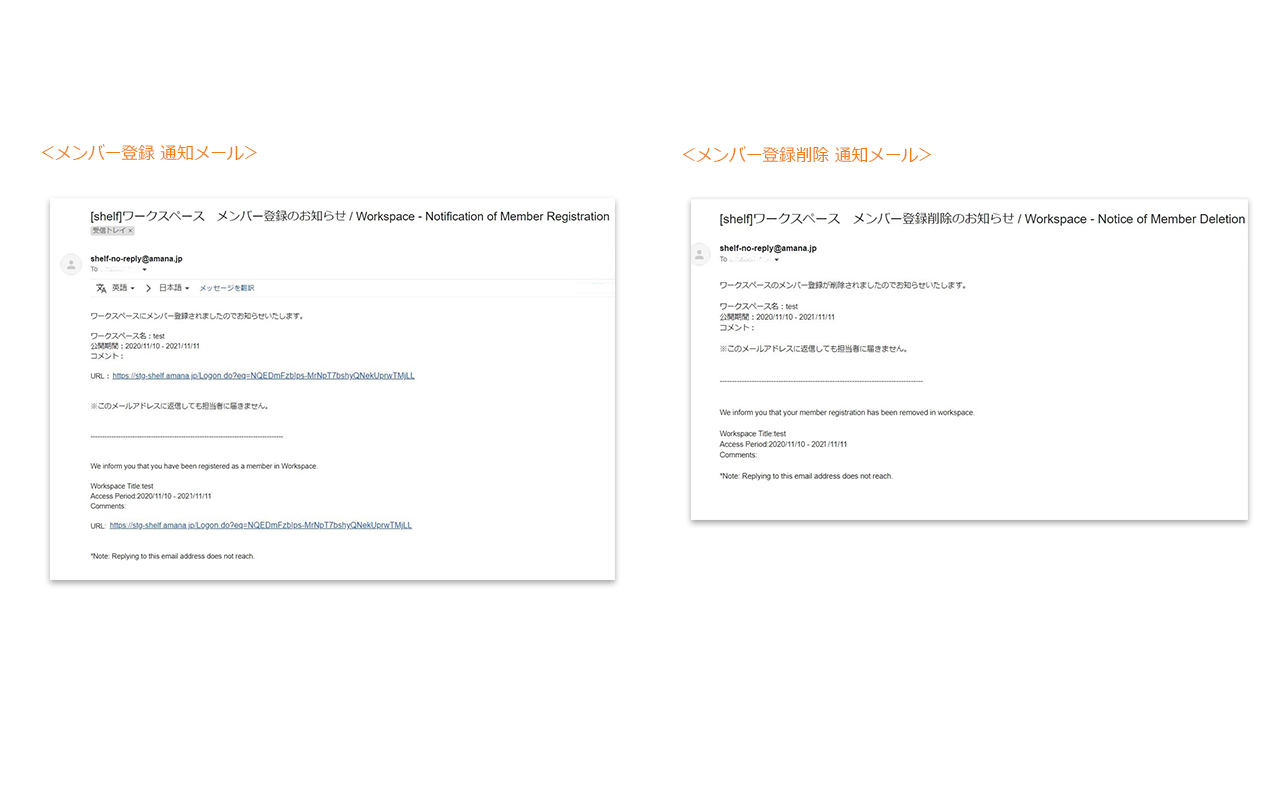
- When a new workspace is created, a notification email will be sent to users who have registered as members.
*You can enable or disable notification emails (set to “ON” by default). If some users do not require notifications,
please uncheck the checkbox to the right of the respective username and click the [Create] button.
Please note that “New Workspace Creation” and “Member Addition/Removal” notifications will always be sent to the relevant members, regardless of this setting. *This setting only allows you to disable notifications for content, comments, and proofreading registrations.
【Edite Workspace】
- Click the “Workspace” tab on the content menu page.
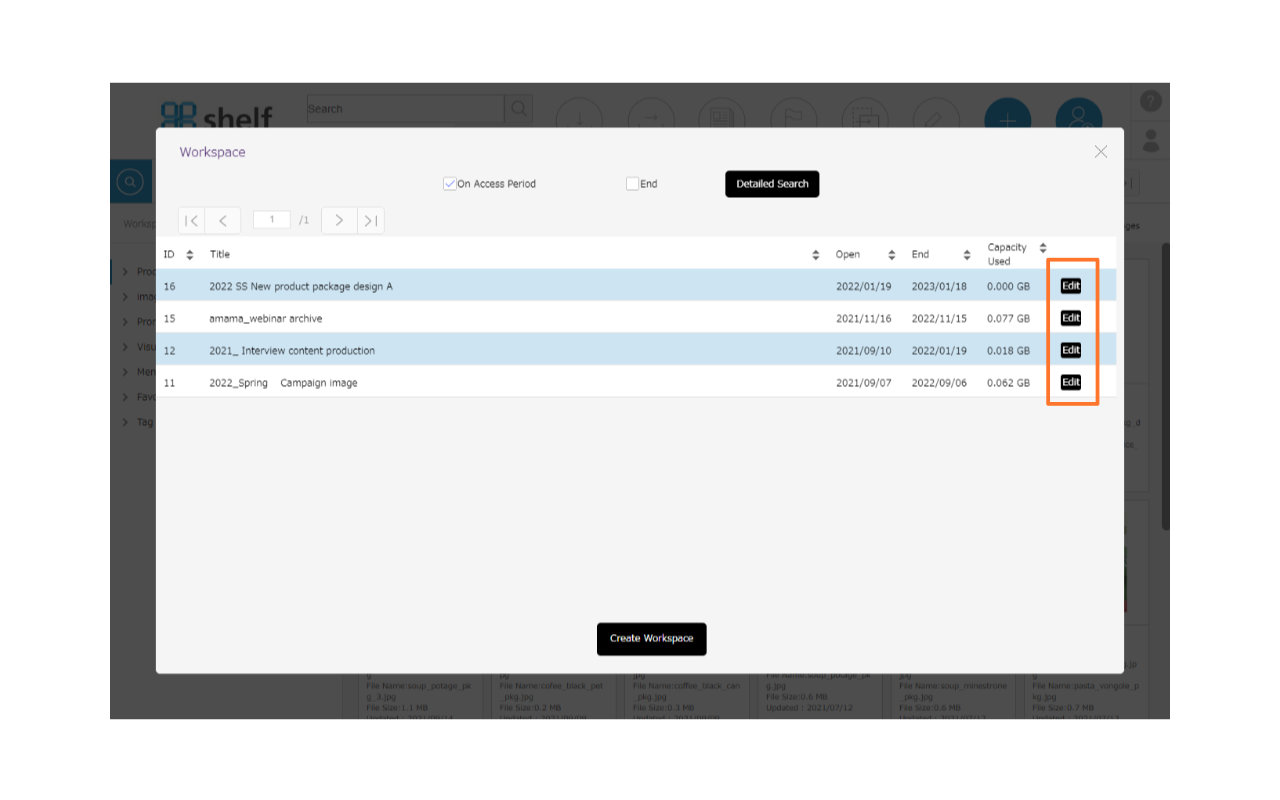
- When the Workspace window appears, click the “Edit” button at the bottom.
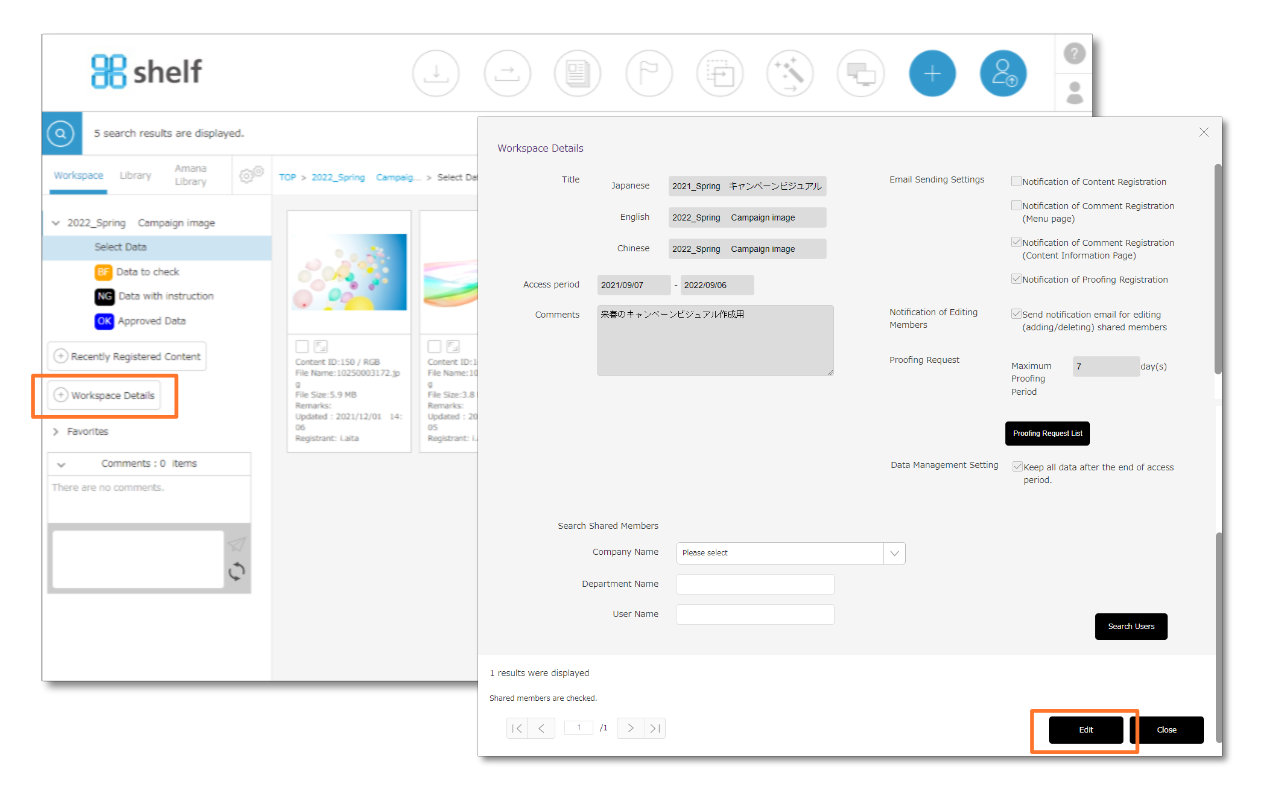
If you have already selected workspace and opened the content list, click [Workspace Details] on the left side of the screen, and then click the [Edit] button in the center of the page.
- When the “Create/Edit Workspace” window is opened, change the items you want to edit.
- Adding member
Select the members you want to add in [Search shared members].
- Deleting member
Uncheck the access permission (Member/Administrator/ Email) on the right side of the registered members list.
*You can also change a member’s access permissions here.
*The workspace creator cannot be changed his/her access permission.
- Extending open period of the workspace
If you want to extend the workspace open period, please change the end date. Only the end date of the access period can be edited until one month after the access period. below.
- “Keep all data after the end of access period”
*If “Keep all data after the end of access period” is checked, the data can be still available for browsing after one month has passed from the access period end. The system administrator or Site Manager can also change the access period end.
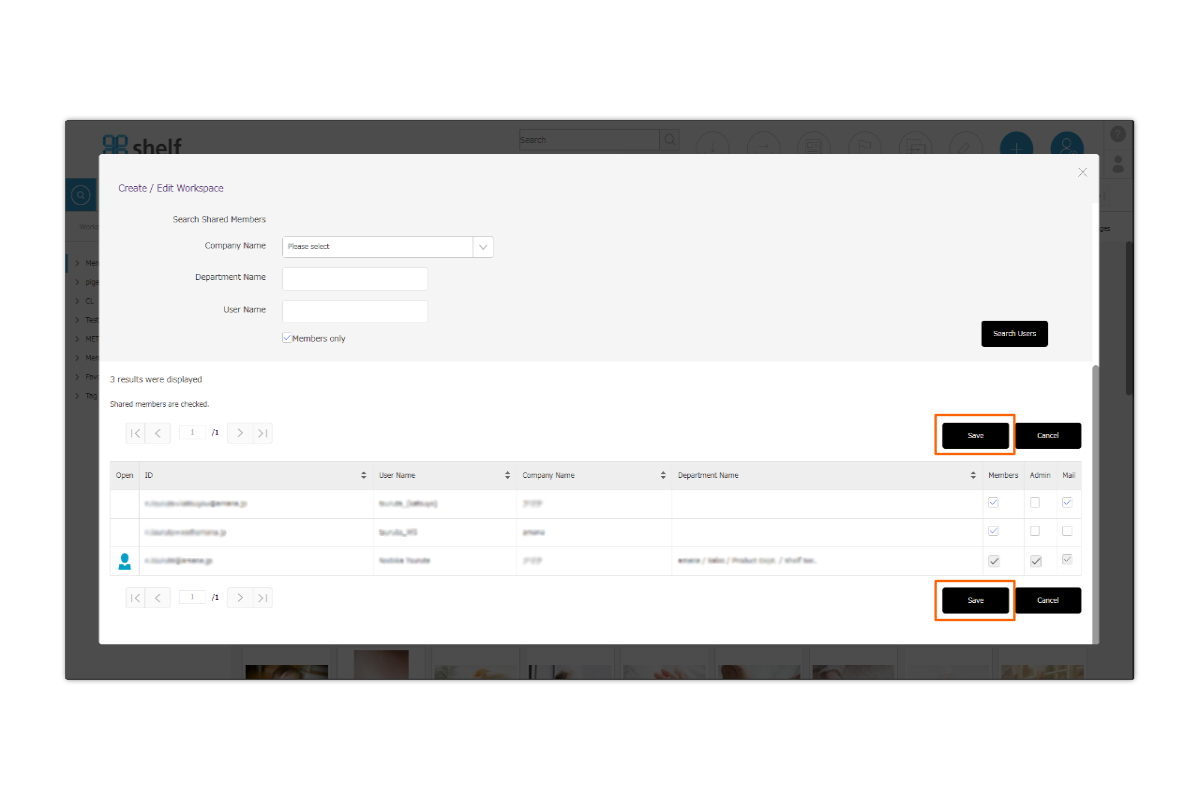
- Click [Save] when you have completed your entry.
- If a new member is registered, a notification email will be sent to the newly added member.
If the registered member is deleted, a notification email will be sent to the deleted member.
*The sending of notification emails can be set to turned on or off. By default, it is set to send ON.
If you do not want the notification email, uncheck the checkbox on the right side of [Create/Edit Workspace] window and click [Save] button at the bottom of window.
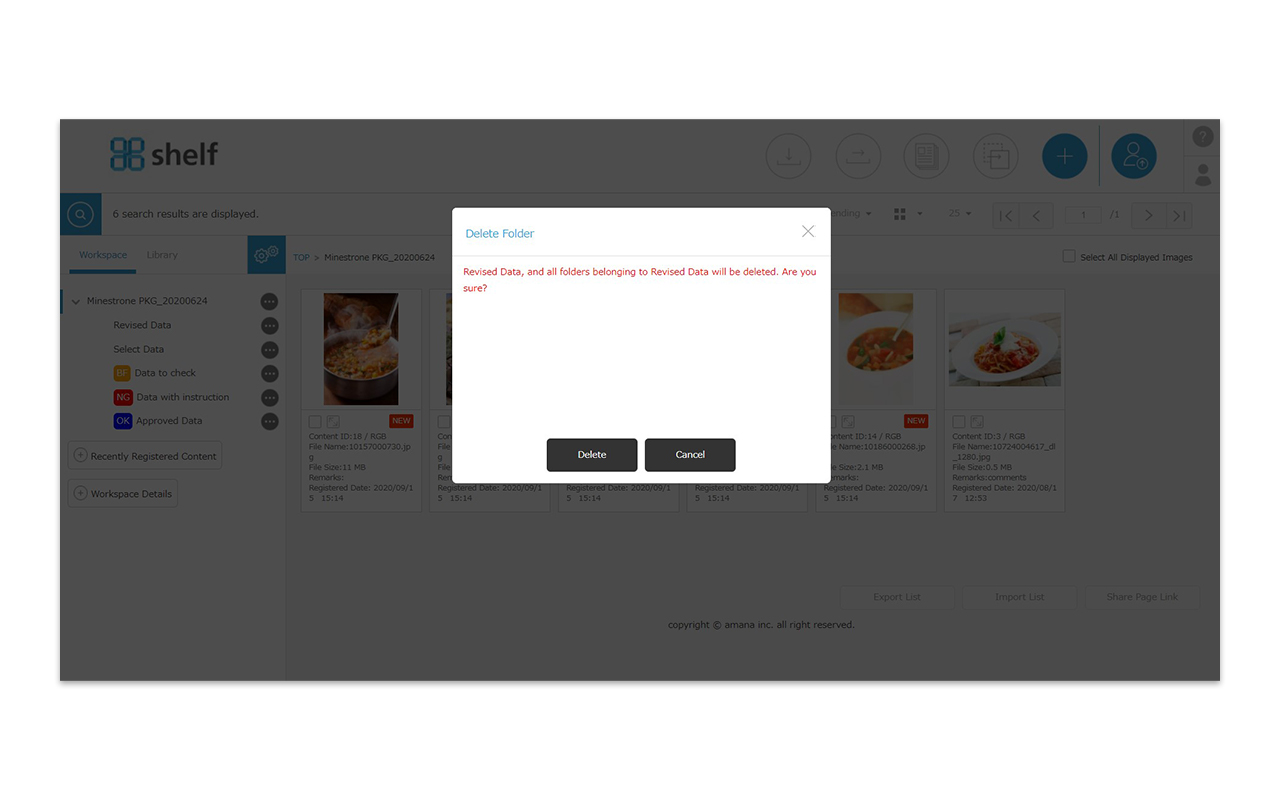
【Delete Workspace】
The workspace cannot be deleted by operation.
A notice mail will be sent to the workspace admin and the creator both 14 days and 1 day before the end of open period.
You can access workspace until one month after the end of access period. After this period, the data management conditions will differ depending on workspace settings.
1. Checked “Keep all data after the end of access period”
If you check “Keep all data after the end of access period.” checkbox in Data Management Setting, workspace will be saved and accessible even after one month from the end of the access period indefinitely.
However, after one month from the end of the access period, only the system administrator or site administrator can edit the workspace information. Members who do not have editing permission can only reference the workspace information.
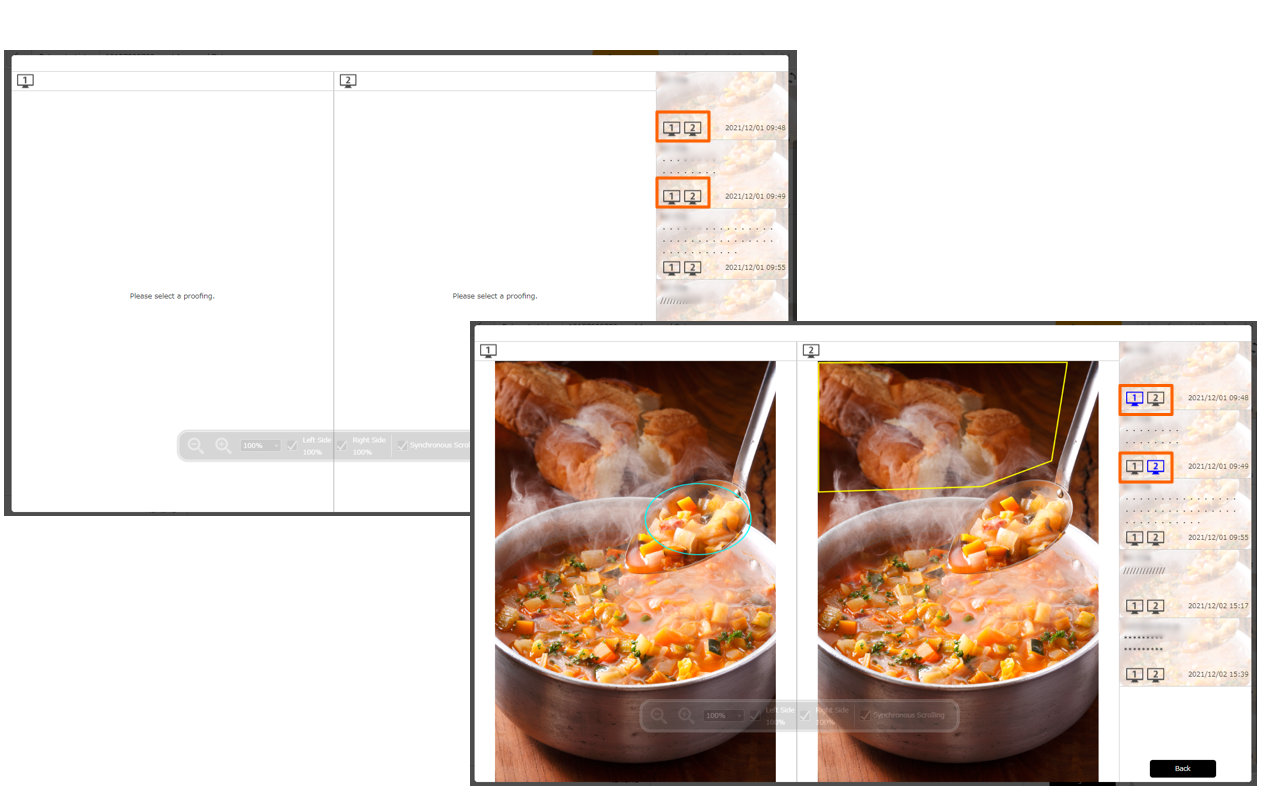
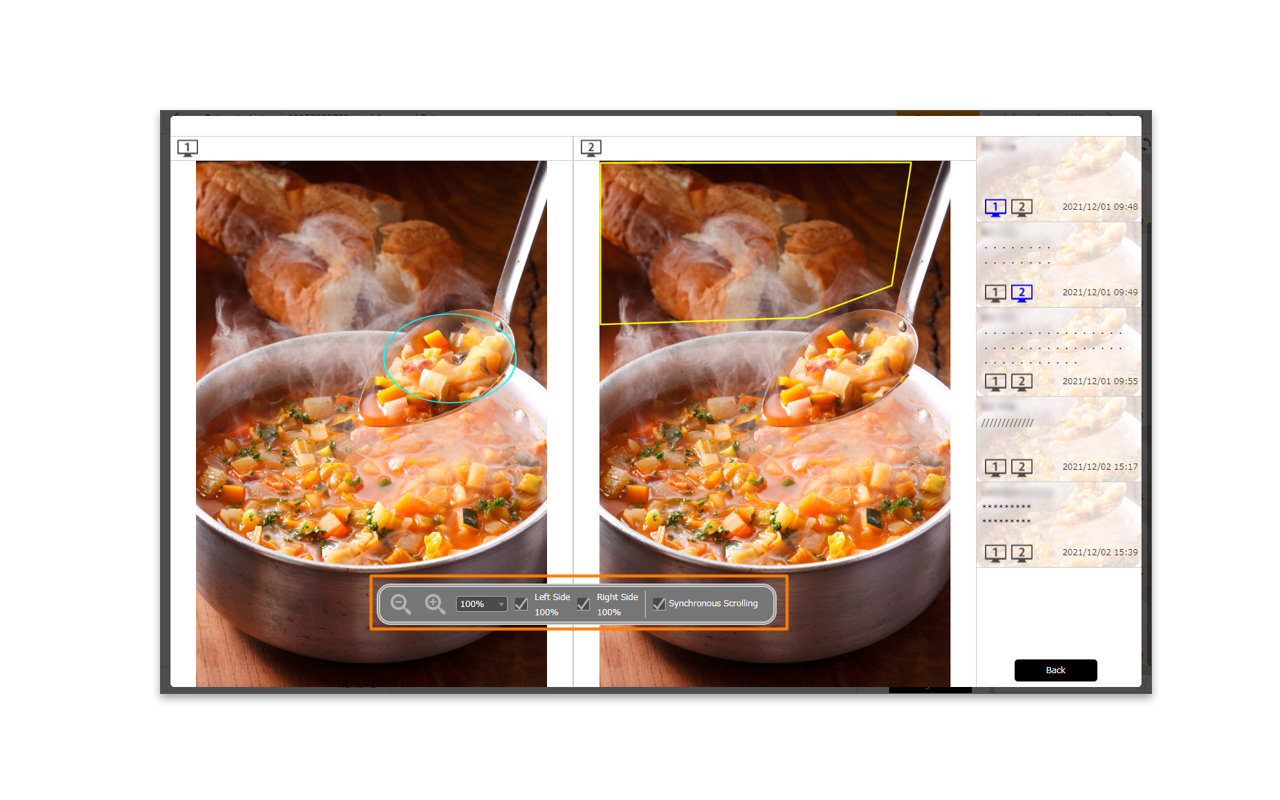
Only “Register to Favorites” and “Contents Comparison” are available for data operations. You cannot proceed with the following operations:
– Content Registration
– Enter/edit comment on the content menu page.
– Enter/edit proofing.
– Enter/edit comment in the proofing window.
– Delete Record
– Update Remarks
– Downloading
– Sending
‐‐Proofing Request
2. Unchecked “Keep all data after the end of access period”
If you do not check “Keep all data after the end of access period.” checkbox, workspace will be automatically deleted after one month from the end of the access period.
Please refer to [Create Workspace] for more details about data management setting.
<Extension and editing after the access period ends>
To extend the access period, change the end date on Create/Edit Workspace window. Only the extension of the end date can be edited even after the access period ends before it is deleted. Also, if you want to change other items after the access period is expired, you can edit them by setting the end date to a date in the future and changing the workspace to the active status at once. Please refer to [Edit Workspace] for details on how to edit.
*If “Keep all data after the end of access period” is checked, the system administrator or site administrator can edit the access period end date even after one month has passed from the access period end.
Close
Content Registration and Deletion
Print
Content Registration and Deletion
【Content registration】
-
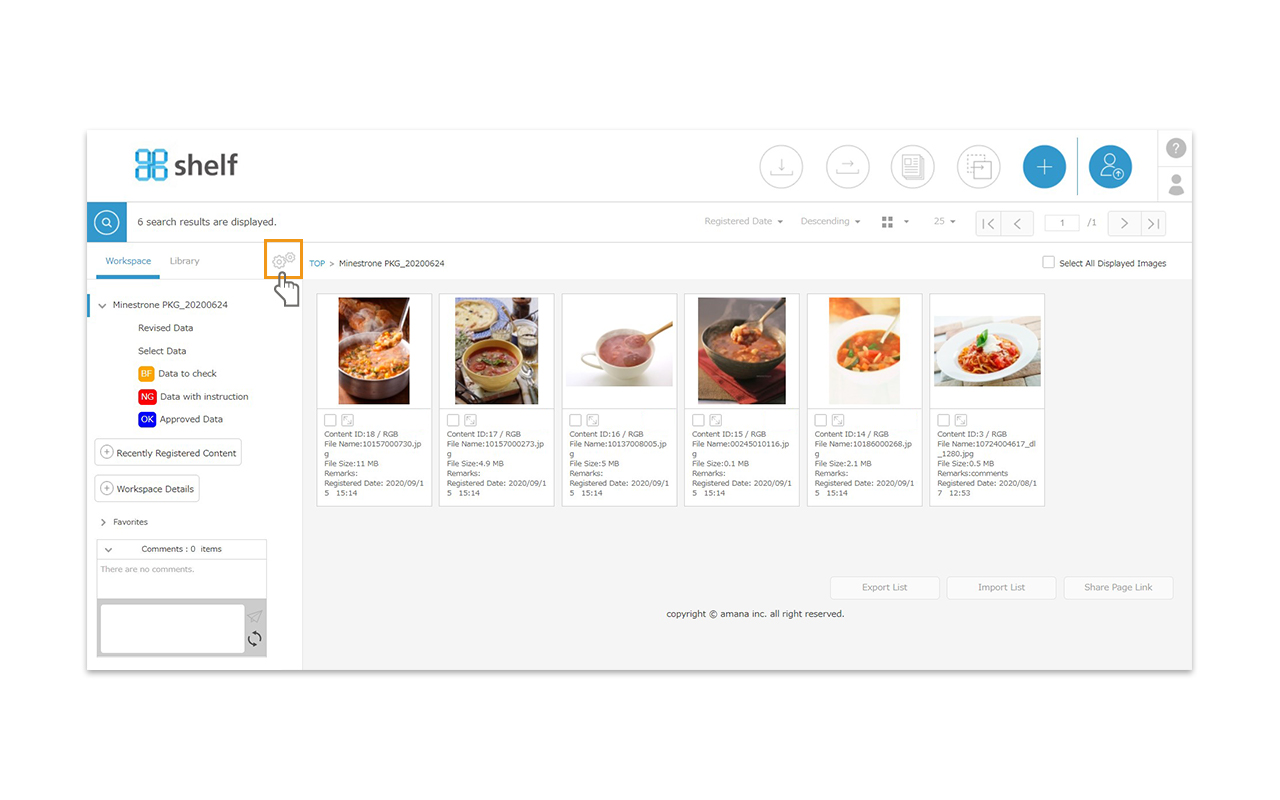
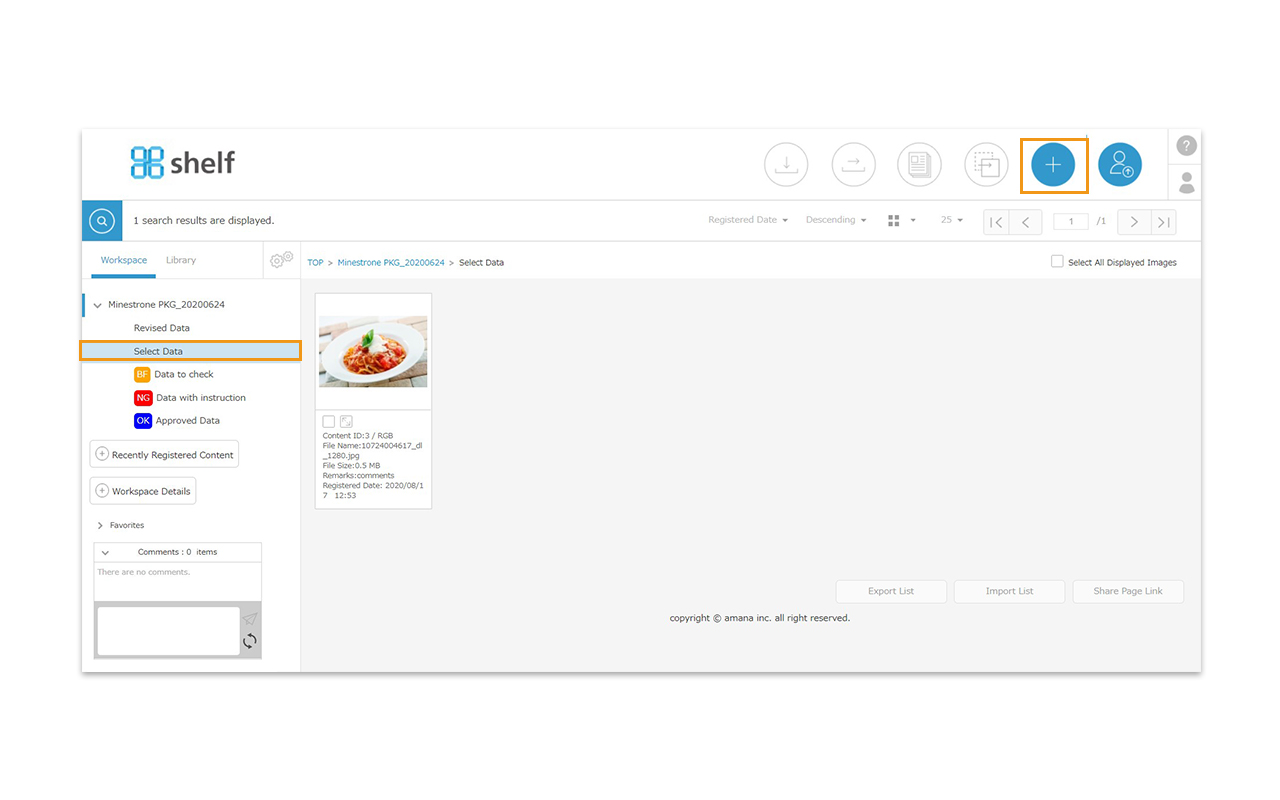
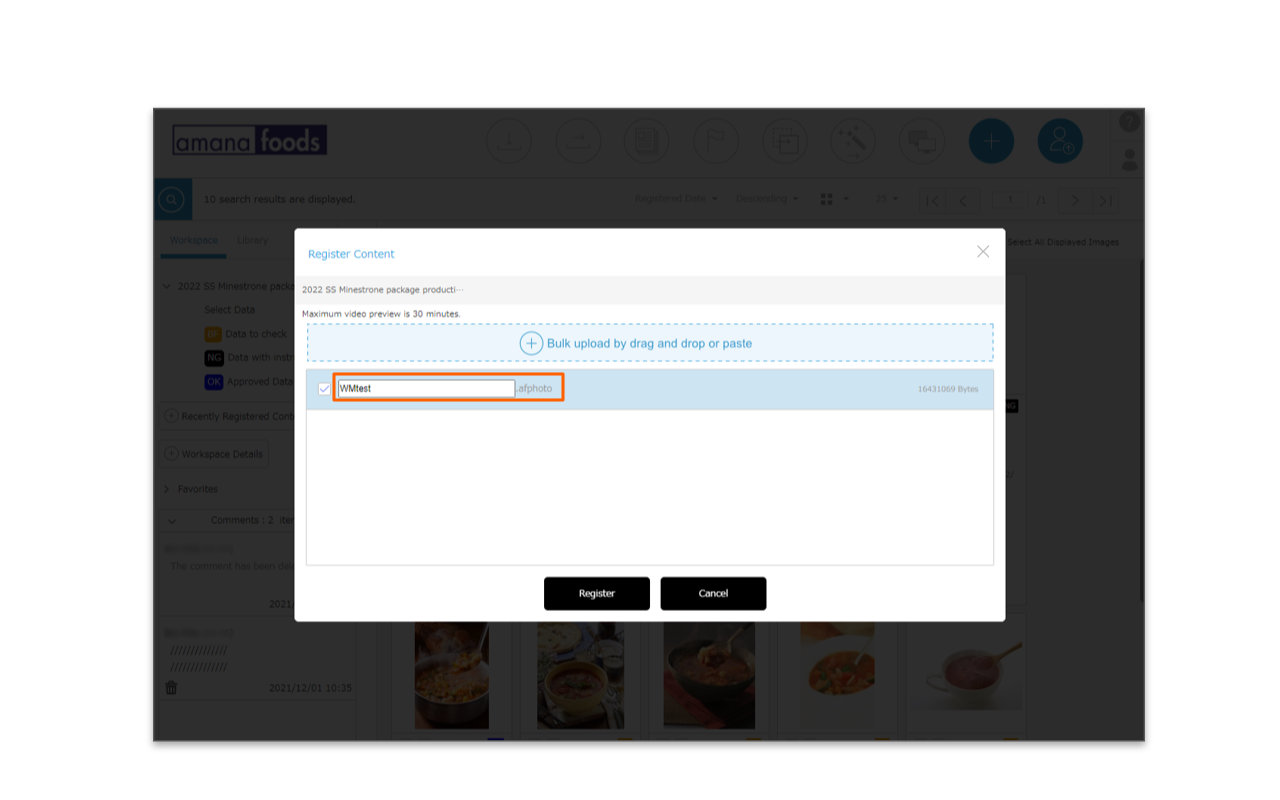
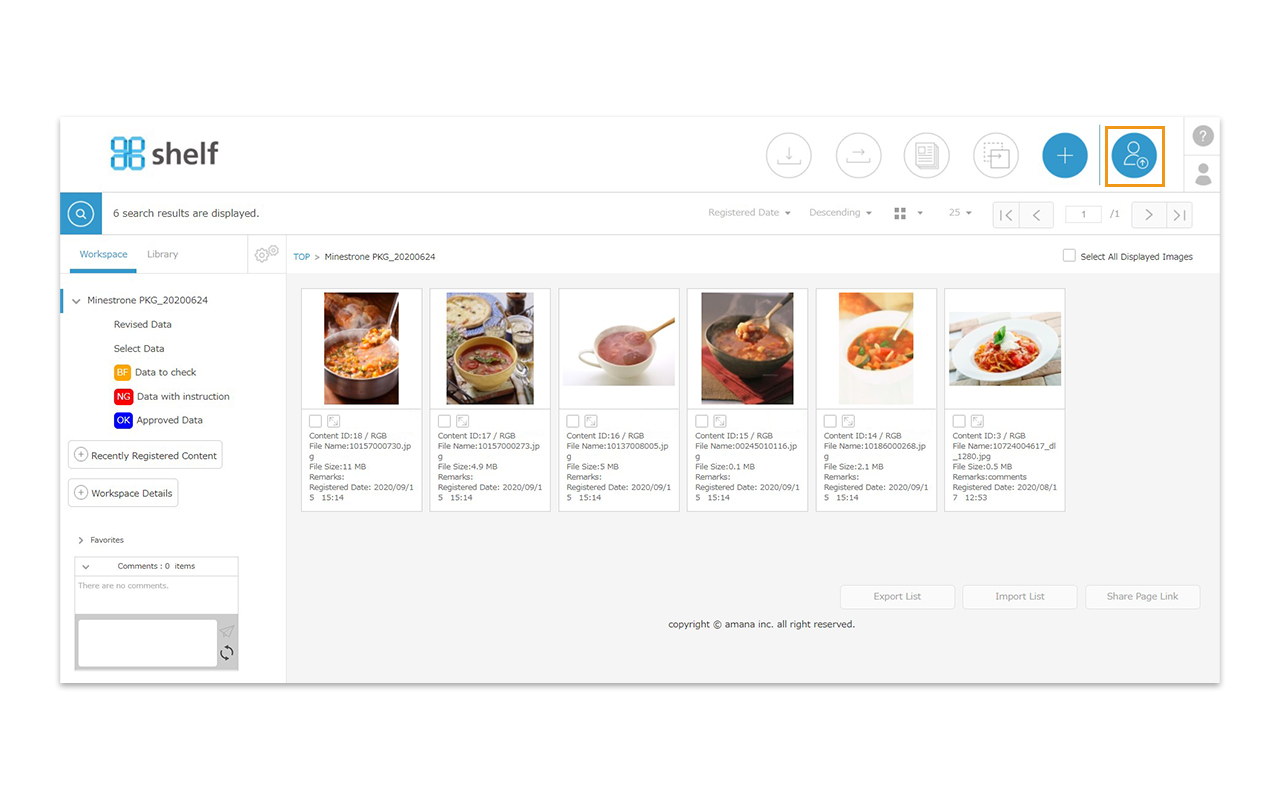
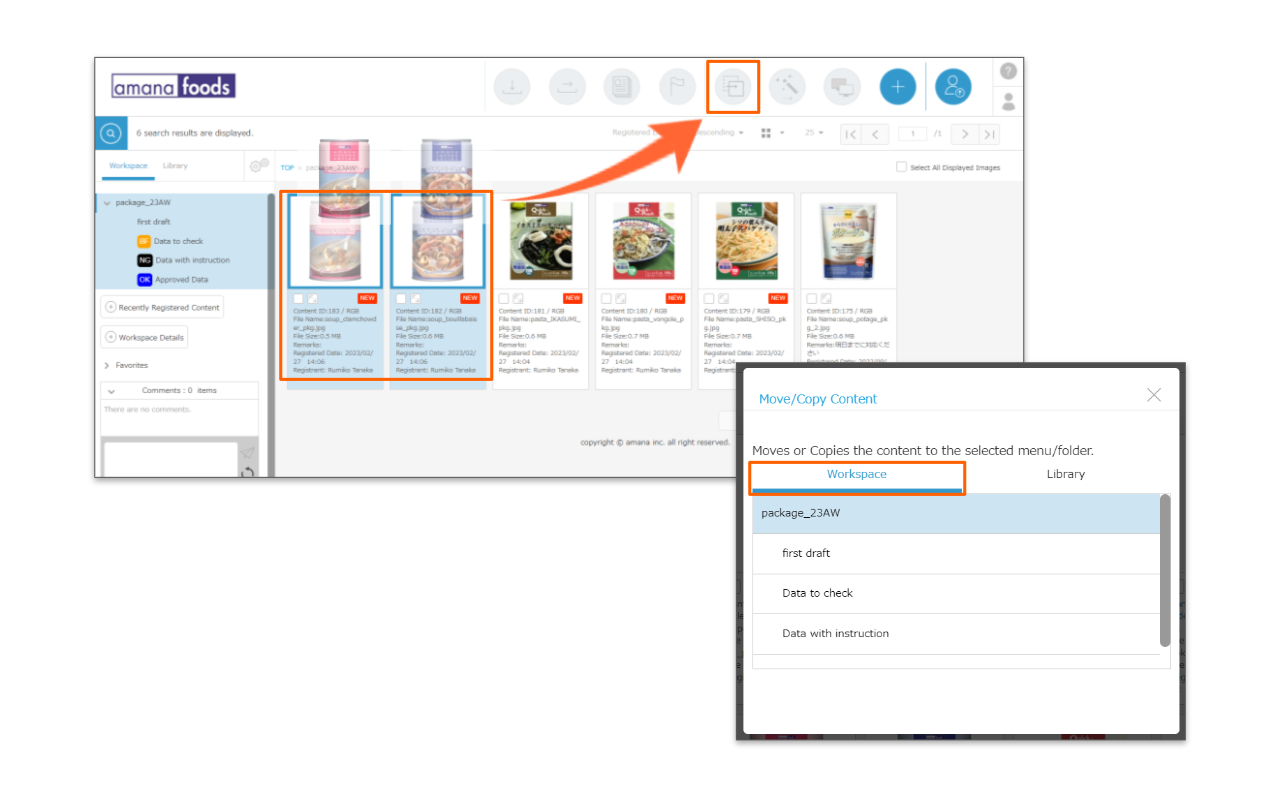
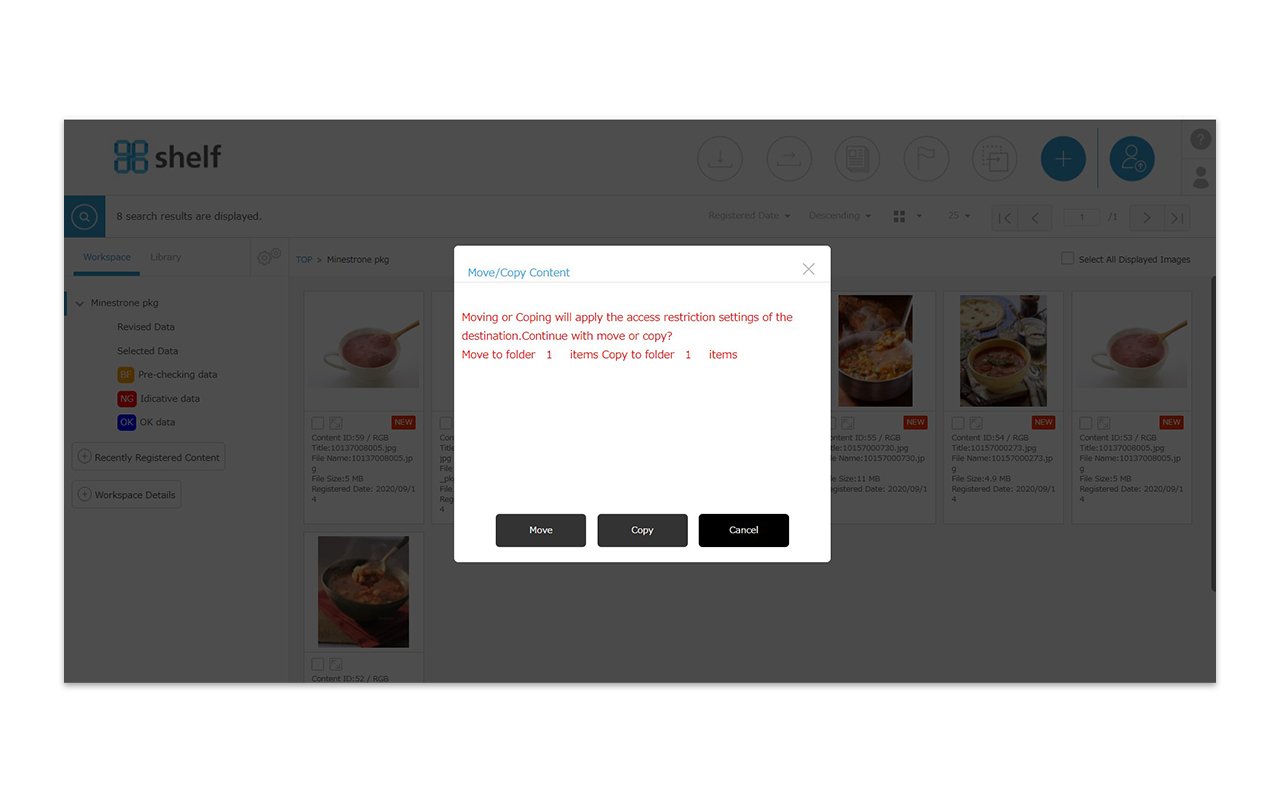
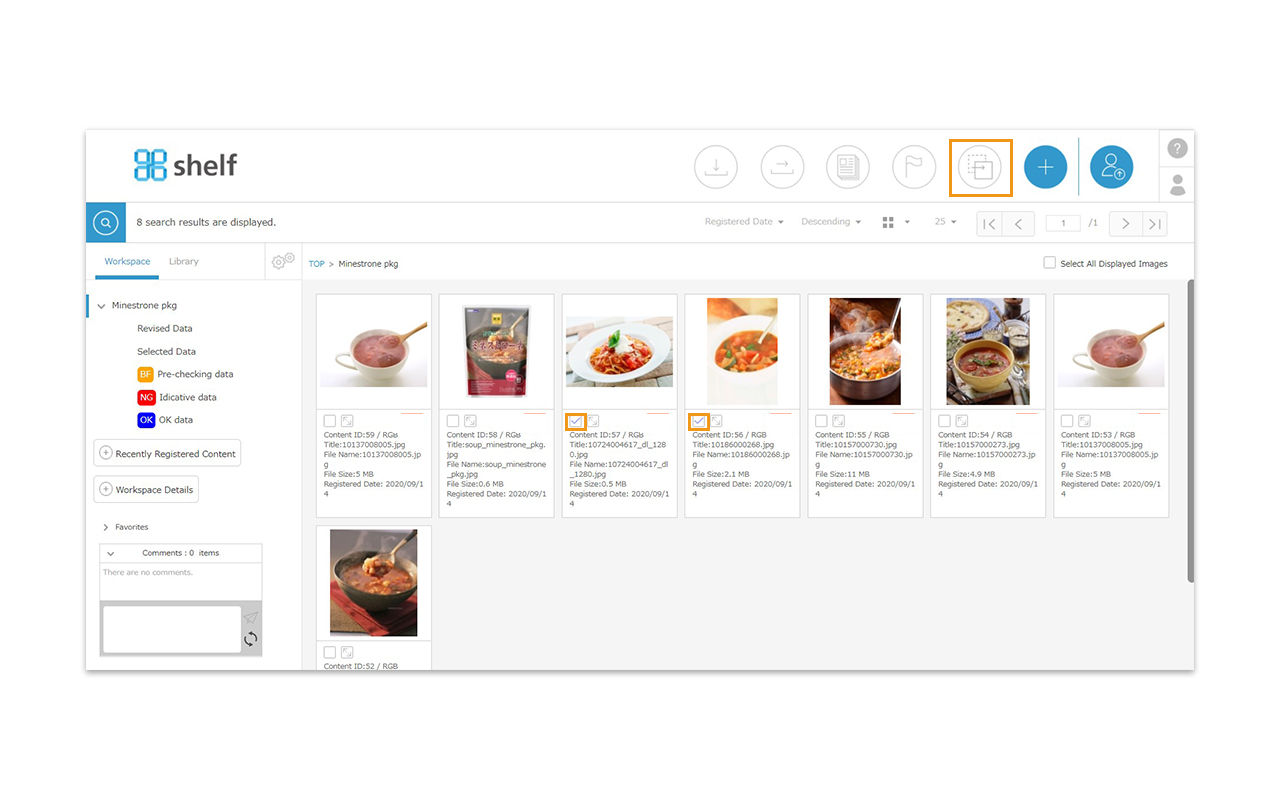
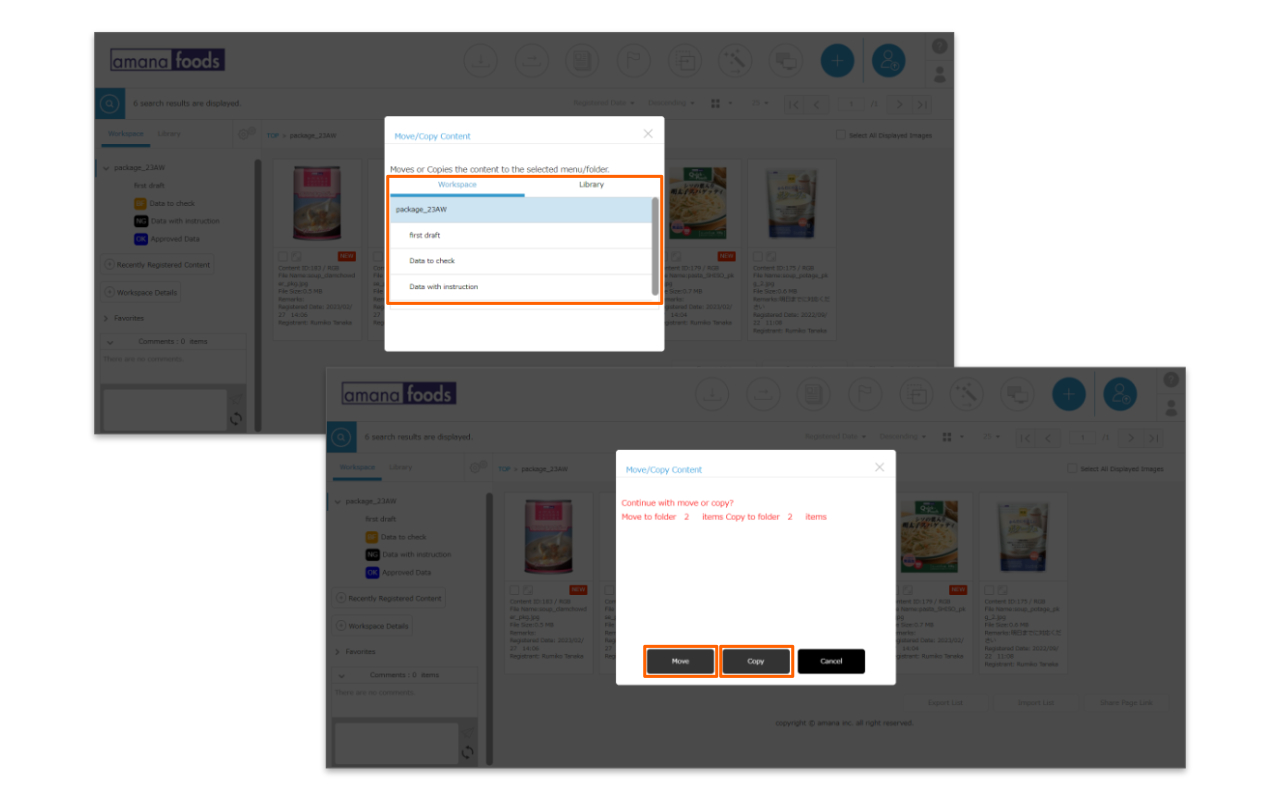
- Select the folder to register the content, and click the [Register Content] icon in the header.
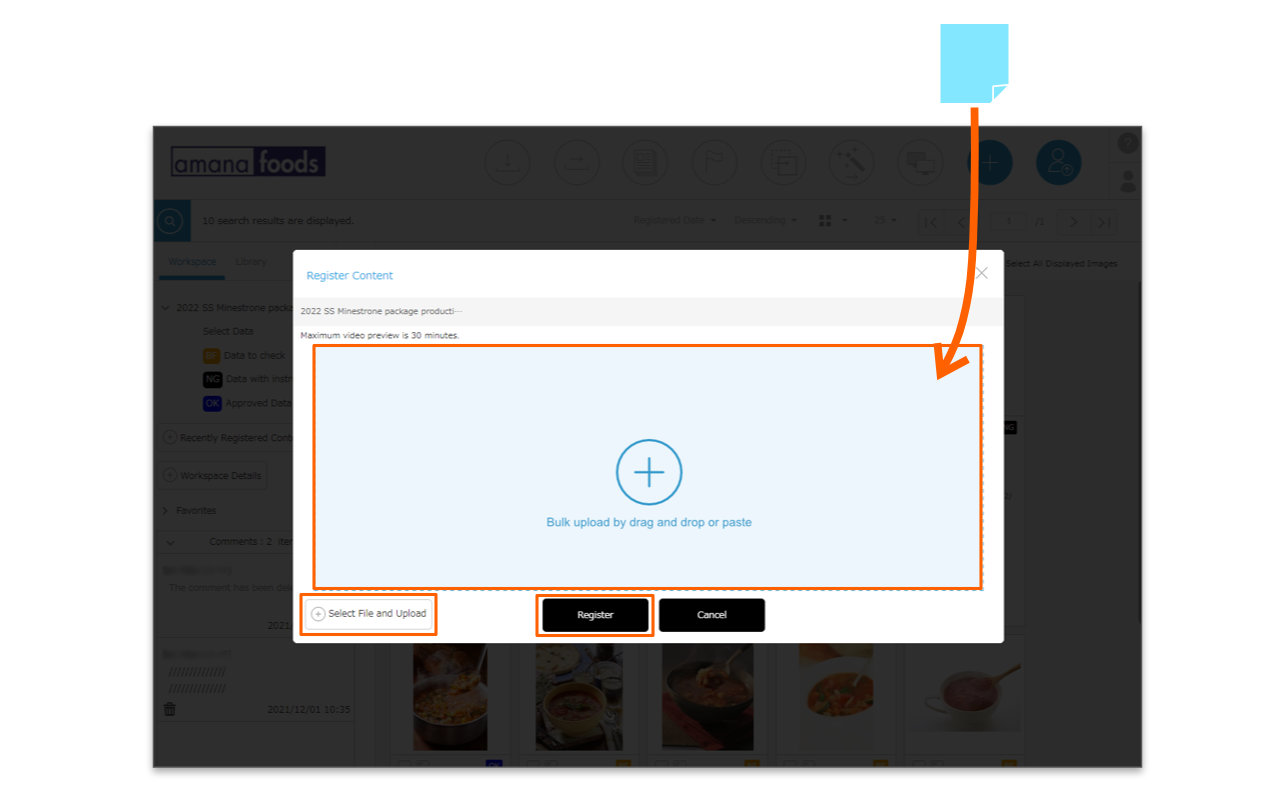
- Either drag and drop or copy and paste the content you want to register into the registration area which appears. Alternatively, you can select the content by clicking [Select File and Upload] button at the bottom of the registration area.
- The file name will be displayed in the contents registration area. If you want to change the file name of the data to be registered, click on the file name and rename it.
*Registration from “Select File and Upload” does not support renaming.
*In Windows, if the file name is too long or contains forbidden characters, it may cause an error when downloading. Please refer here for details.
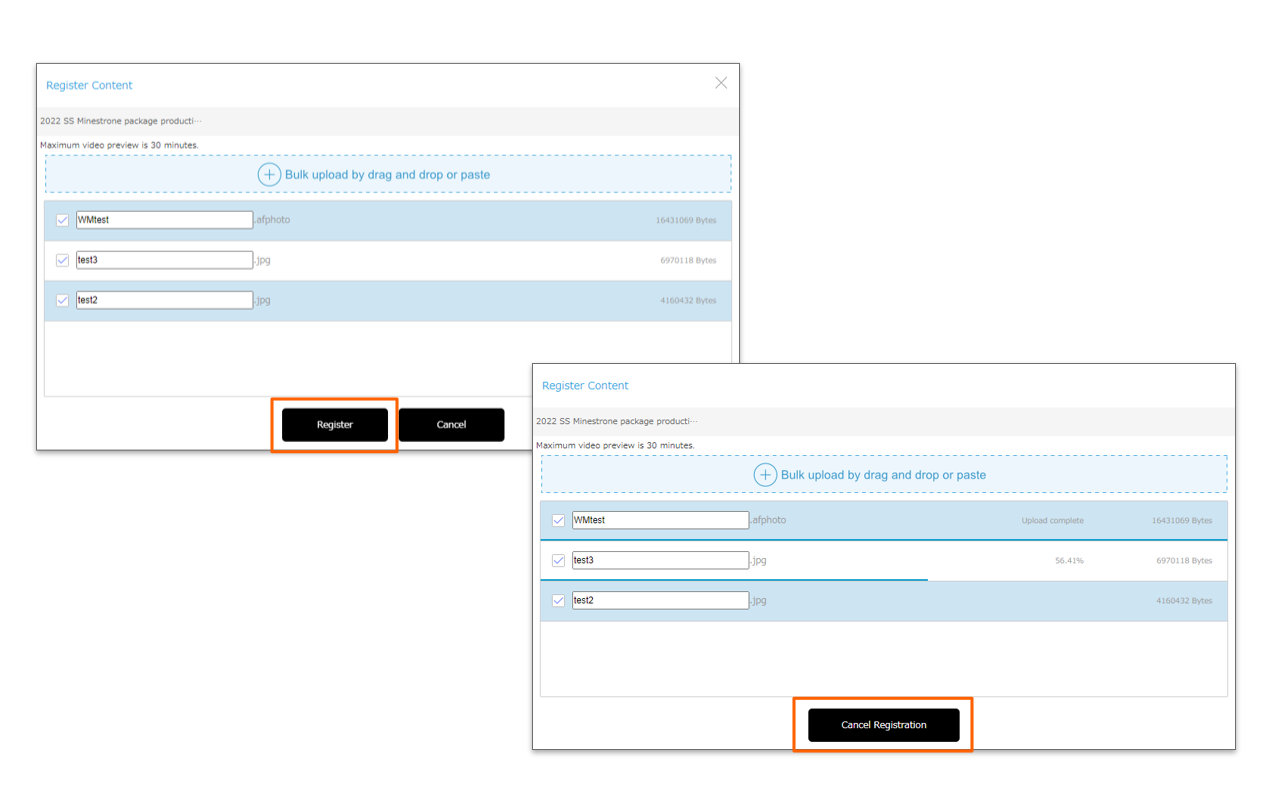
- After selecting the content, click [Register].
A progress bar showing % complete will appear for each item of content. If Cancel Registration is clicked during this process, only files which have 100% completed uploading will be registered to the site.
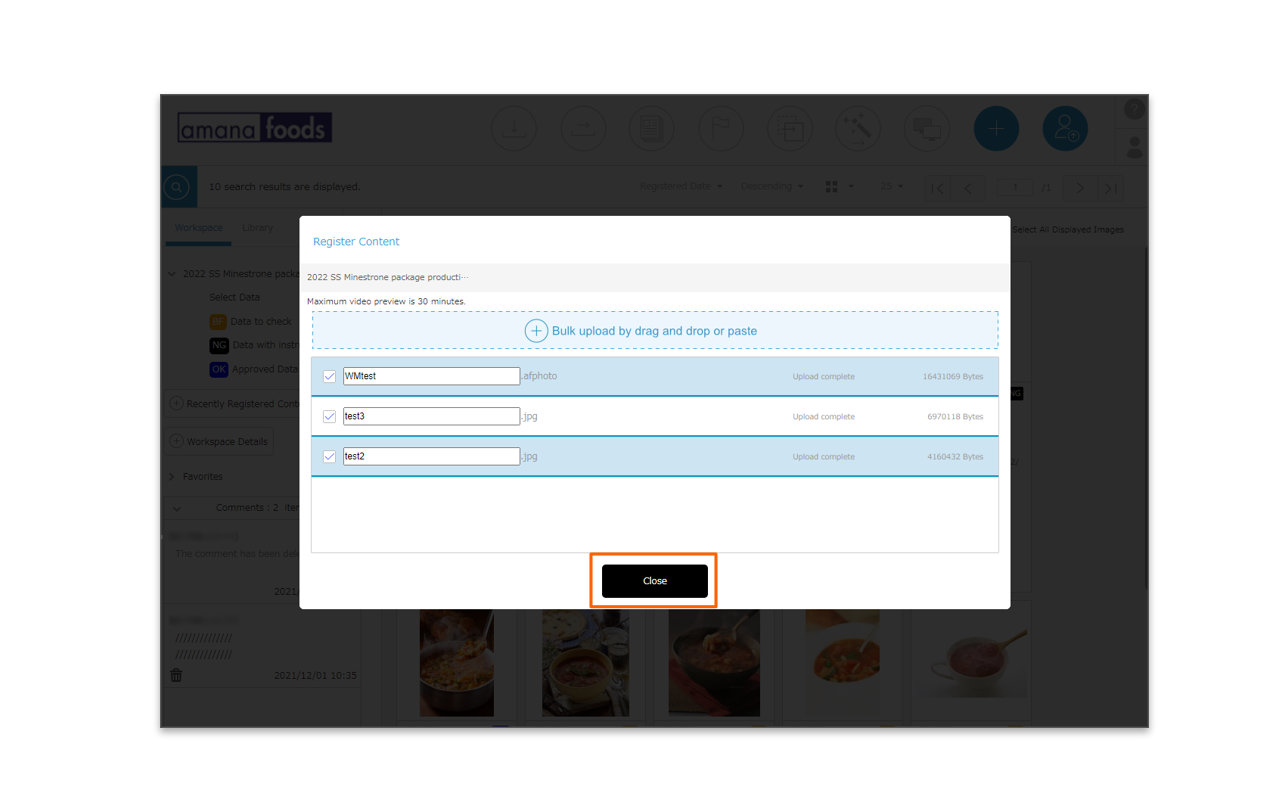
- Once the content has been registered, [Close] button will be displayed, and click [close] to complete registration.
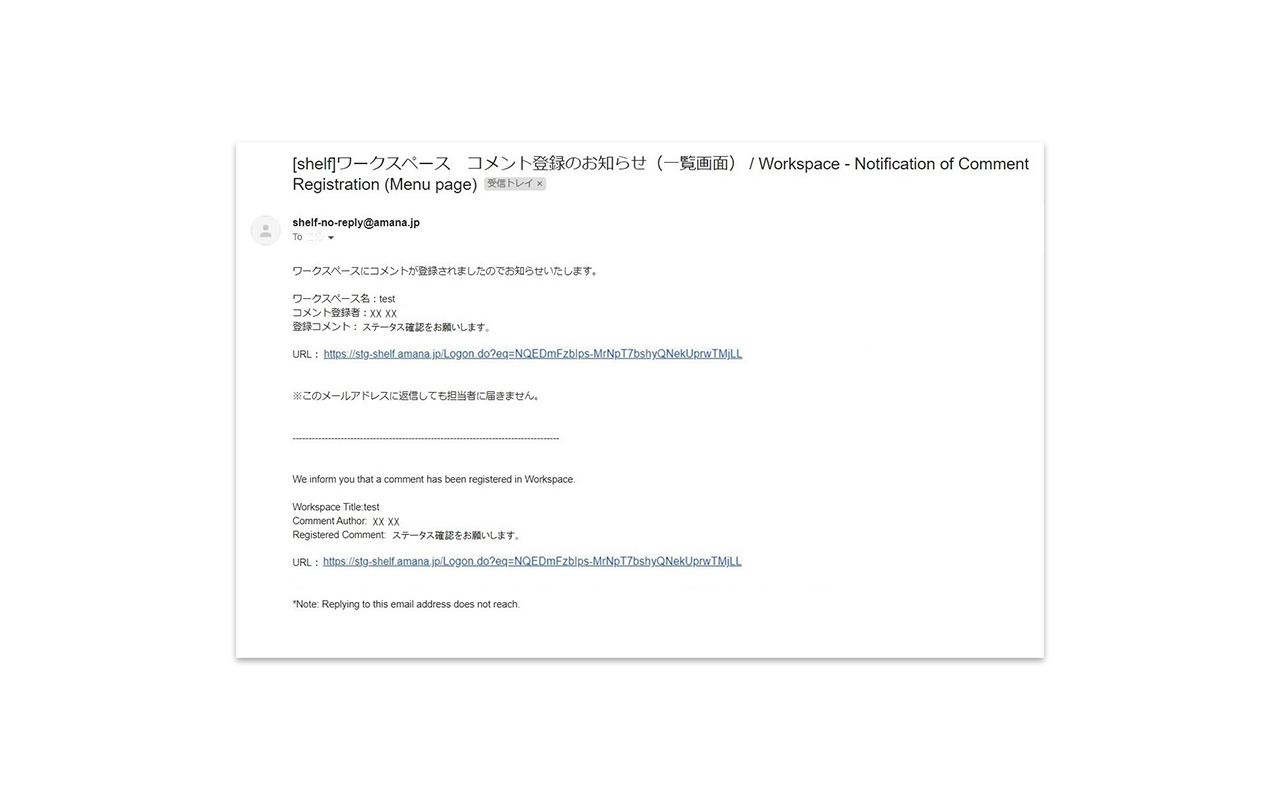
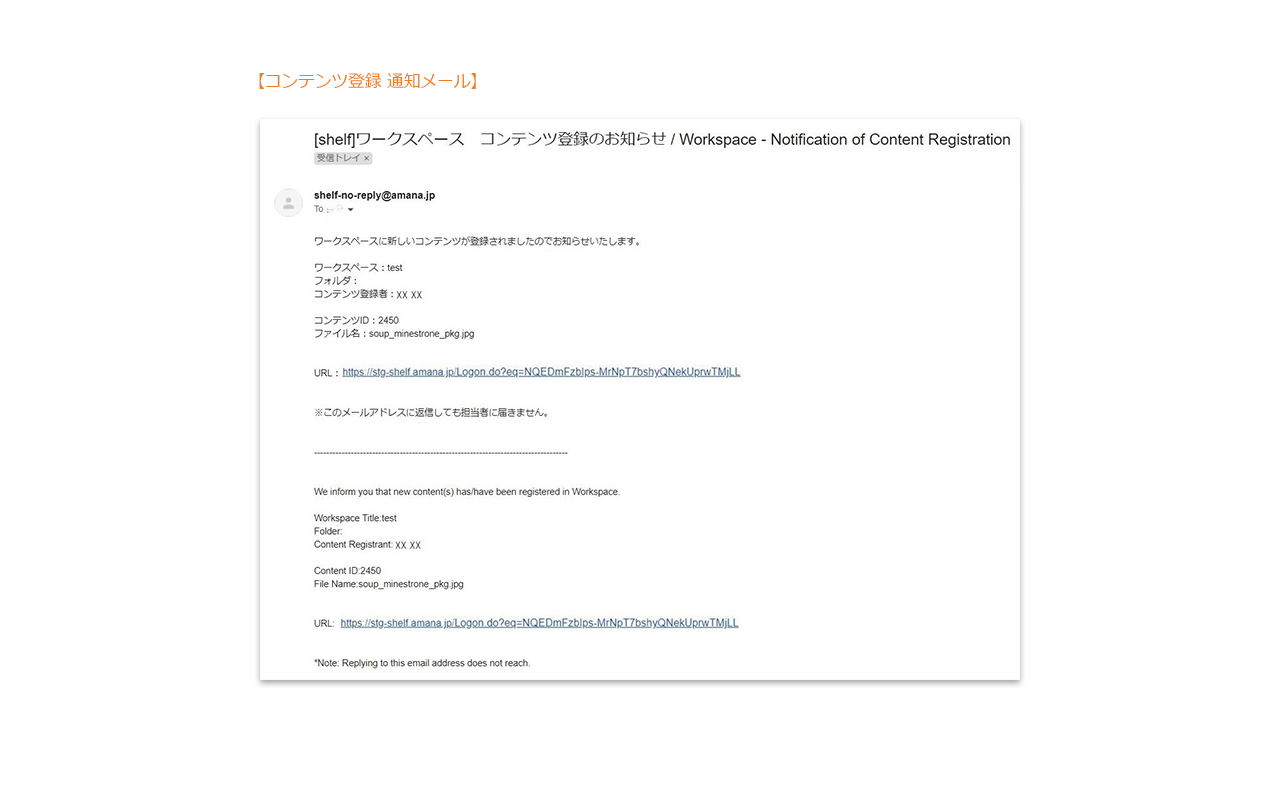
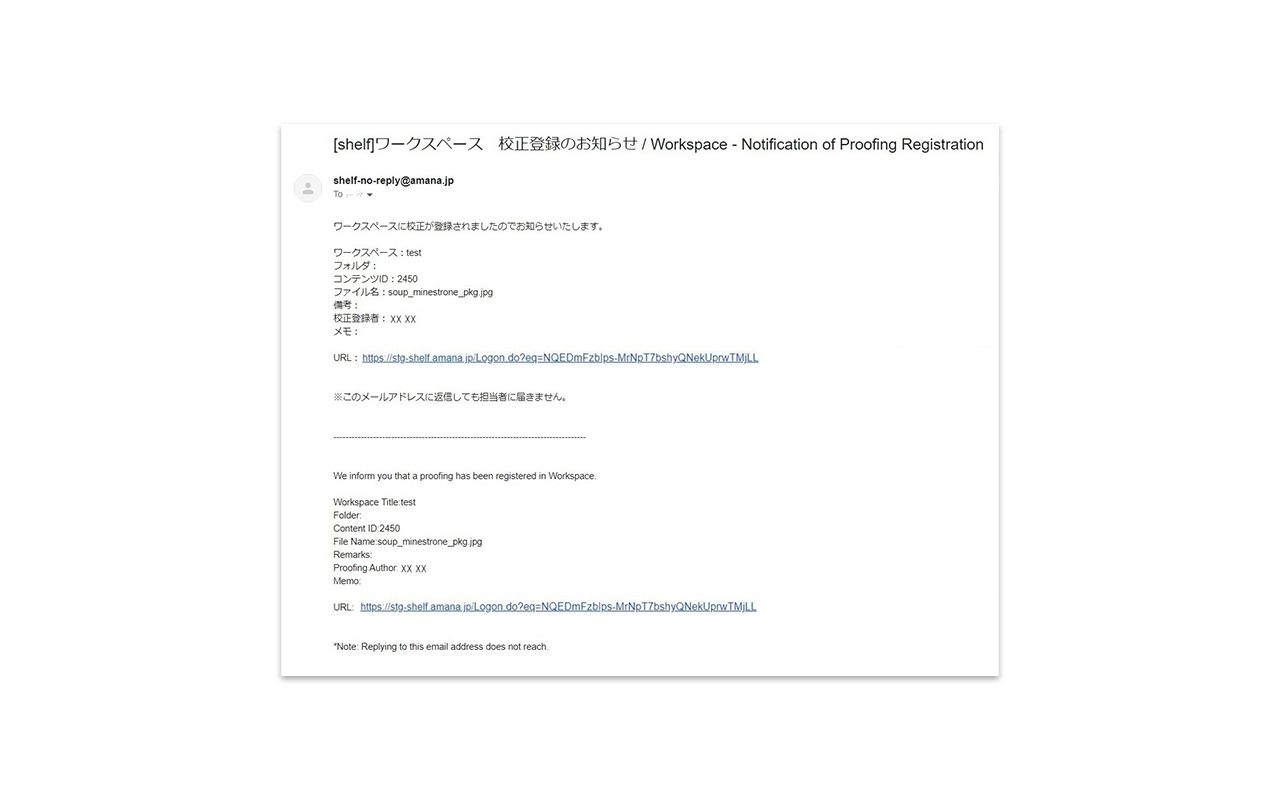
When the content is registered, a notification email will be sent to members of the workspace.
*For folders set to be hidden, only site administrator and workspace administrator can be notified.
*The sending of notification emails can be set to turned on or off. By default, it is set to send ON.
If you do not want the notification email, uncheck the checkbox on the right side of [Create/Edit Workspace] window and click [Save] button at the bottom of window.
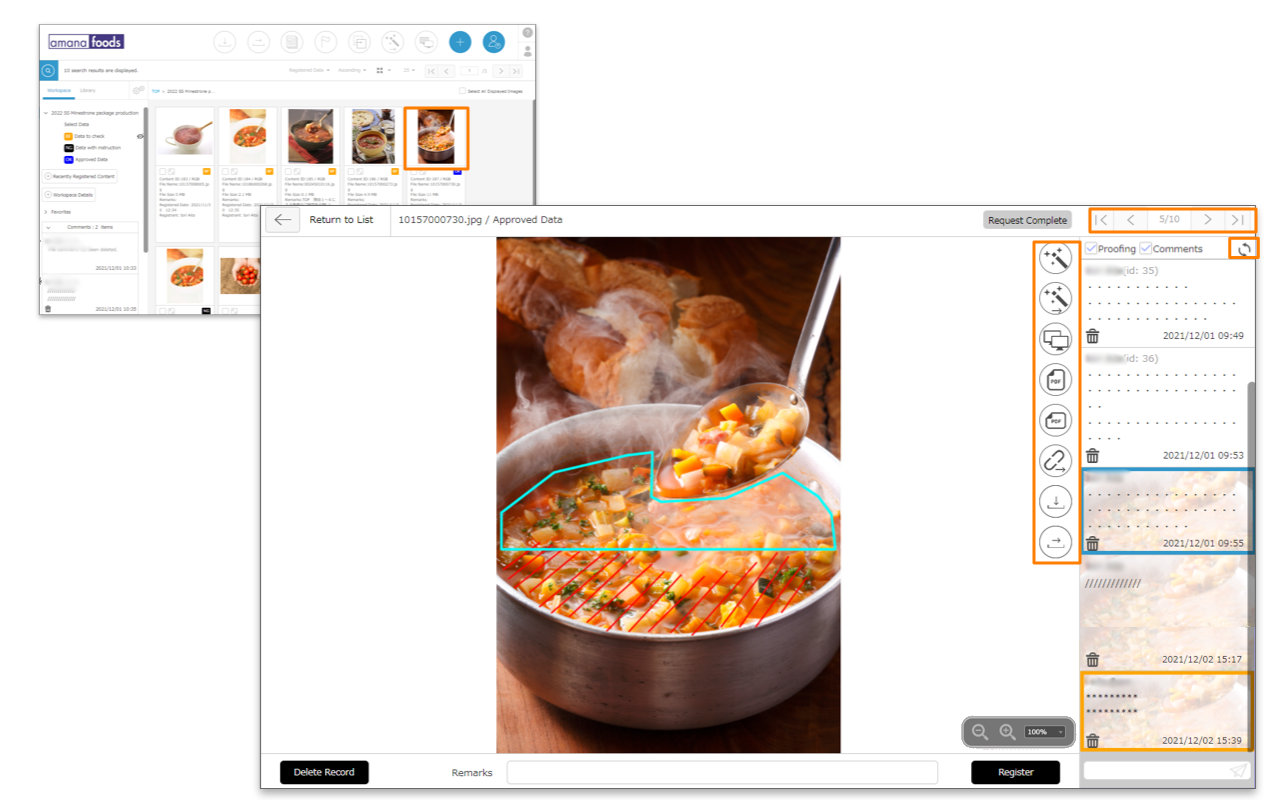
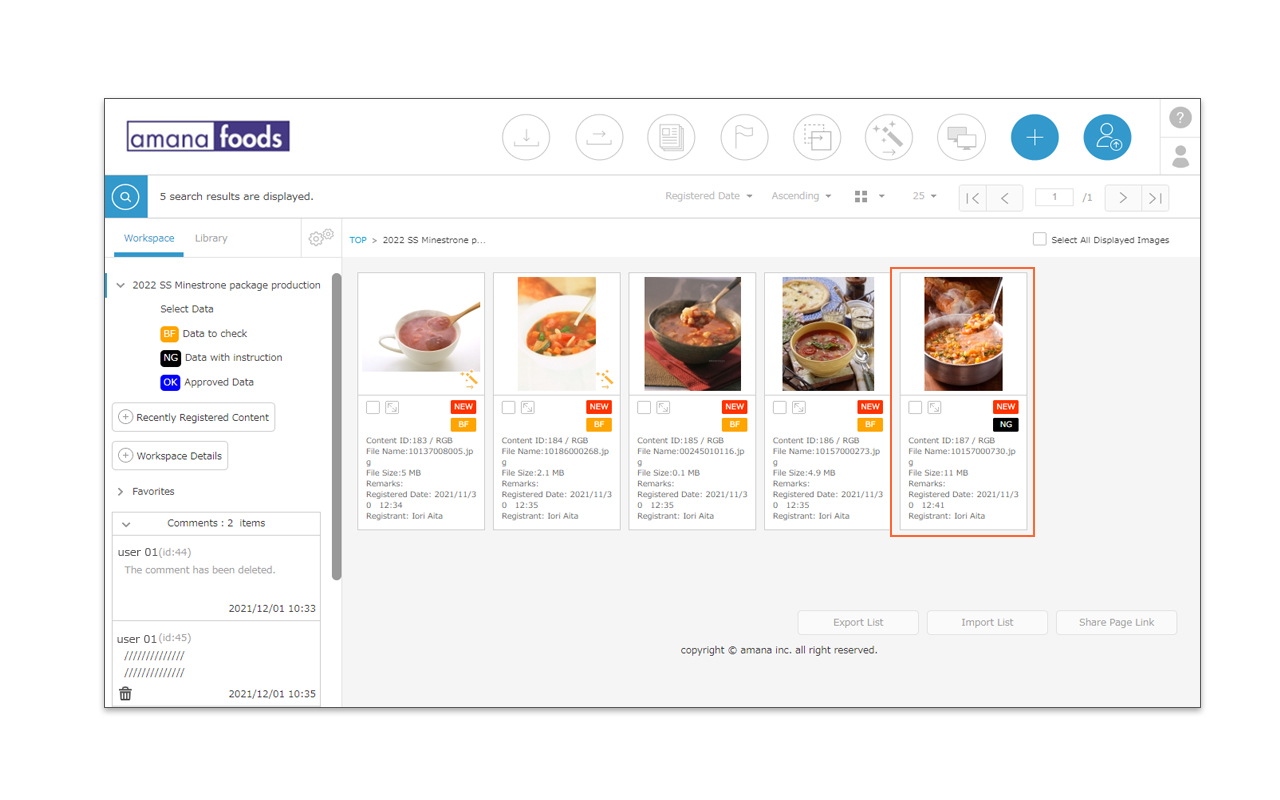
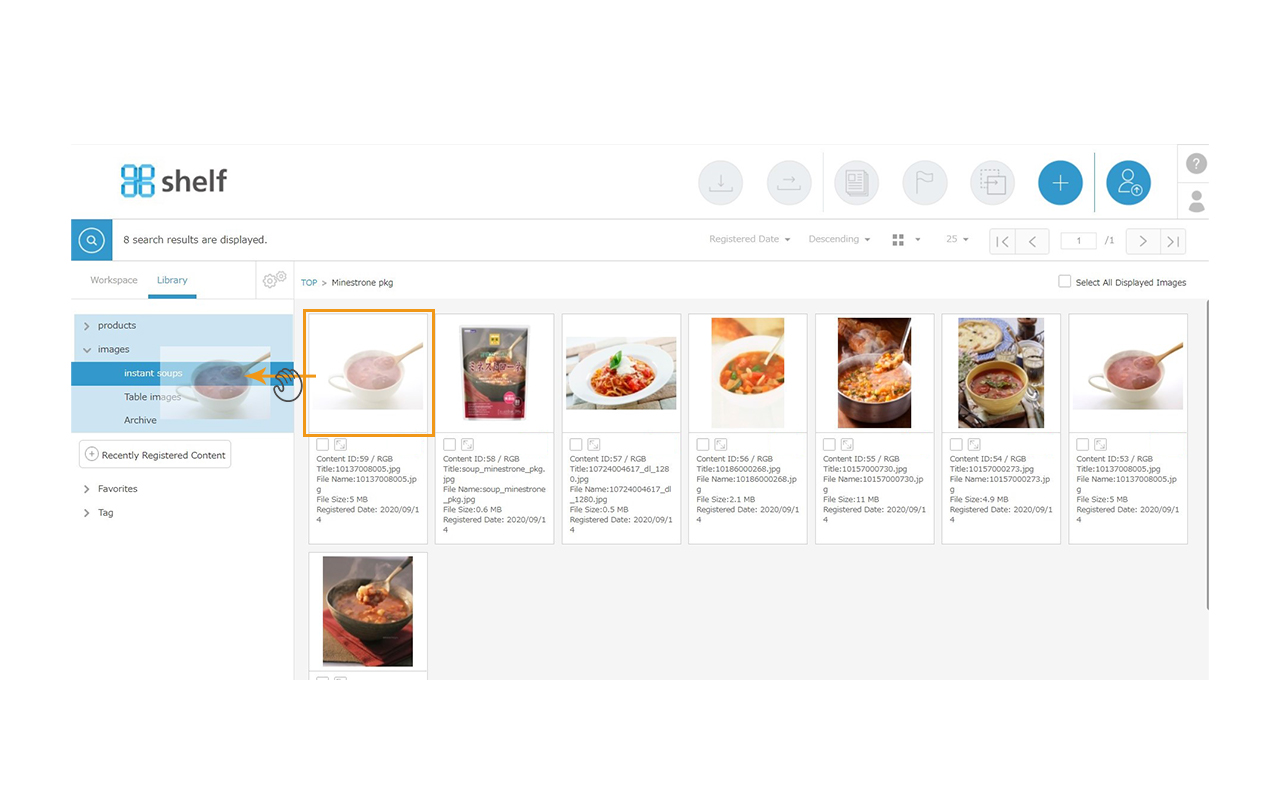
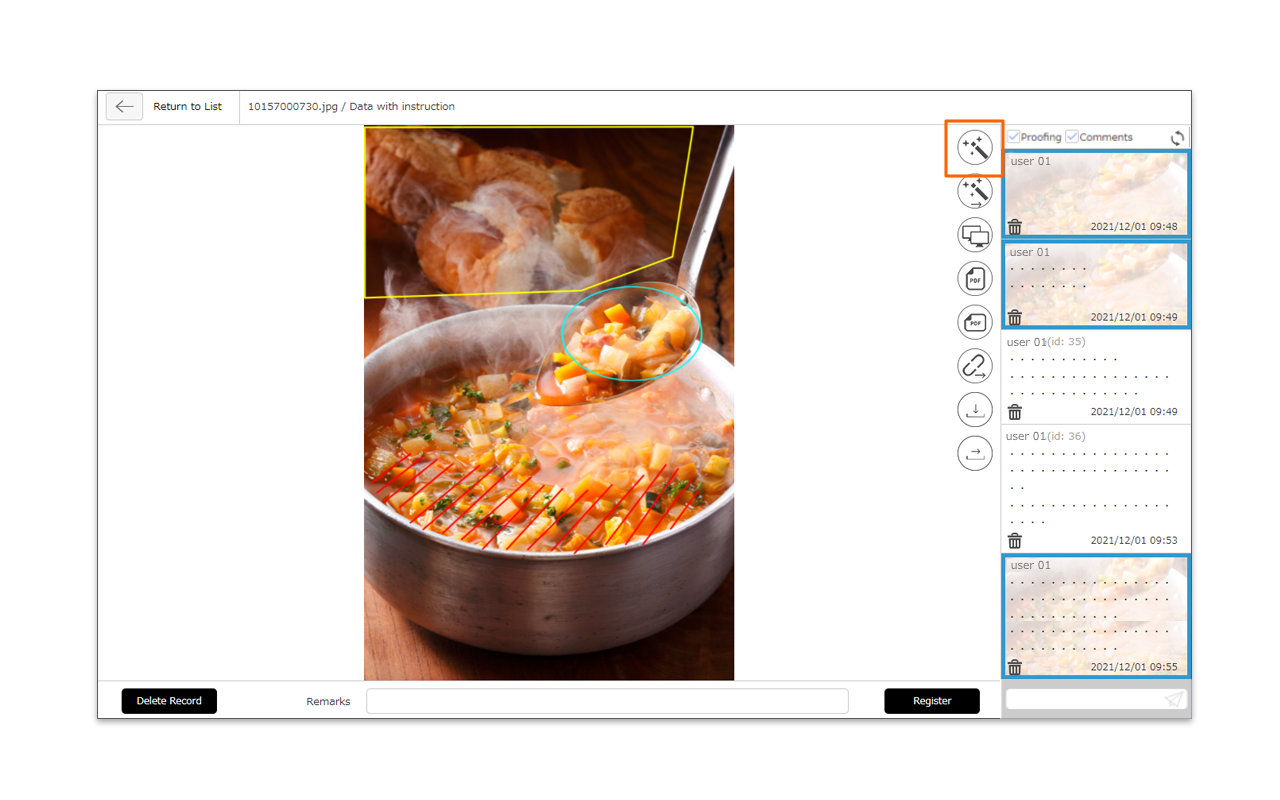
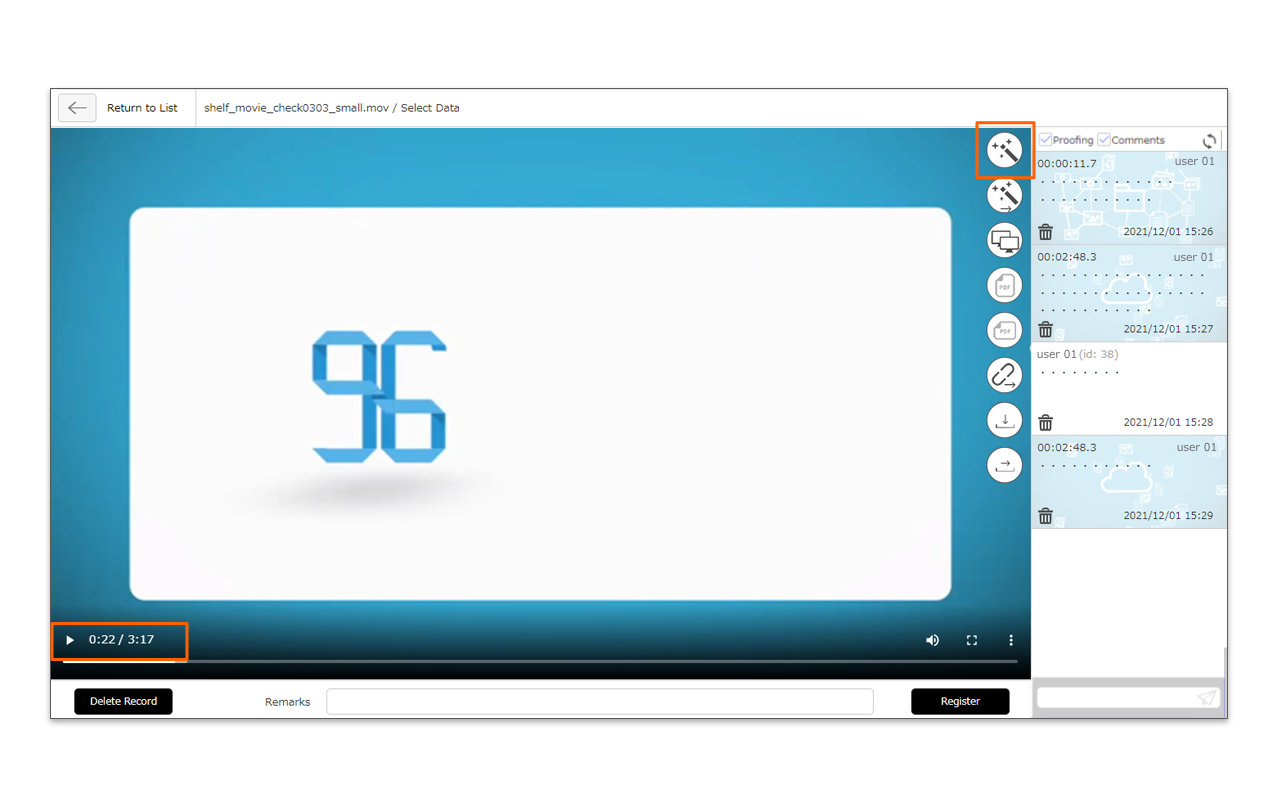
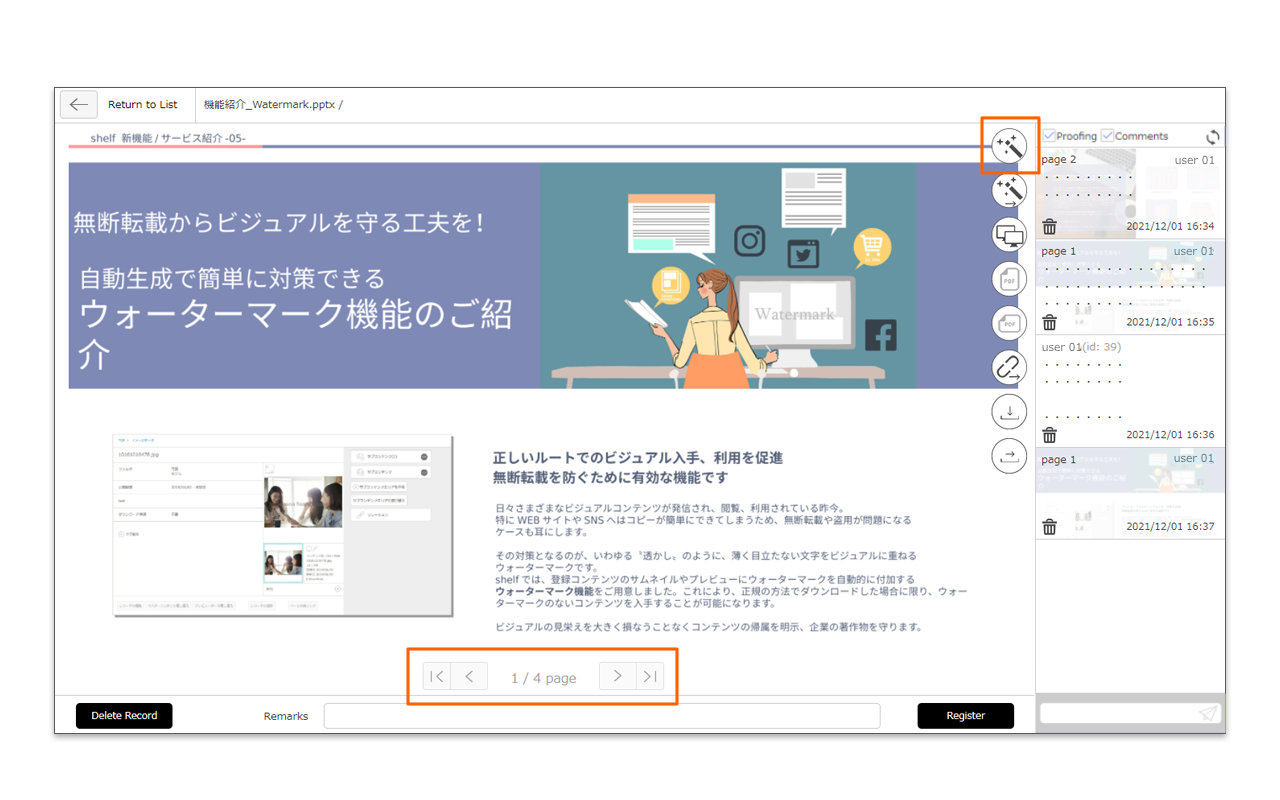
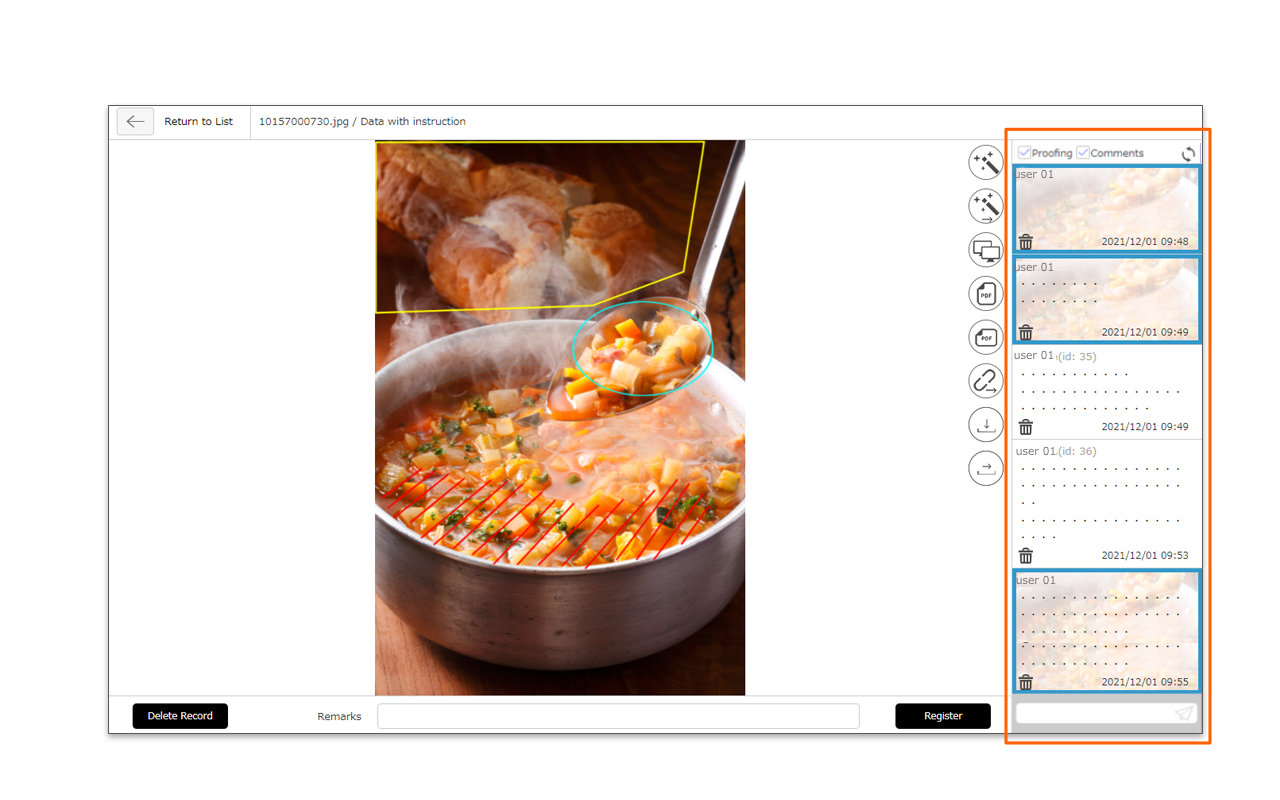
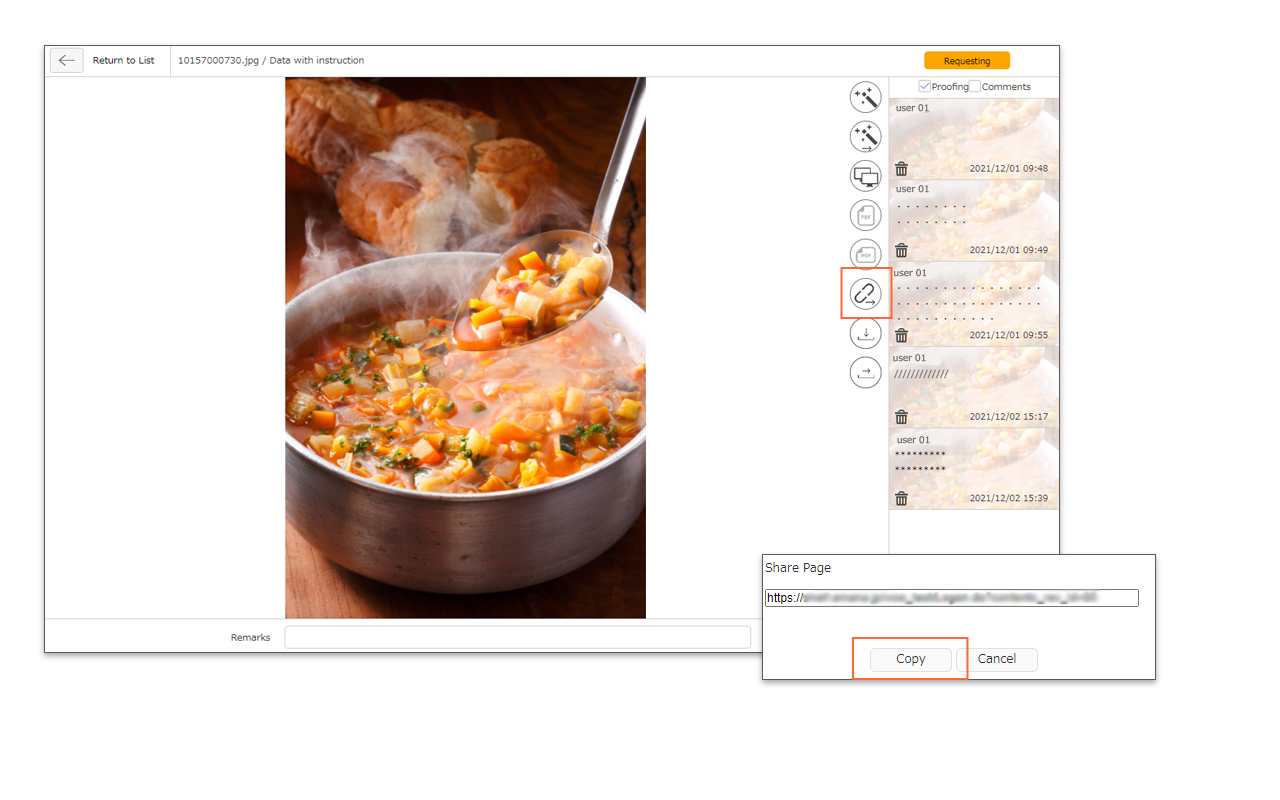
- Click the thumbnail of the registered content on the content menu page to open the content’s information page. In the content’s information page, you can use the buttons on the right side of the preview to perform operations.You can move to the content’s information page of the contents that were listed back and forth in the content menu page by clicking the page feed button on the upper right.Click on [Refresh] icon to check the new comments (It will not automatically update while you are logged in).
*The registered video contents can be previewed for up to 30 minutes.
* Users without the relevant permissions cannot perform this action. For more information please contact your site administrator.
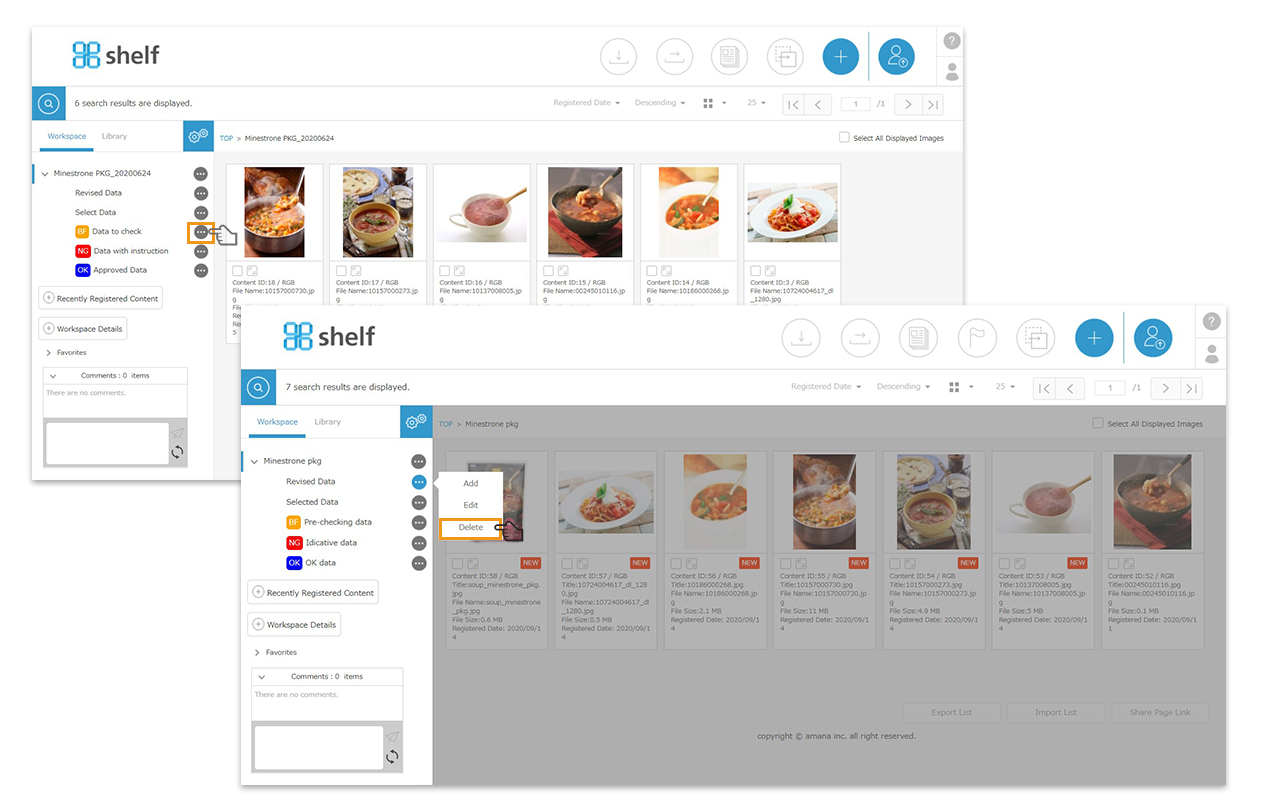
【Content Deletion】
- Click the thumbnail of the content you want to delete on the content menu page.
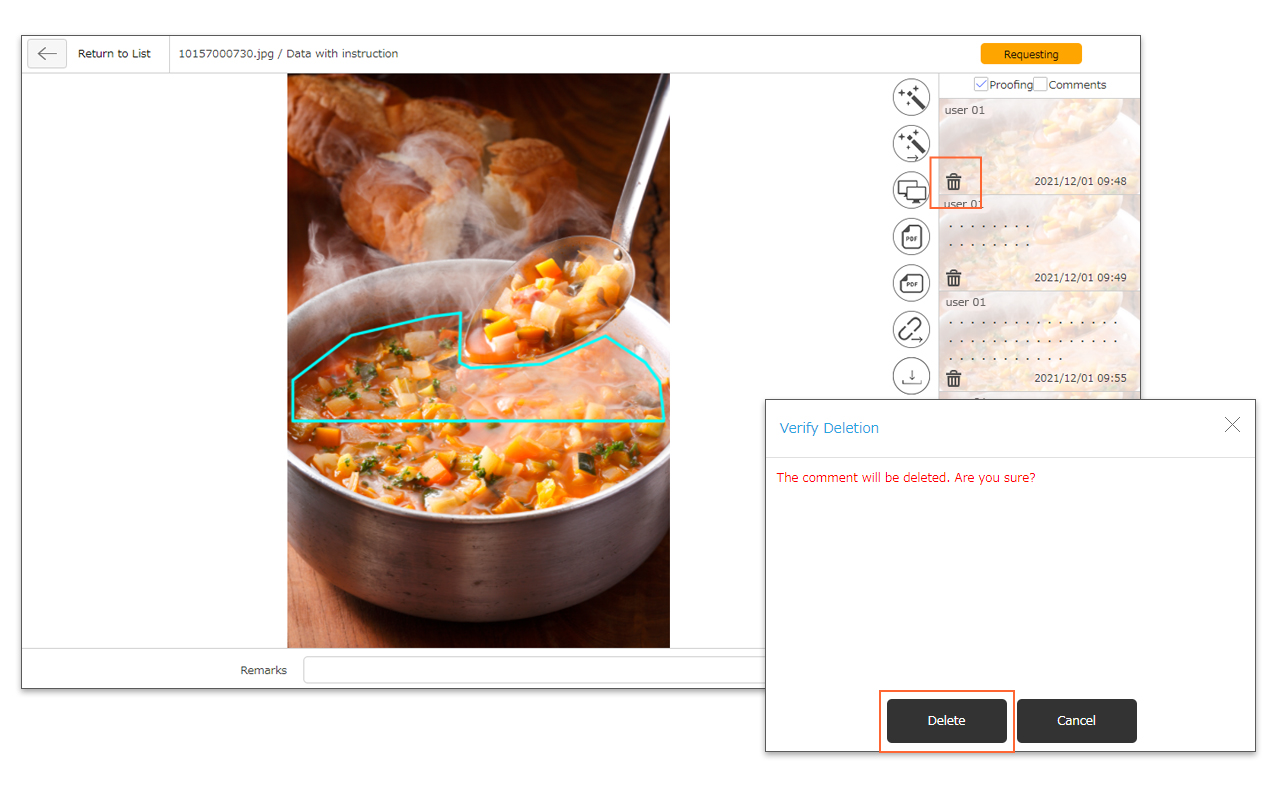
- When the content’s information page opens, click [Delete Record] at the bottom right of the window to delete the content.
*Please note that it is not possible to restore a content once it has been deleted.
* Users without the relevant permissions cannot perform this action. For more information please contact your site administrator.
*The content that is currently being requested for proofing cannot be deleted. If you need to delete the content, cancel the proofing request first and then delete the content. Click here for details about the proofing request.
Close
Content Registration Requests
Print
Content Registration Requests

Content Registration Request is the same operation as Library.
For more details, please refer to Registering Content by Non-Shelf Users.
* Users without the relevant permissions cannot perform this action. For more information please contact your site administrator.
Close
Proofing Request to Non-shelf Users
Print
Proofing Request to Non-shelf Users

Through proofing requests, it is possible to allow non-Shelf third-party users to proof the content. Third-party users will only be able to view the proofing screen, and will not be able to see the contents of the site. Third-party users will only be able to view the content that is selected, will not be able to see any other content on the site.
You can select “Proofing Mode” in which the requested third party can enter comments and proofread, or “View Mode” in which you can only view.
【Request Proofing】
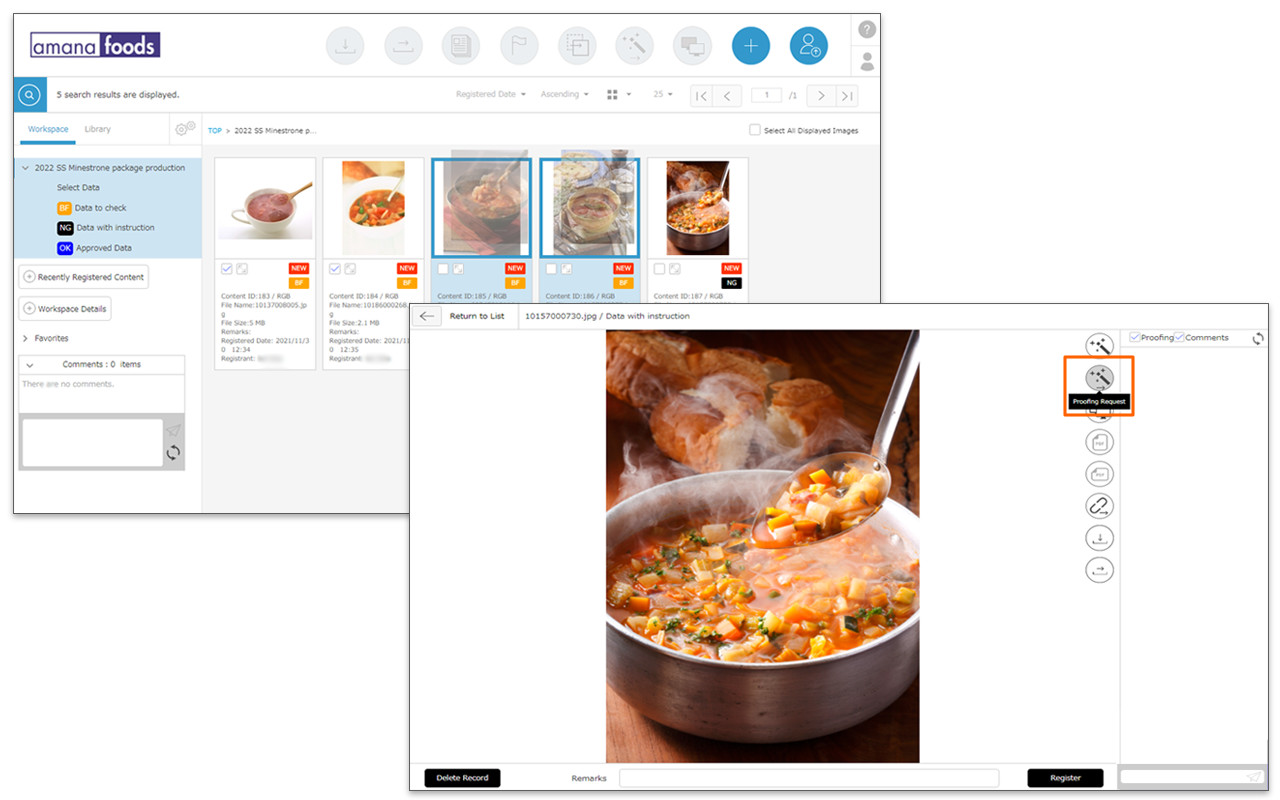
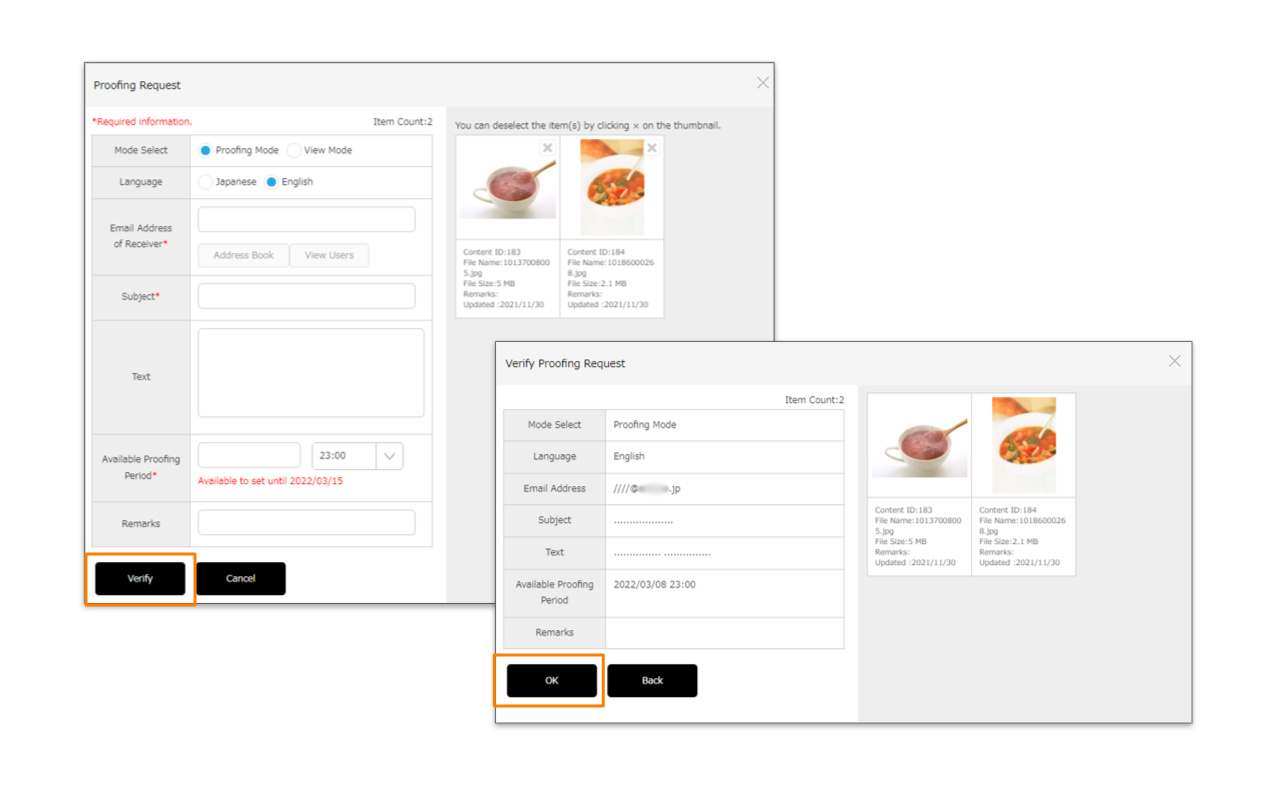
- Check the content you want to request for proofing. Then, select the content by clicking Proofing Request icon in the header area or dragging and dropping the thumbnail to Proofing Request icon. You can also select the content by clicking [Proofing Request] icon in the content information page.
- When the proofing request window opens, enter the required fields.
- Select Mode
Select the operation that can be performed by the recipient of proofing request.
Proofing Mode: The proofing screen is shown. Both proofing and comments are possible.
View Mode: Cannot proof or comment, can only view the contents.
- Language
Select language from Japanese/English. The notification containing the upload URL will be sent to the requestee in the selected language.
- Requestee Email Address
Enter the destination email address. If you want to enter multiple addresses, separate these with spaces or commas.
- Subject, Text
Text entered here will appear as is in the subject line and body of the email respectively.
- Available Proofing Period
Set the deadline for the proofing. You cannot set a date and time beyond the expiration date of workspace.
*The maximum number of days that can be specified for the proofing/viewing request can be set. Please refer to Create Workspace for the details.
- Click Verify, then OK to send an email notification to the requestee.
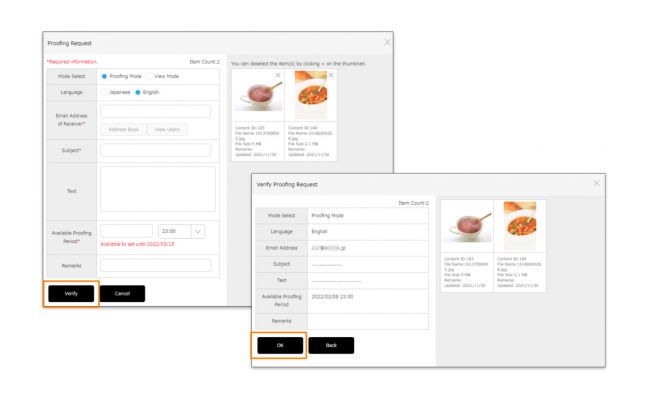
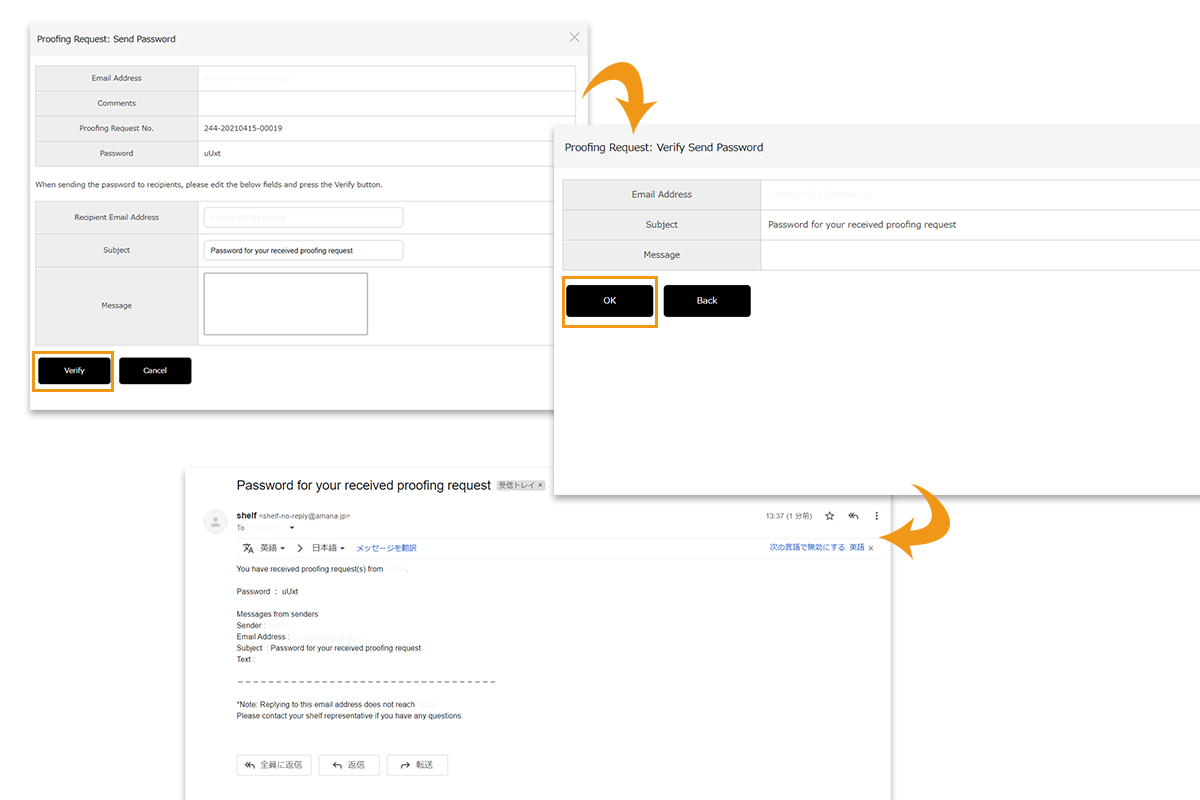
- Following this, the Send Password window will appear showing the password to be sent which will be required to access the registration page. Confirm the email addresses and the subjecy are correct, and click Verify, then OK to send this password to the recipient(s).
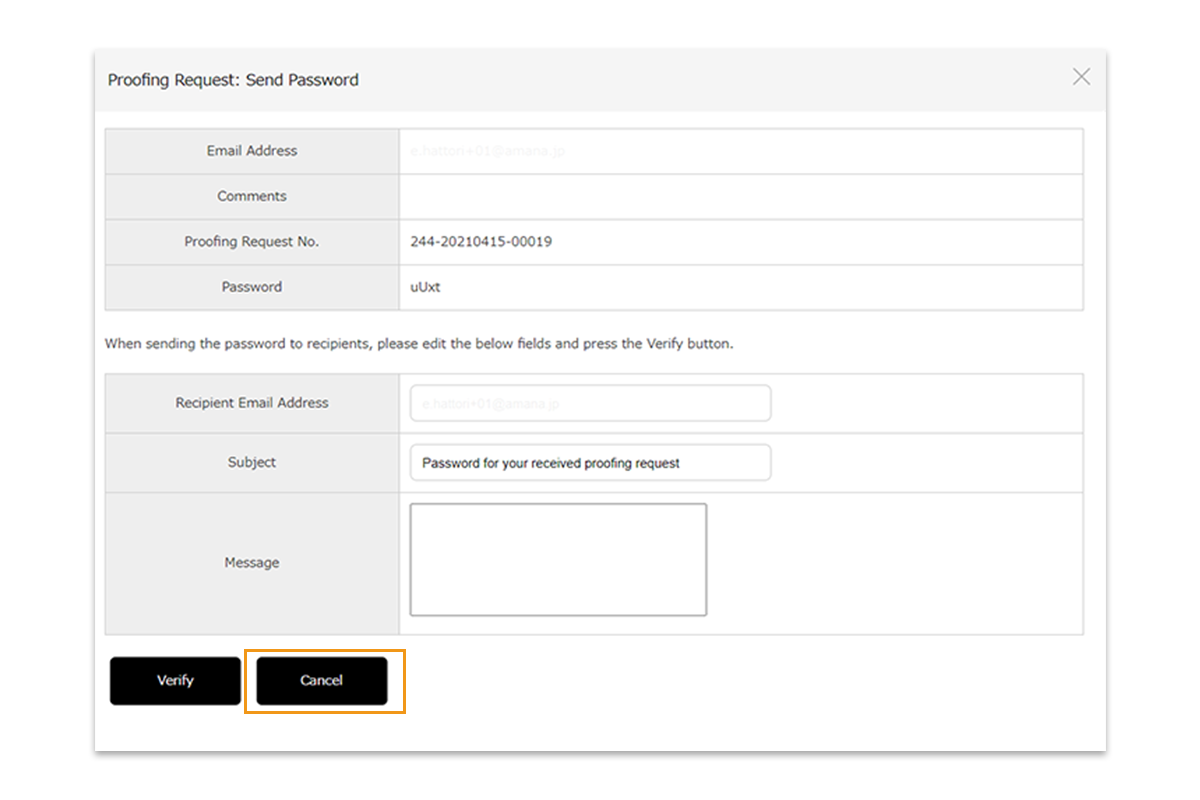
If you do not want to send a password notification e-mail, click [Cancel].
*Confirmation email sent to the operator will be in Japanese if the operator is logged in to a Japanese site, and in English if the operator is logged in to a site in another language.
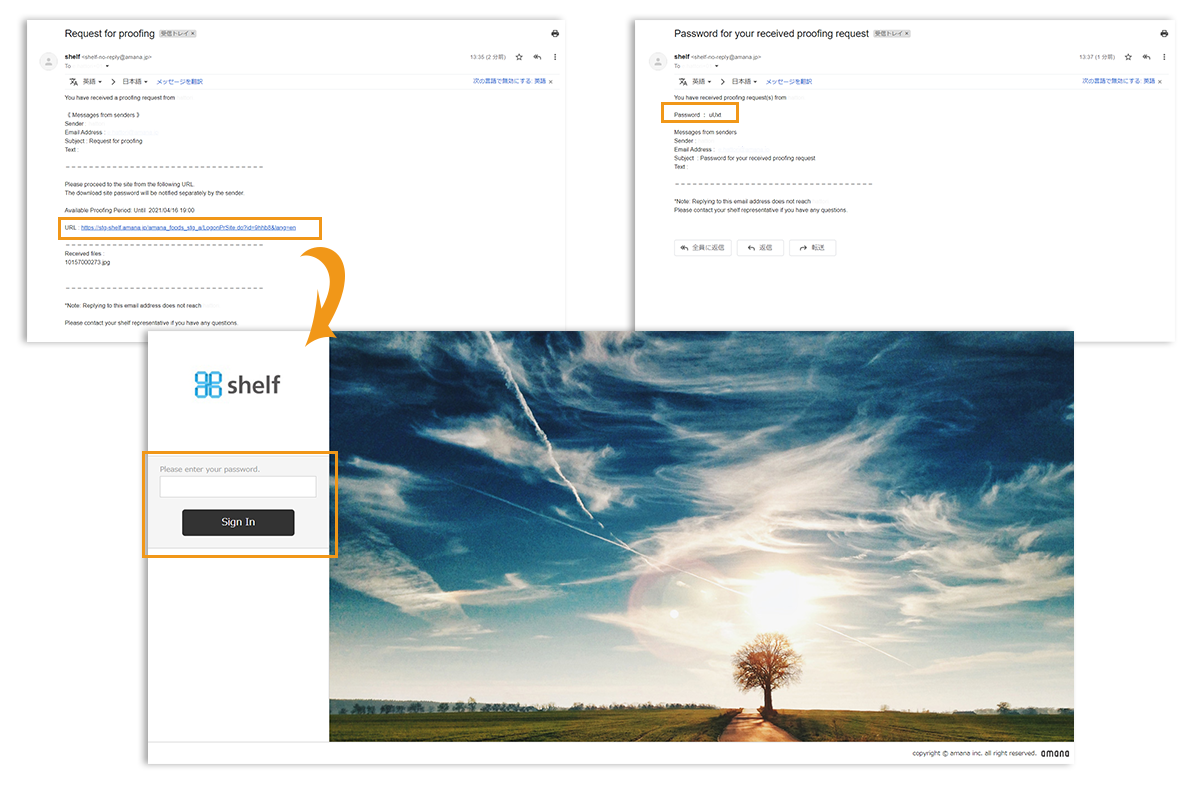
【Proofing Registration/Viewing from Request Emails】
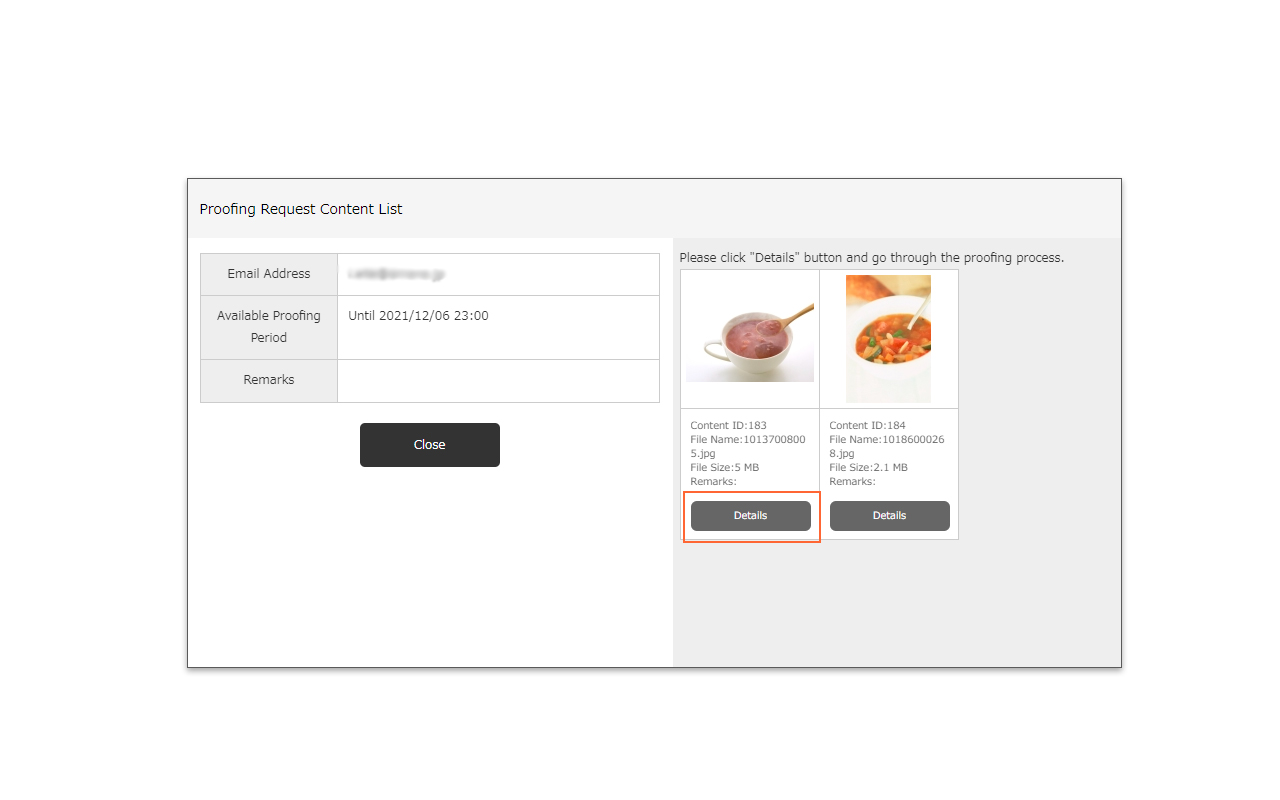
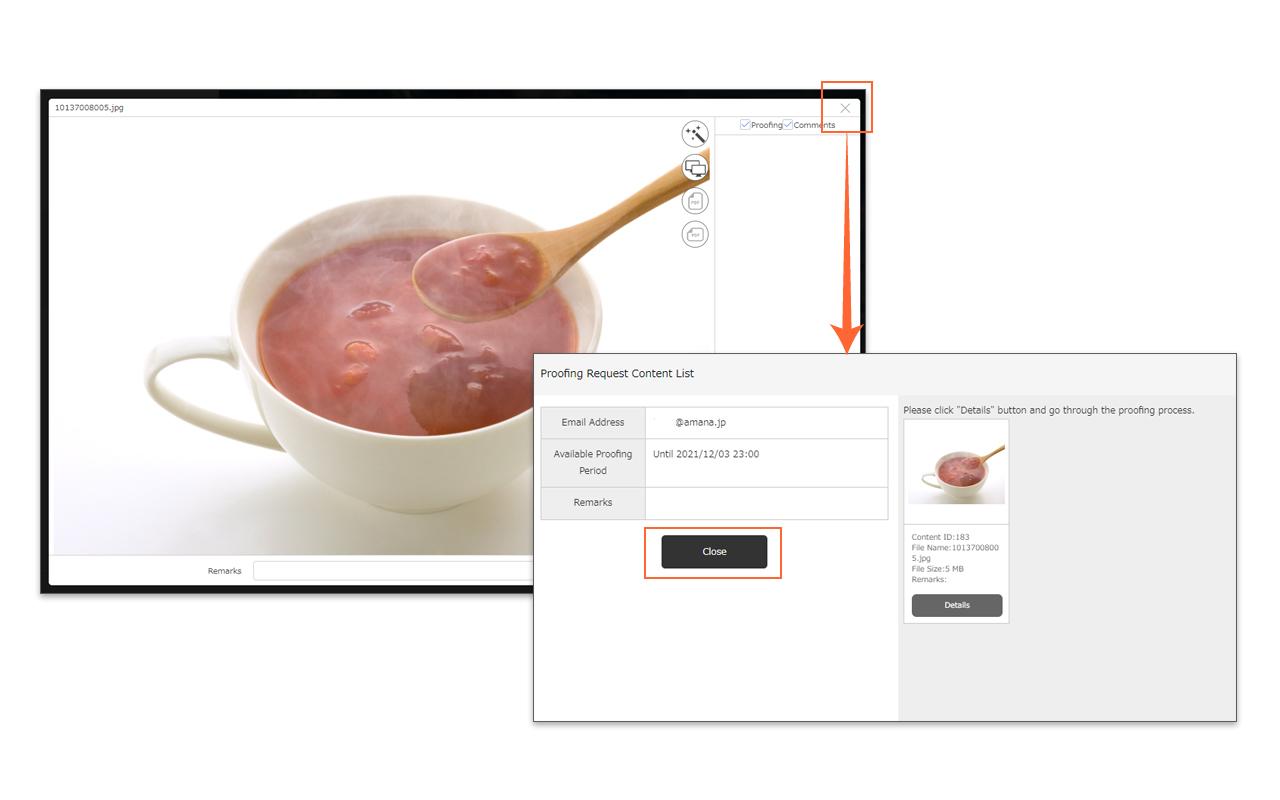
- Clicking on the URL will take you to the password prompt page. Enter the password which was provided to log in, and the proofing request content list will be opened.
-
*The login will be disabled after the available proofing period is expired or the proofing/viewing request is removed.
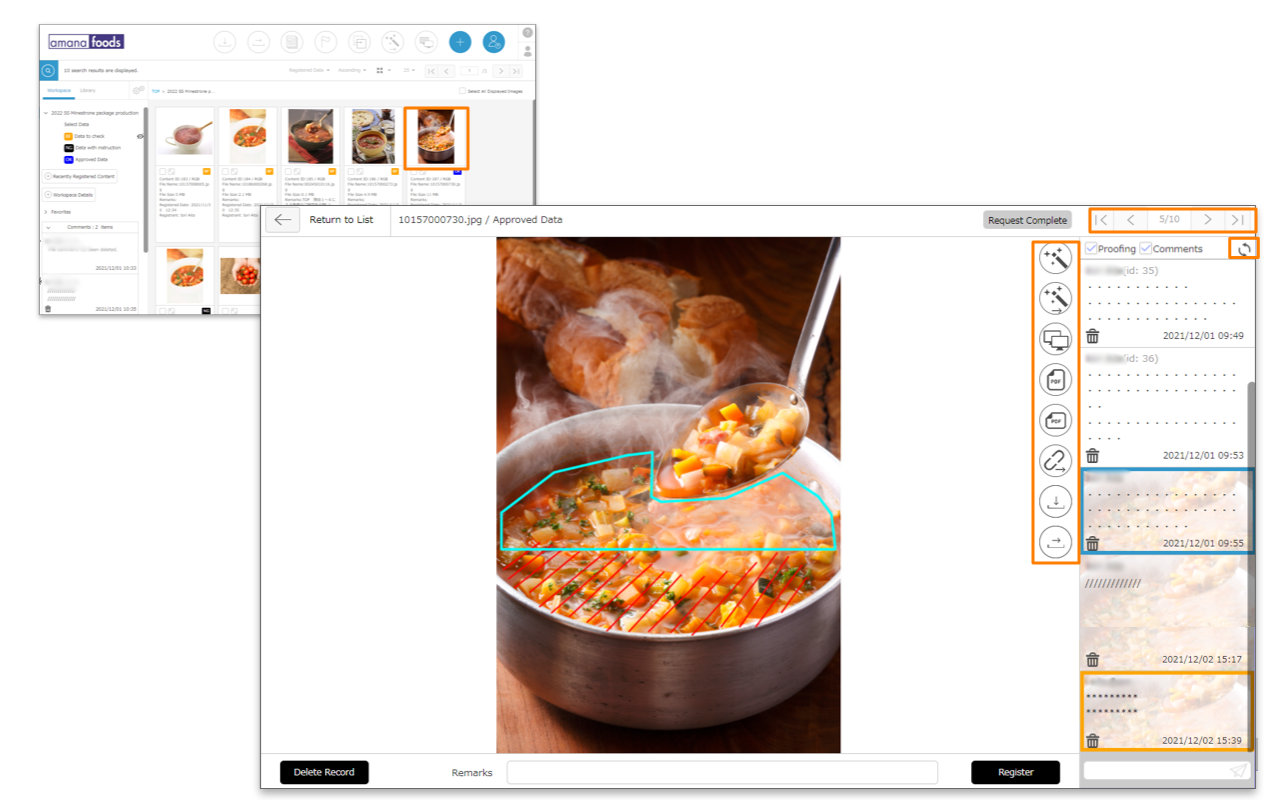
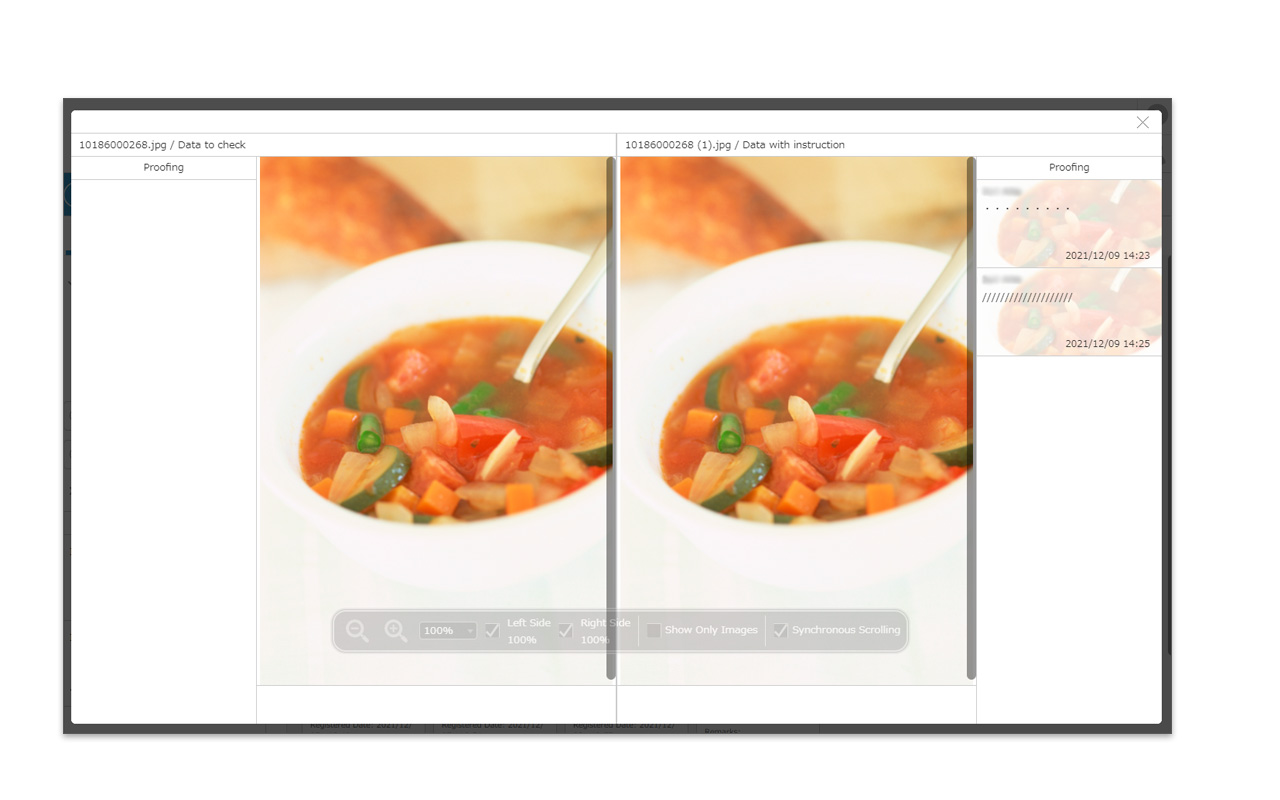
- Click [Details] or [View] button that you find below the thumbnail of the content to open the content page.
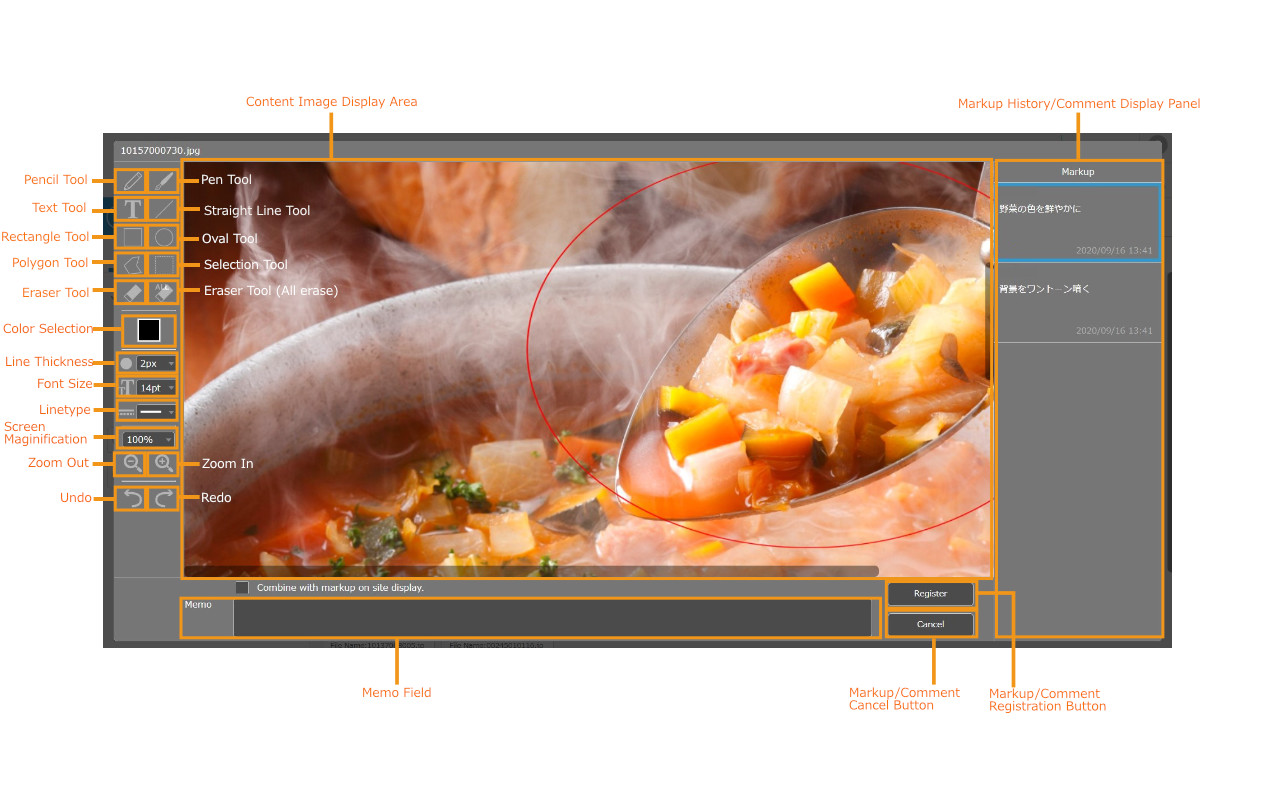
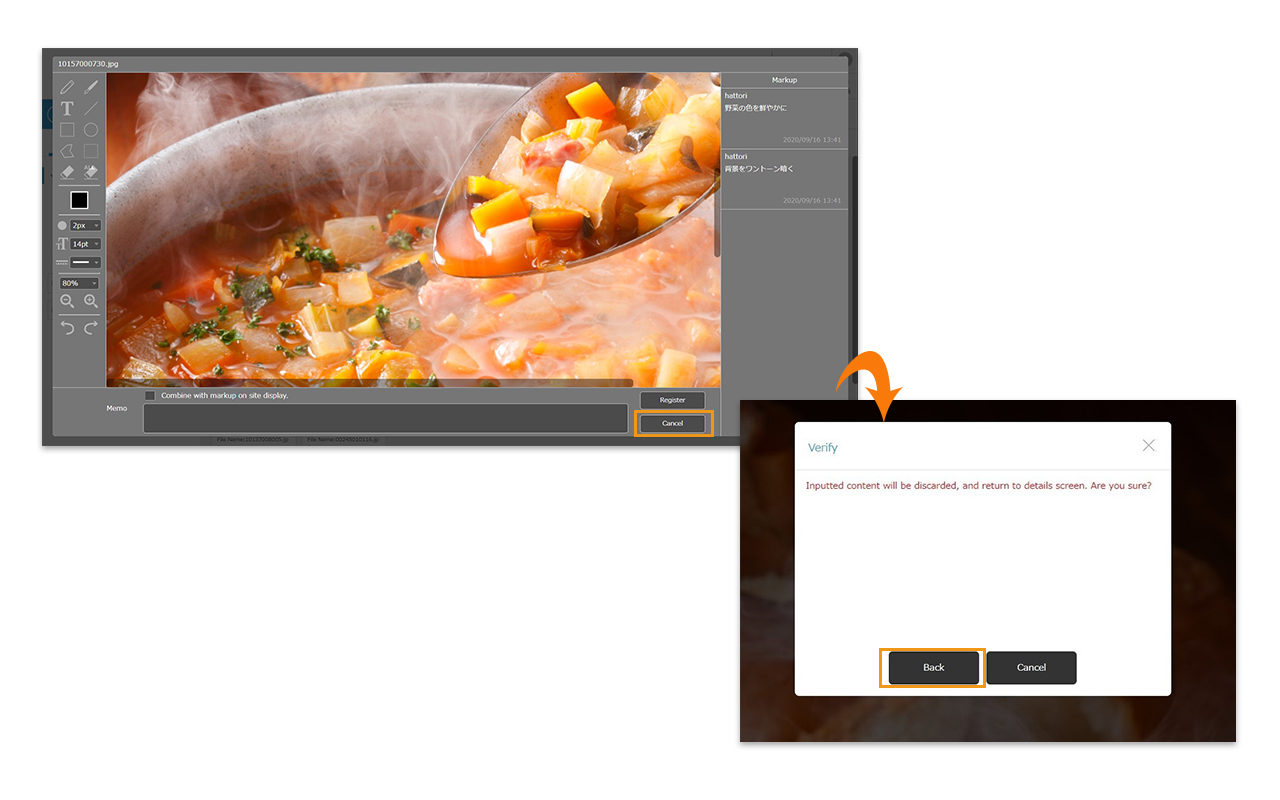
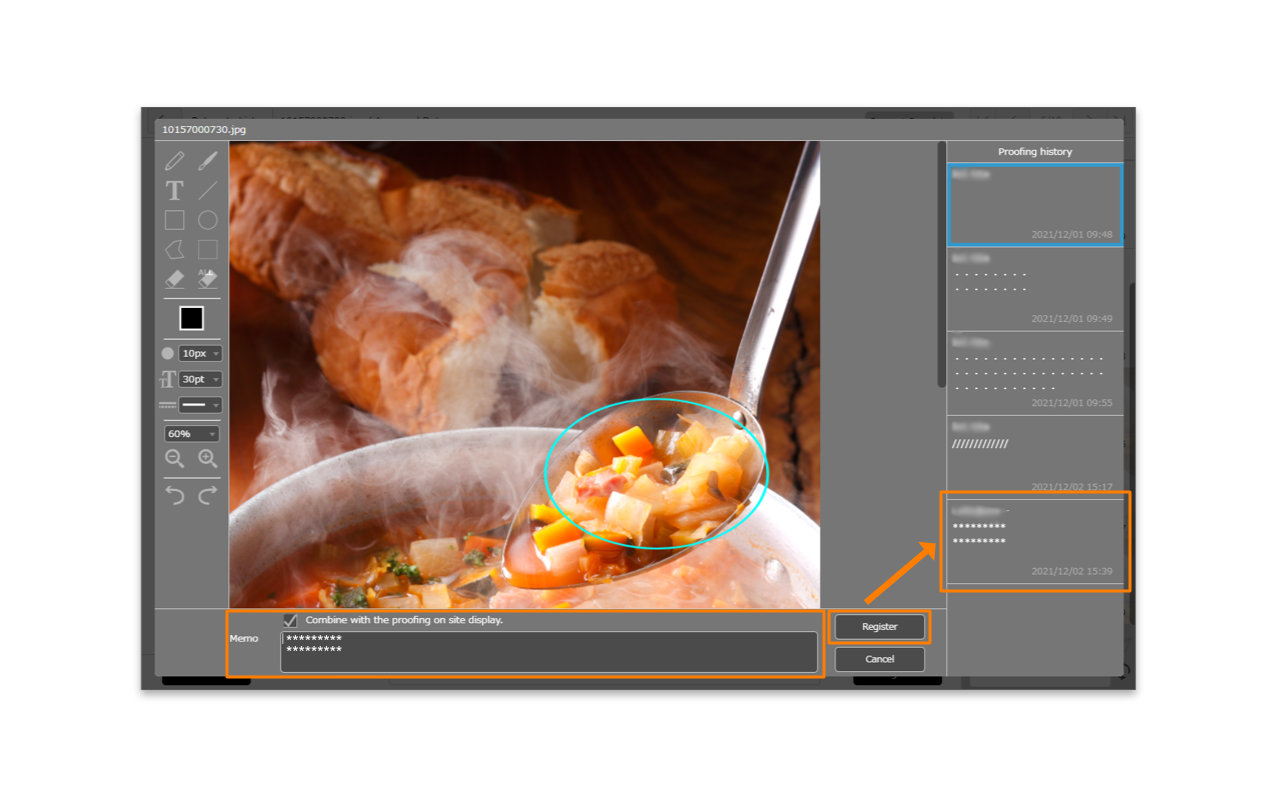
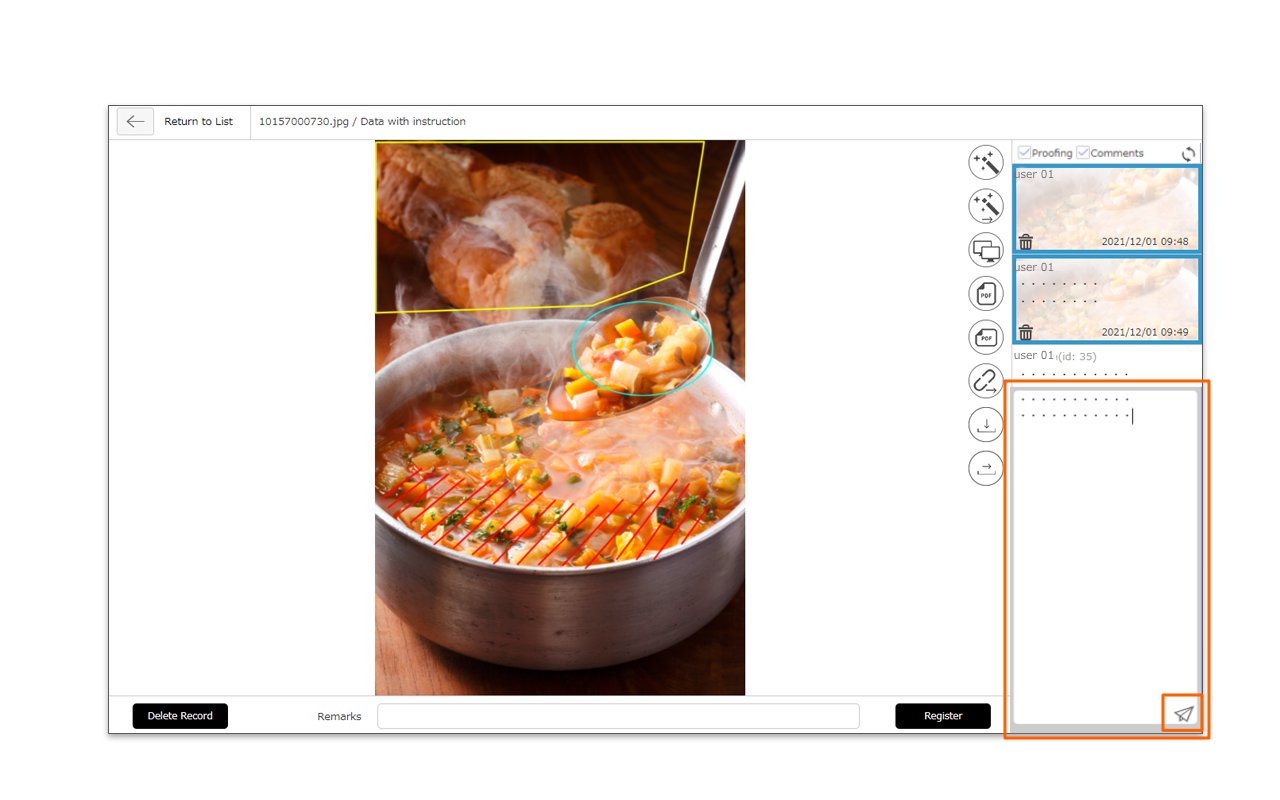
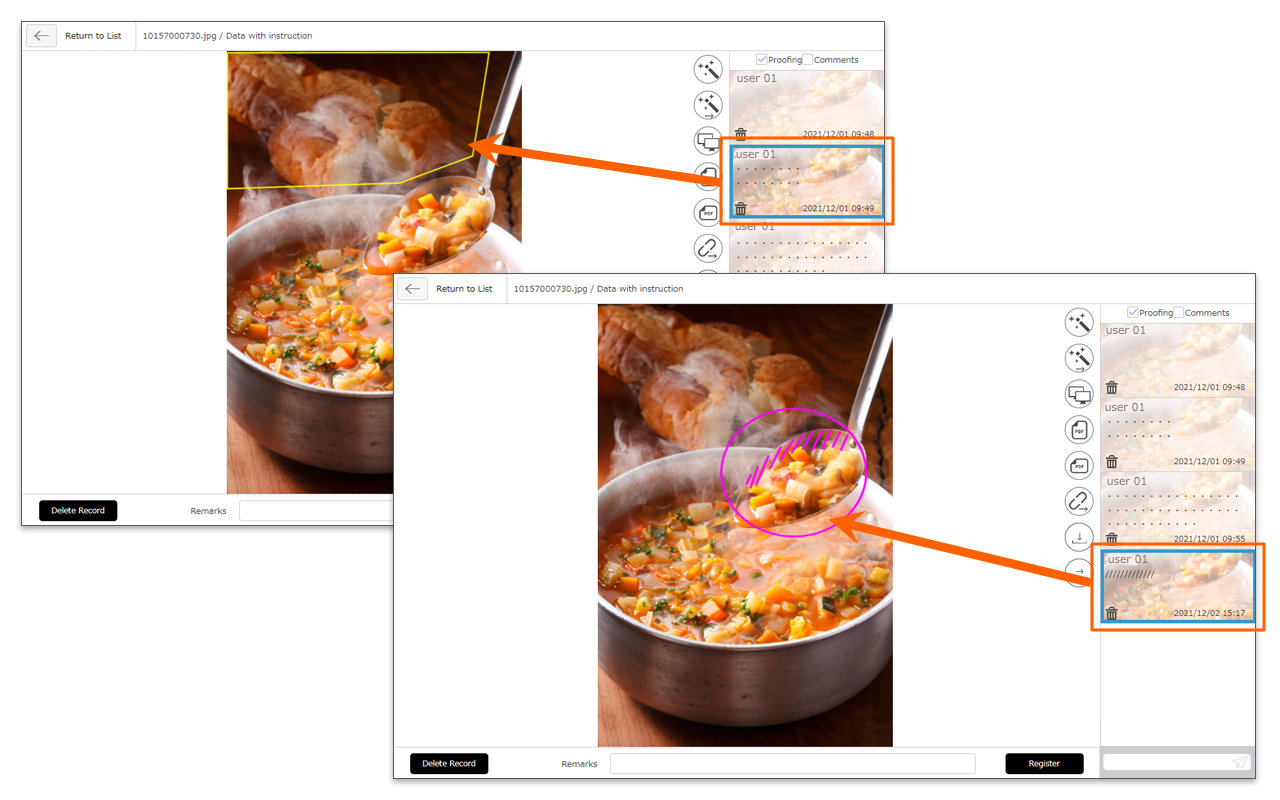
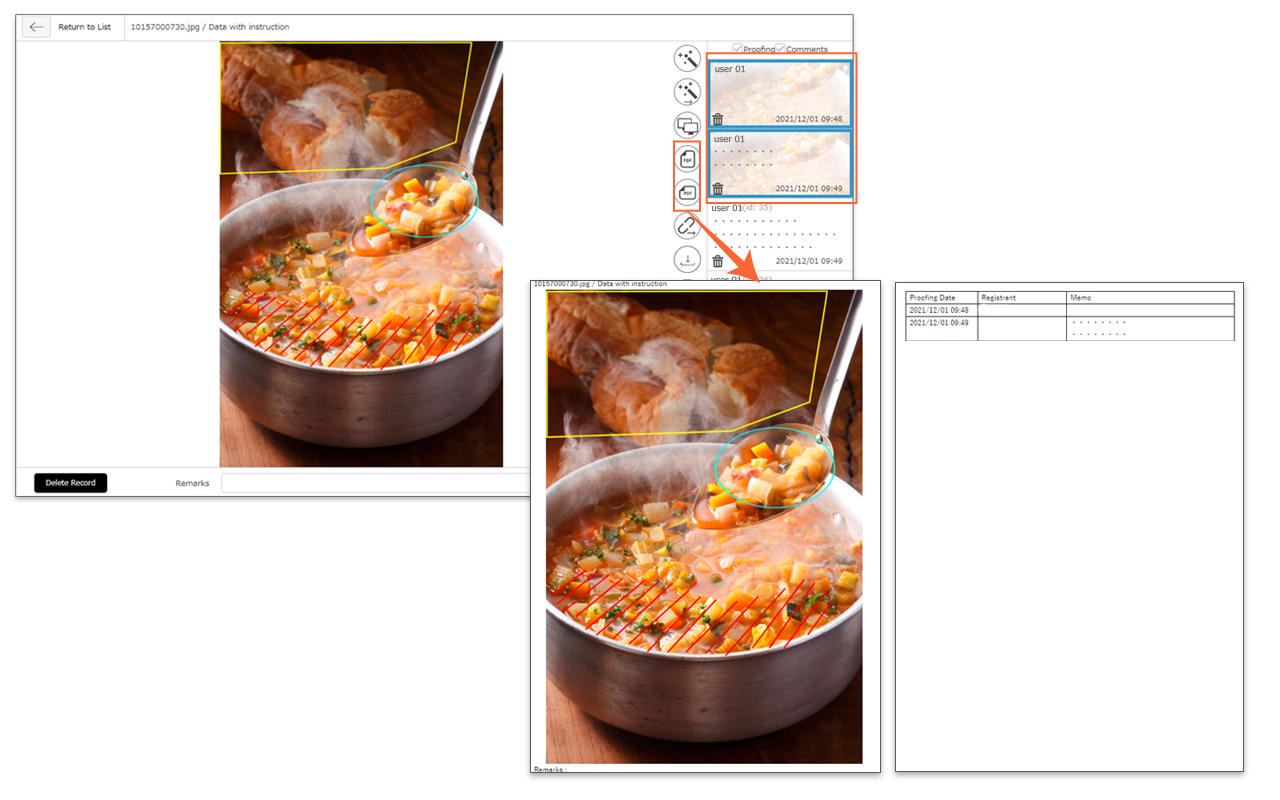
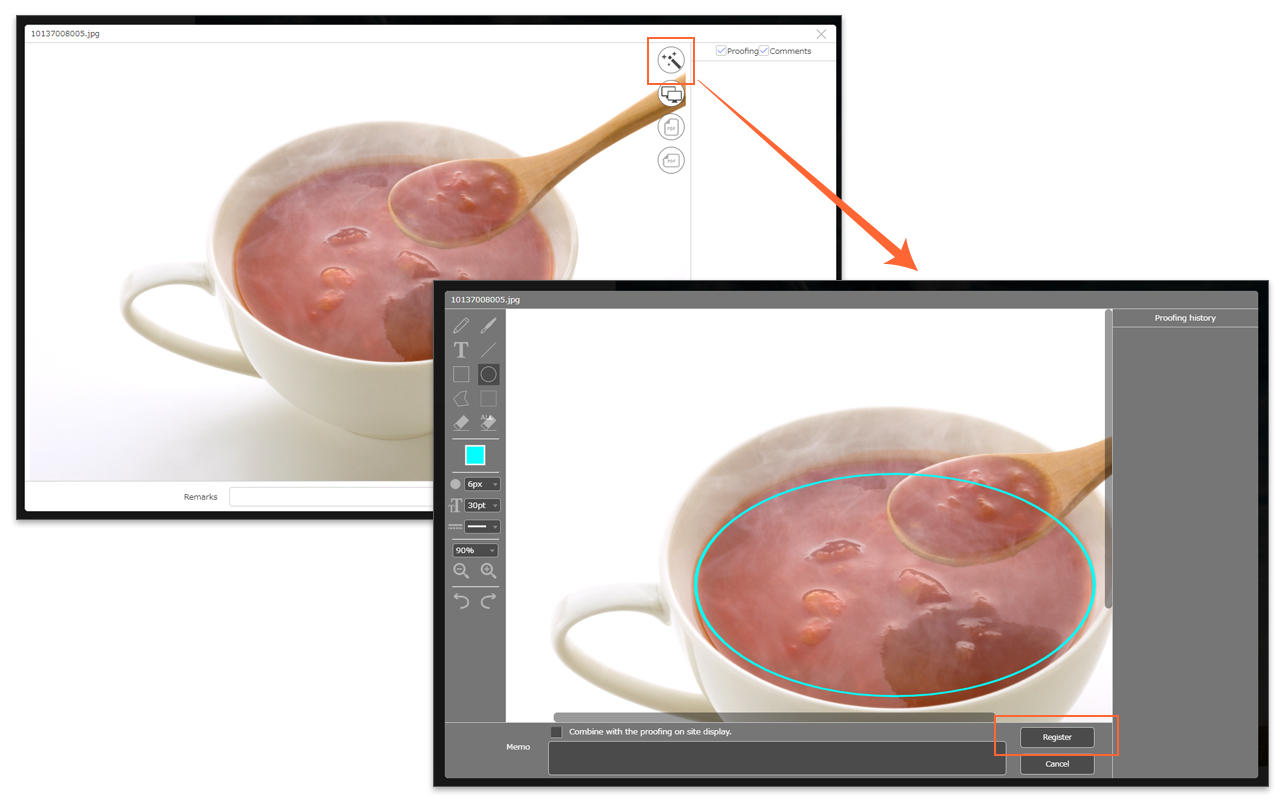
- In proofing mode, Click
 icon to register proofing on the content information page. Once the registration is completed, click [Register] button. For more details about the proofing, refer to Proofing page.
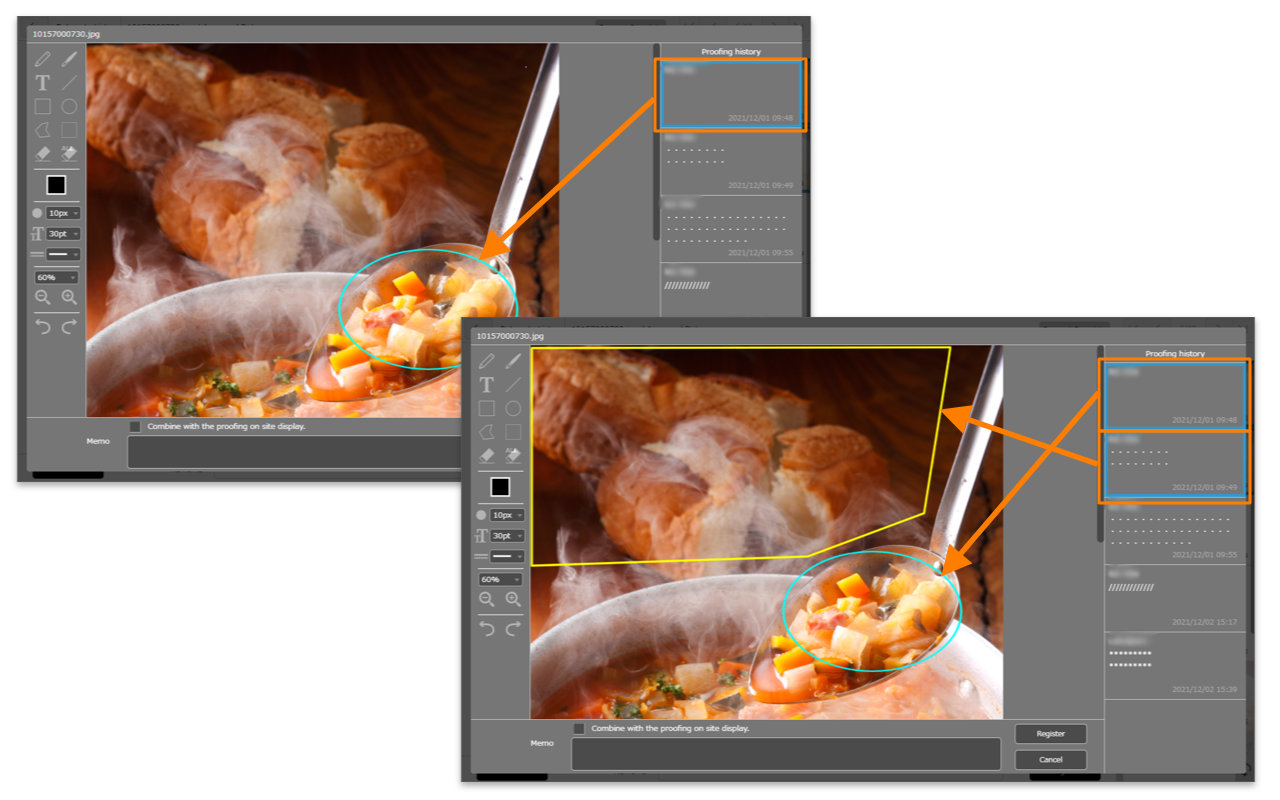
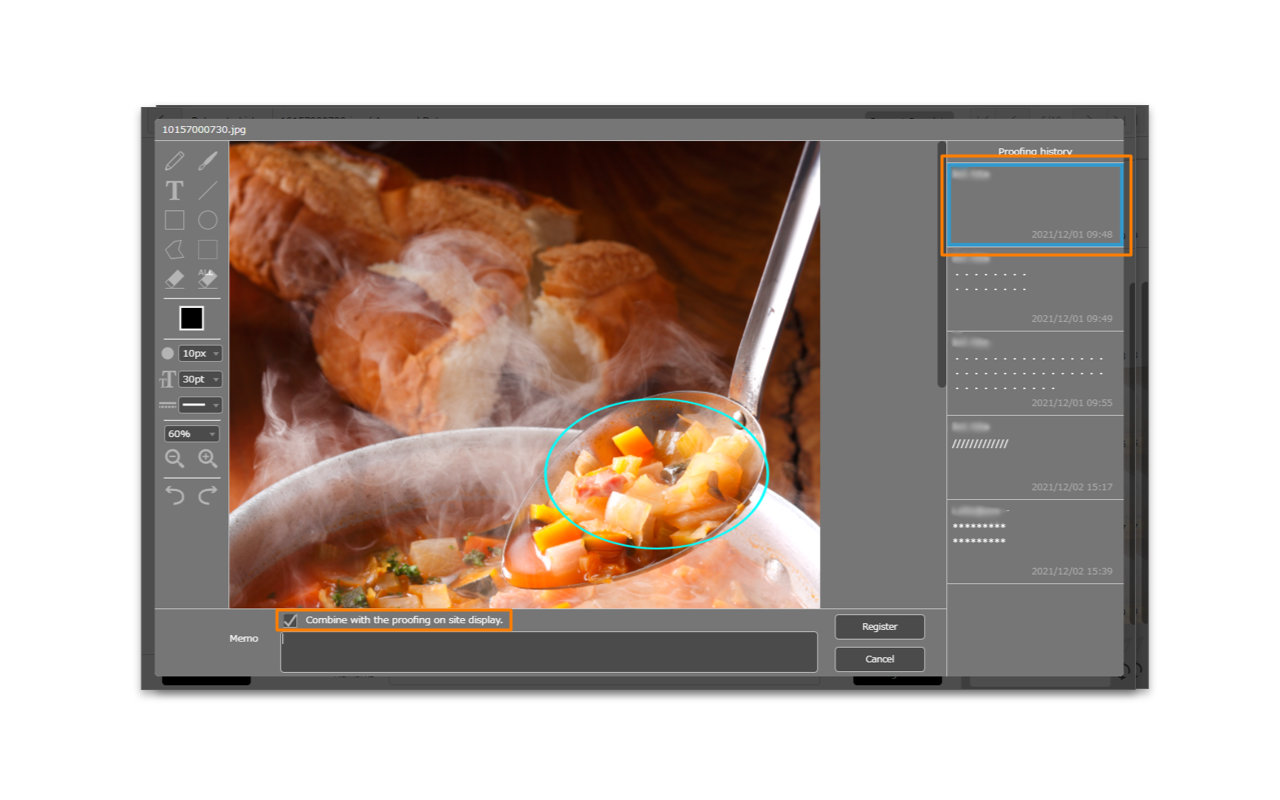
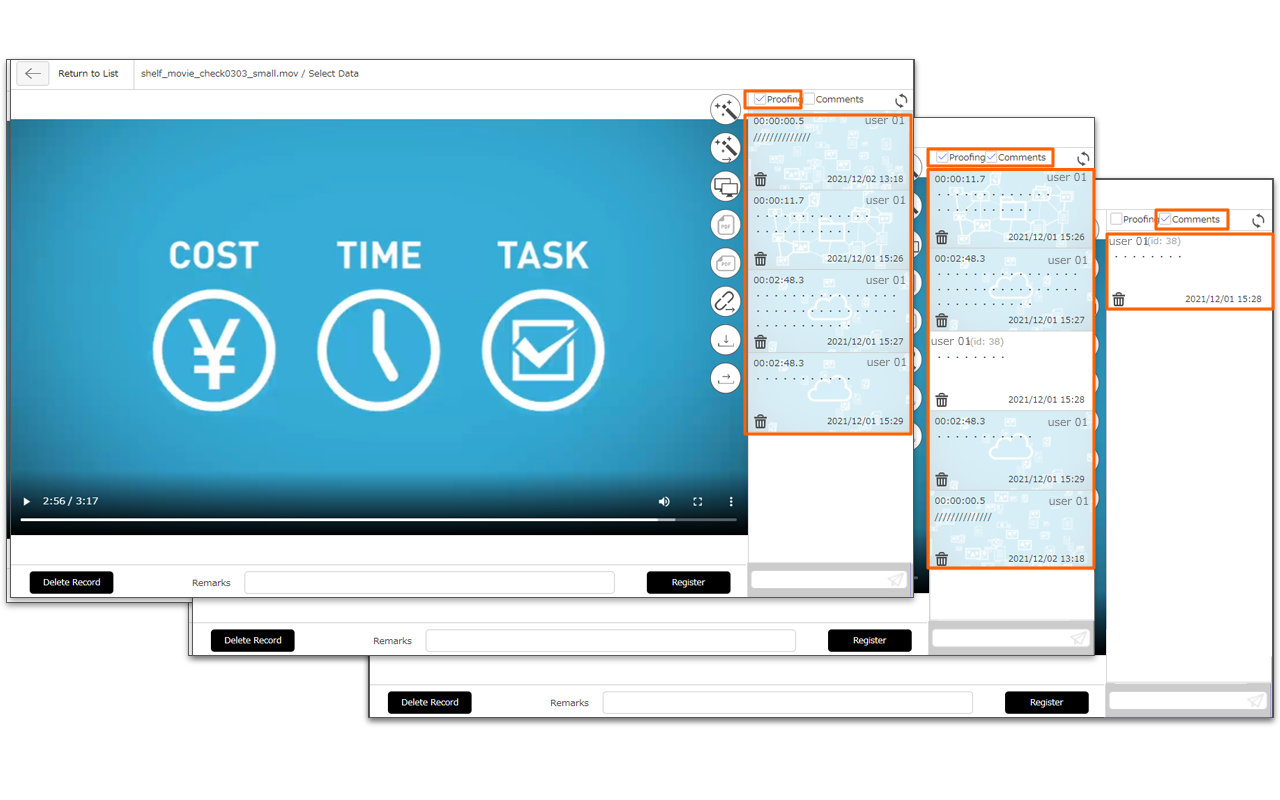
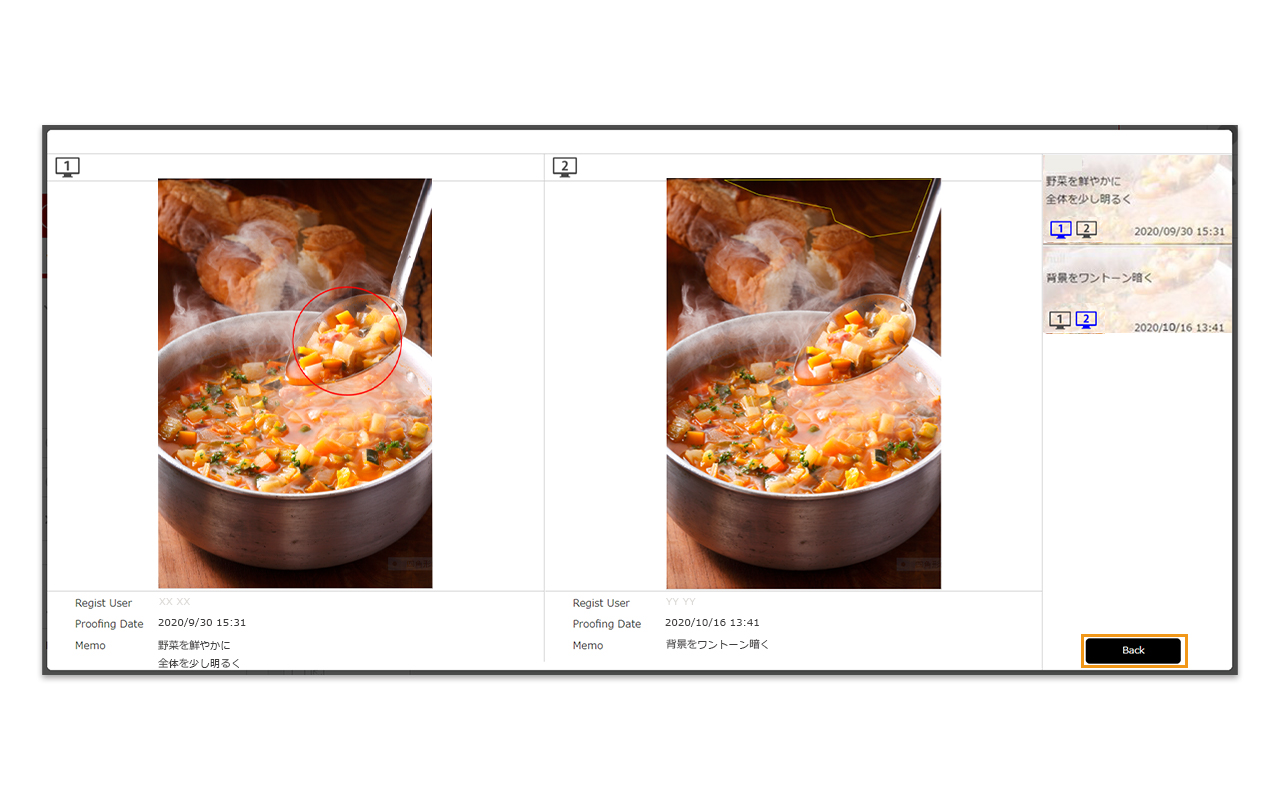
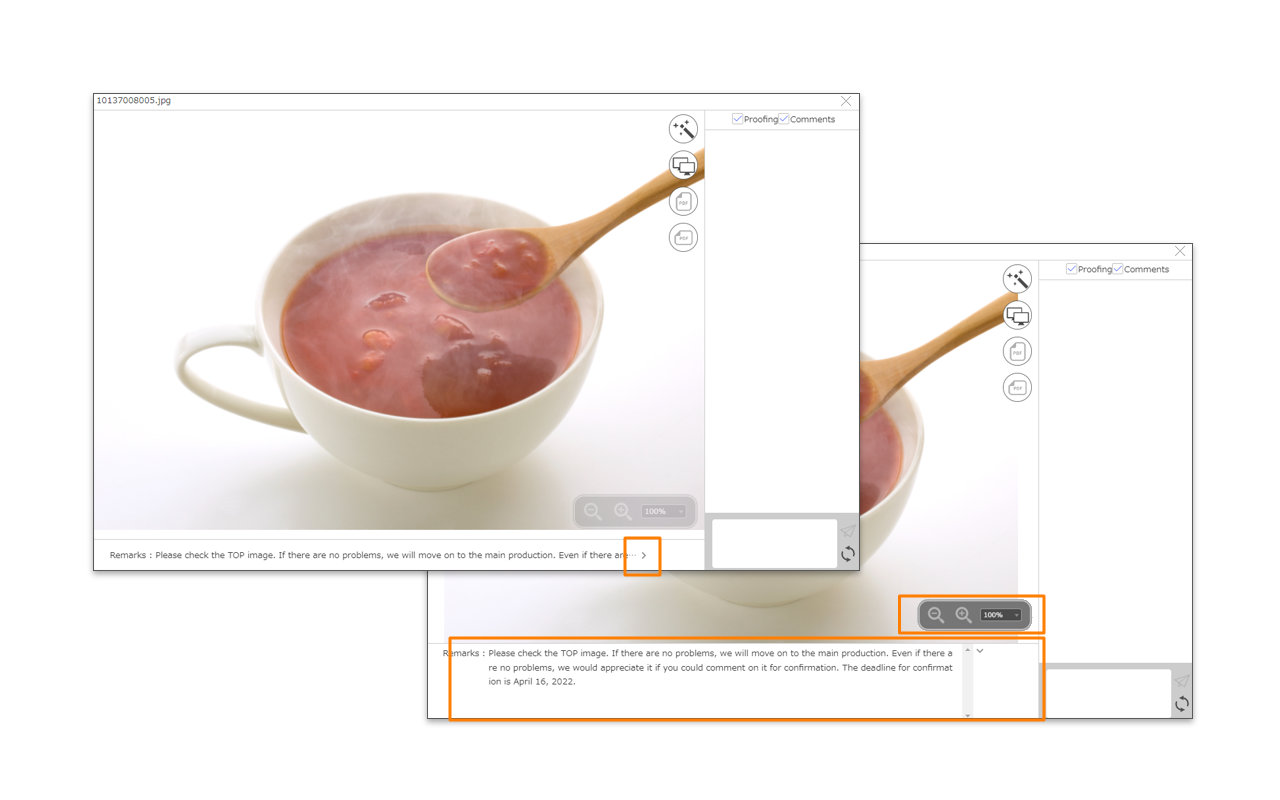
In the content information page, it also shows the proofs and comments registered by other users.
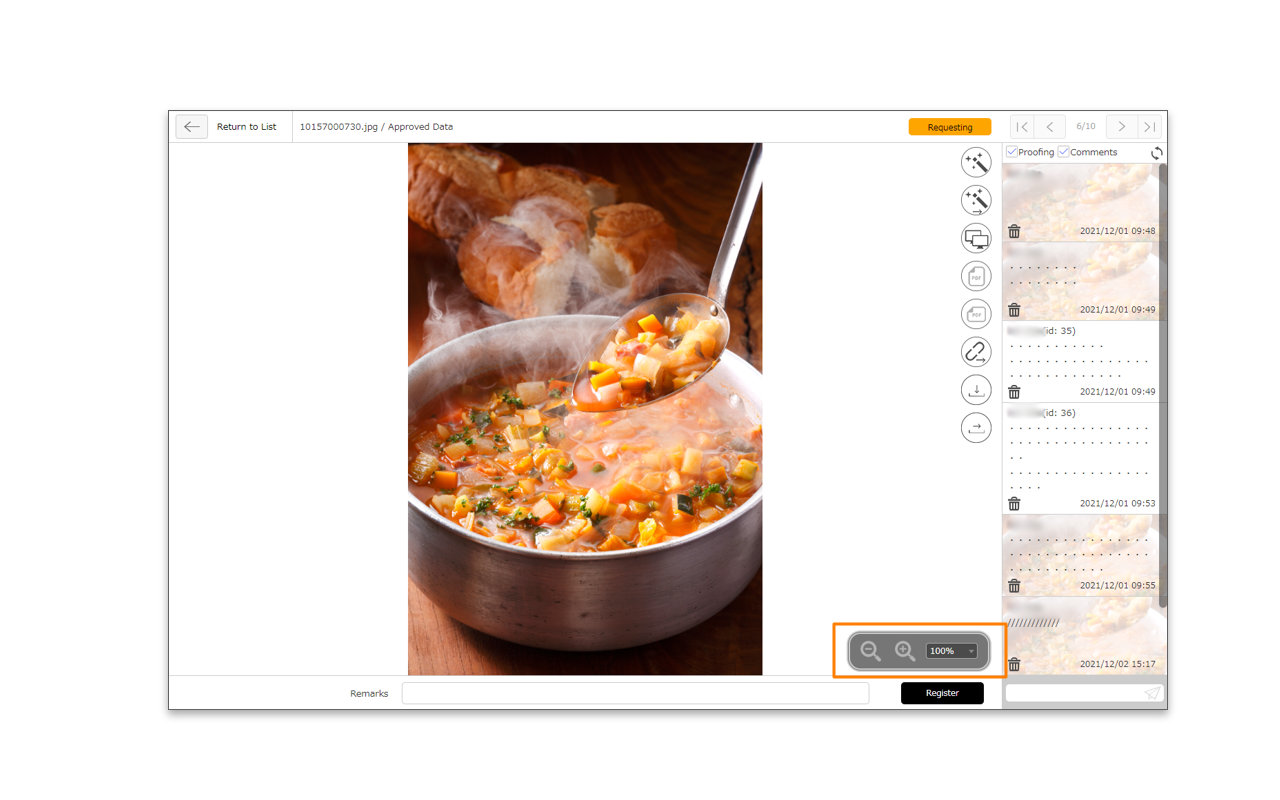
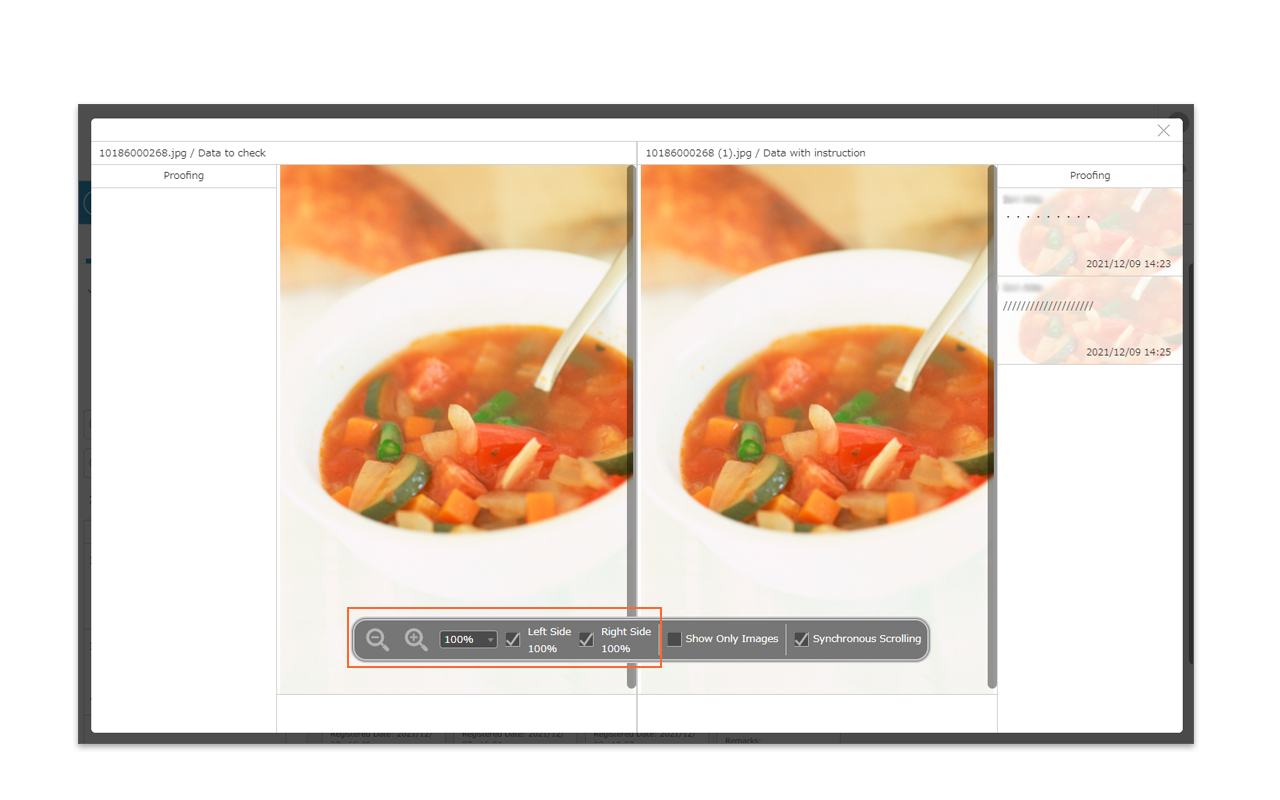
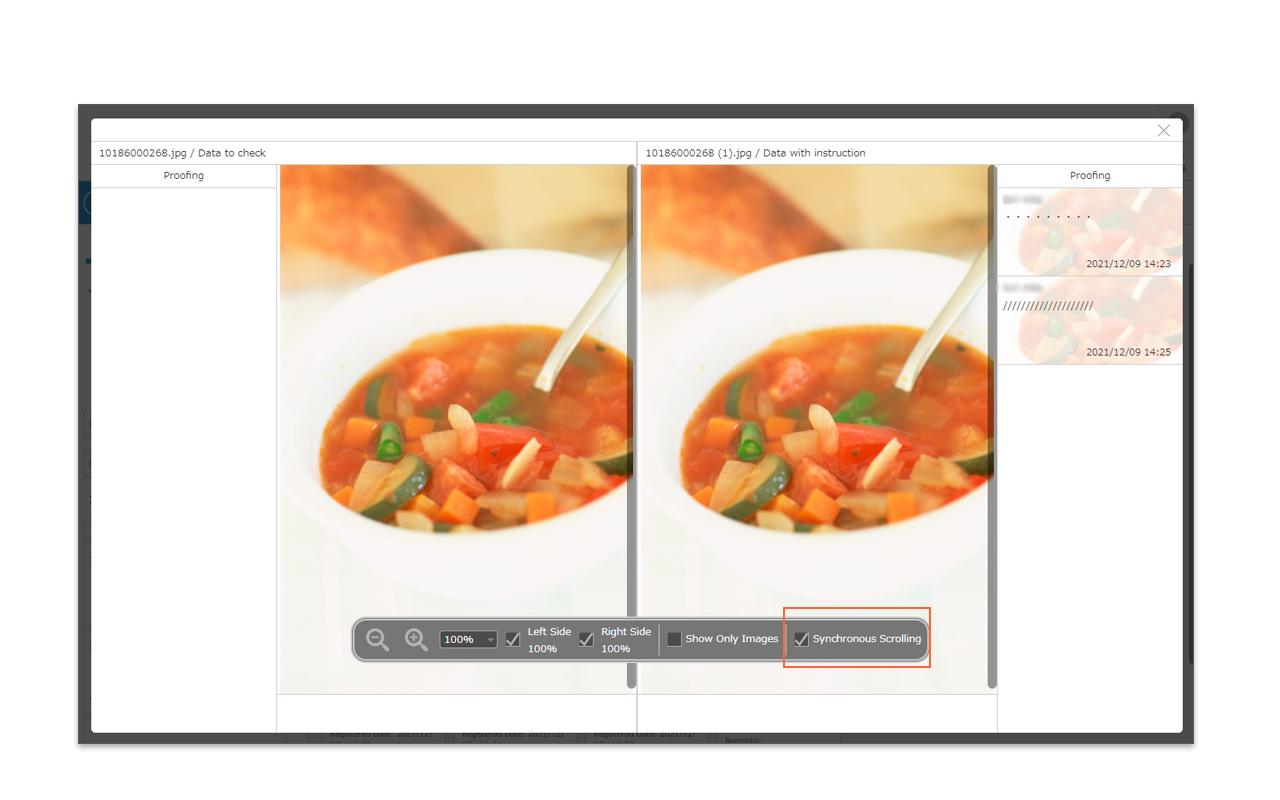
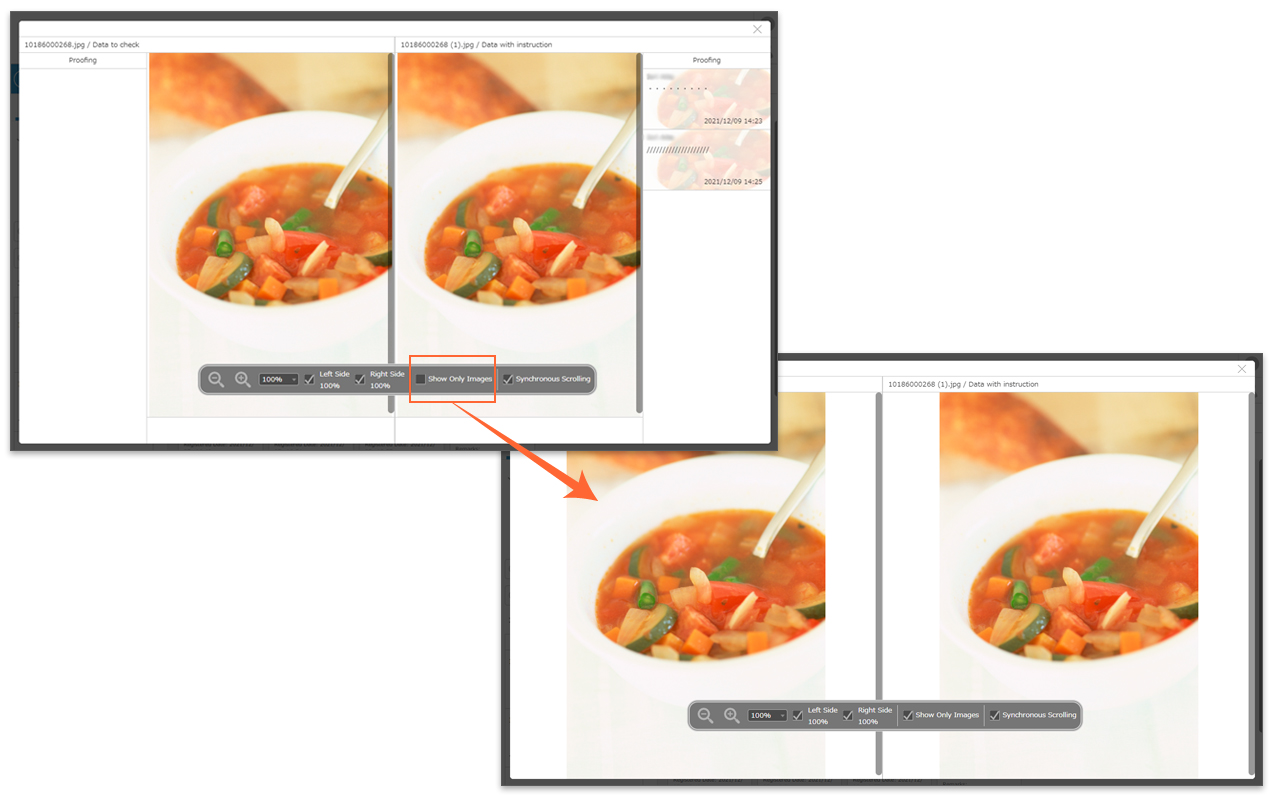
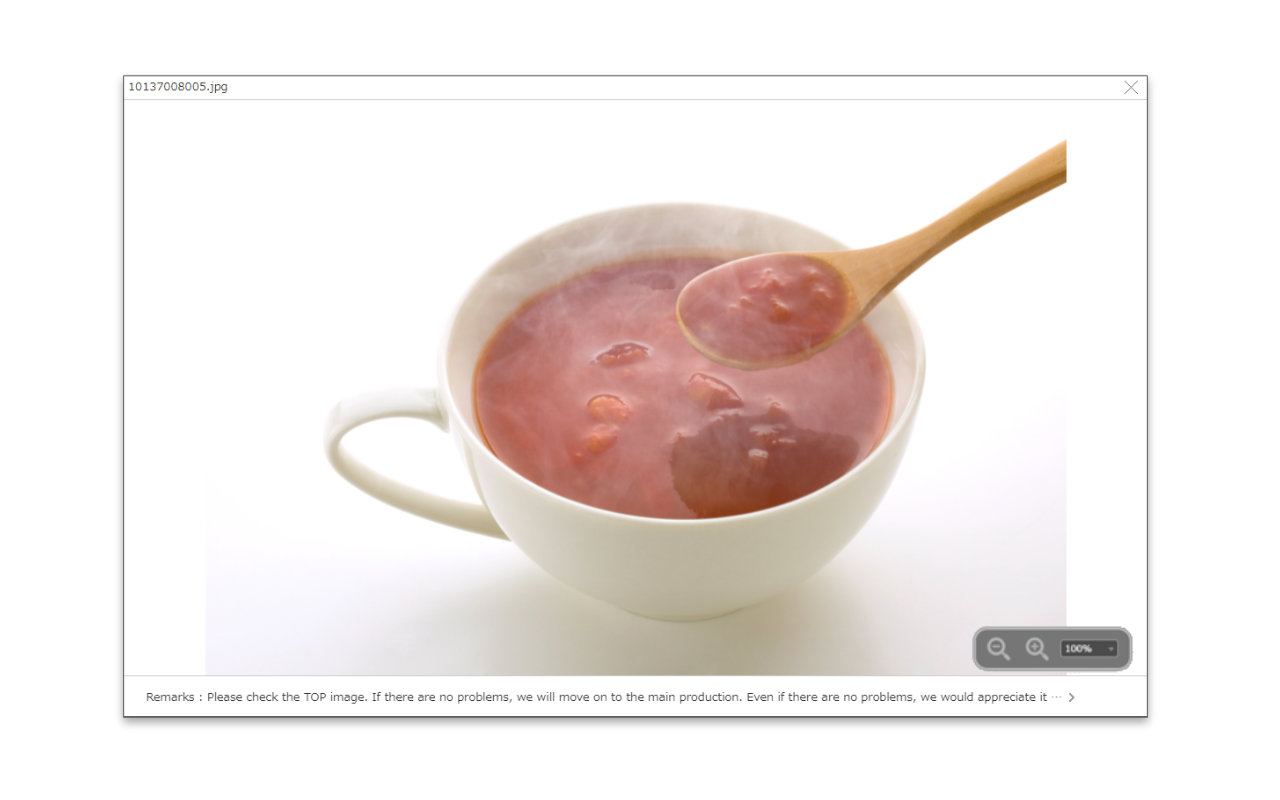
The remarks will be visible if it is noted. Click on “>” to expand it and see the full text. Also, mouse over the screen control panel operate it and you can change the display zoom size.
In viewing mode, you can only check the contents and remarks, not proof. Mouse over the screen control panel operate it and you can change the display zoom size.
- Close the content details screen and click [Close] button in the Proofing Request Content List.
*Registration of proofing by non-shelf users is highlighted in an orange frame when you select any proofing history in the proofing history column. Also, an email address will be displayed in the registrant user name field.
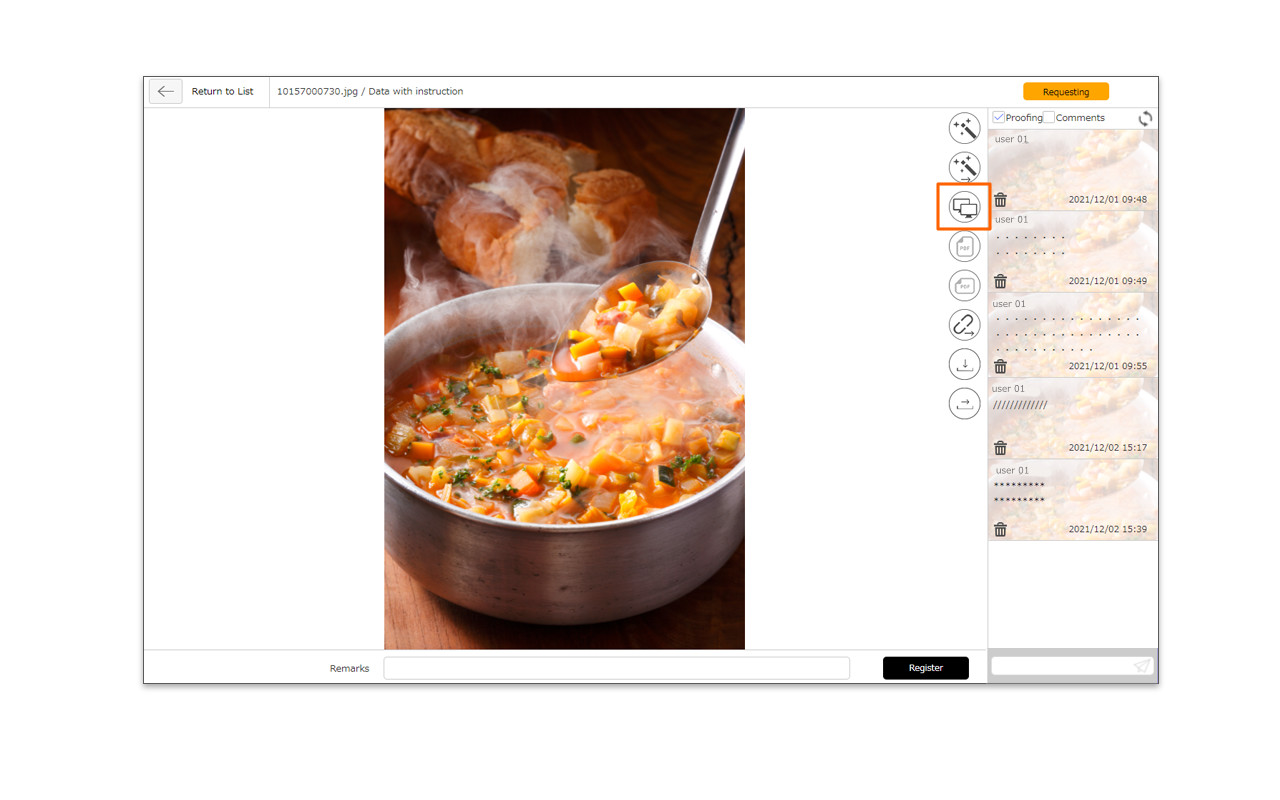
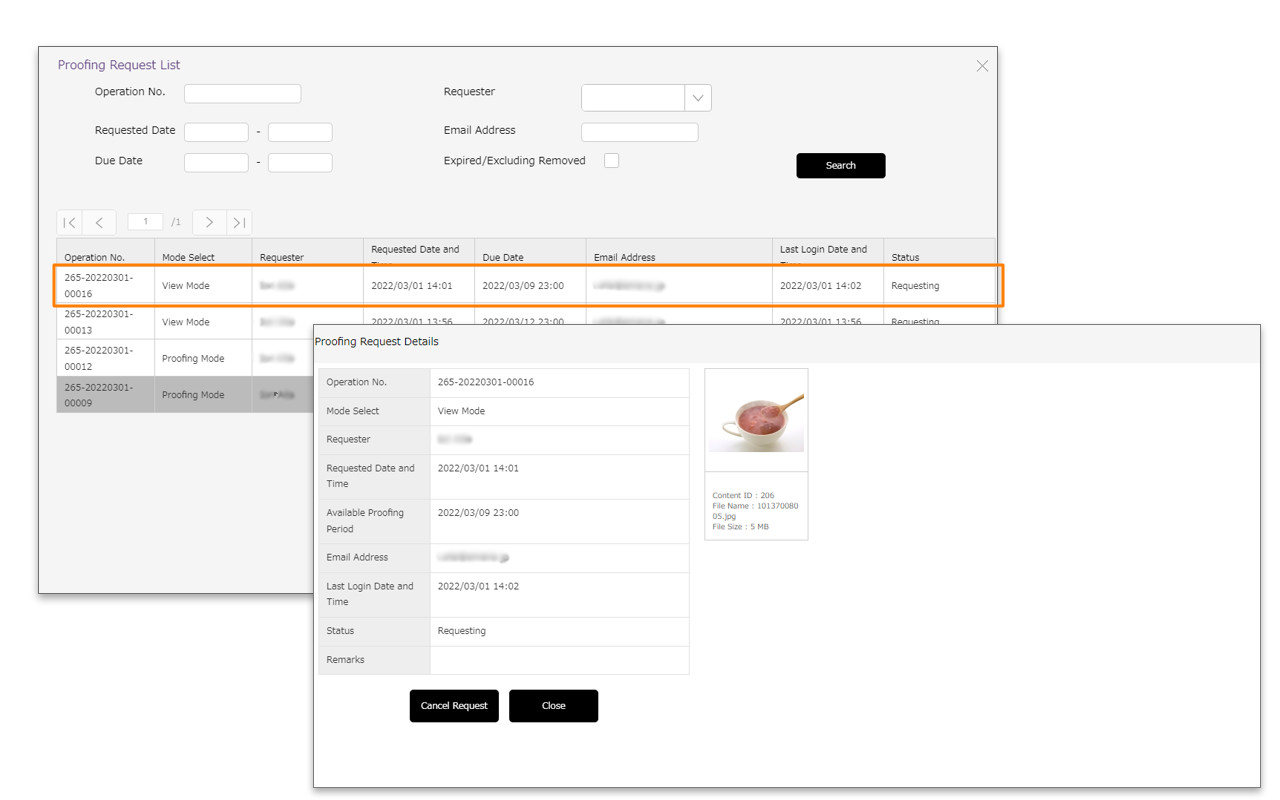
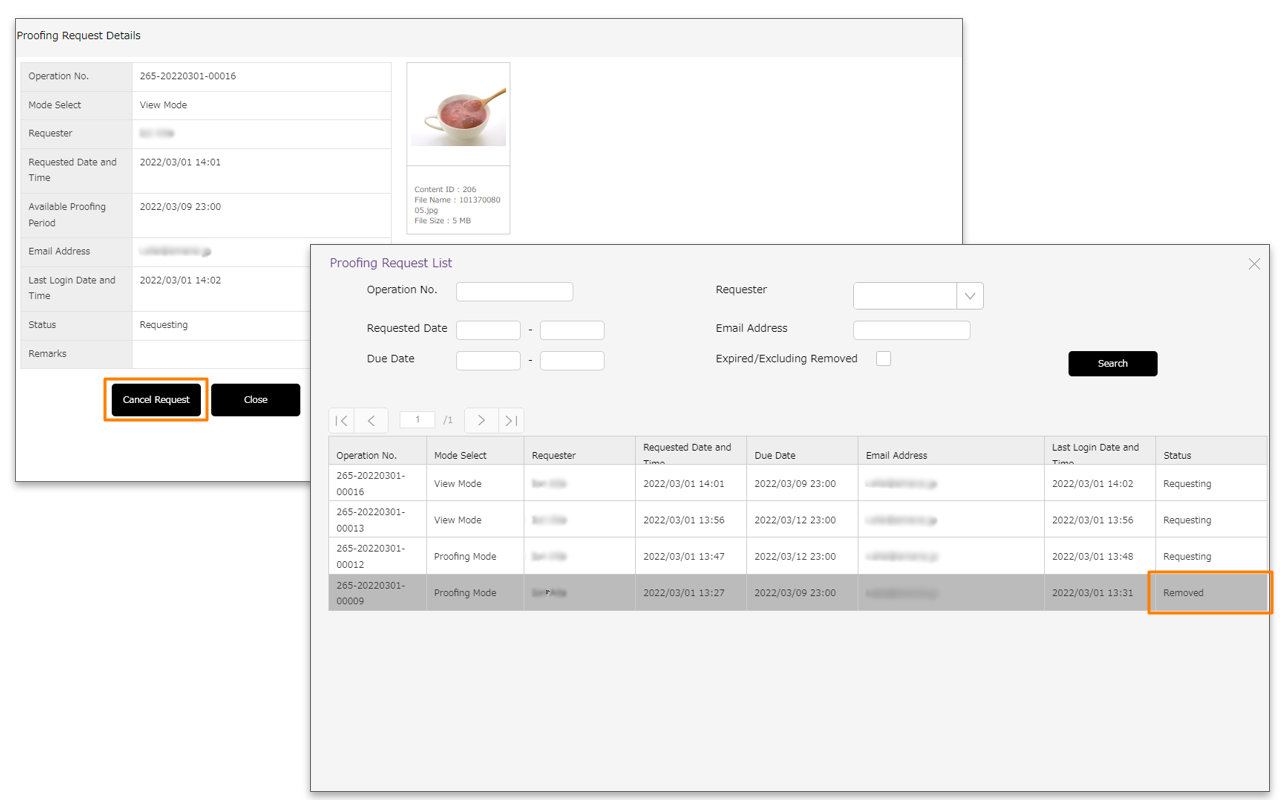
【Proofing Request History】
The history of proofing/viewing requests can be managed in the proofing request list. On this page, you can cancel the proofing/viewing request that you are currently requesting, as well as check the history such as removed and expired. Only registered workspace users can view the proofing request list. The requested third party user cannot view it.
- You can see the proofing request list in two different ways as below.
- To operate via Content Information Page
Click [Requesting] icon in the content information page, and then the proofing Request List will be displayed.
- To operate via Content Menu Page
Click [Workspace Details] from the left side of the content menu page, and the workspace details window will be opened. By clicking [Proofing Request List] button on the workspace details, the proofing request list will be displayed.
- Click on the line that contains the request you want to see details, the proofing request details will be shown.
To cancel the proofing request, click [Cancel Request] in the proofing request details.
【Icon display for proofing request】
The content that has been requested for proofing will have a status icon displayed in the following two areas.
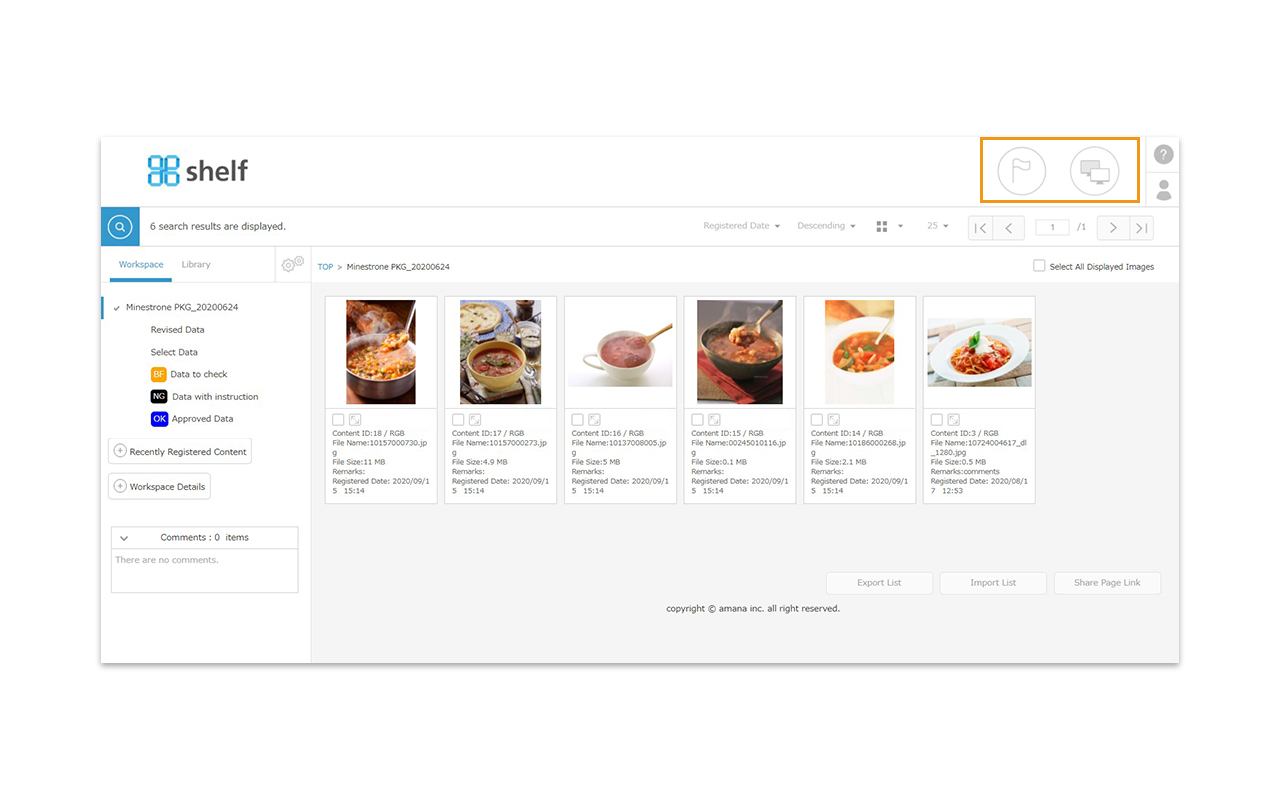
- Content Menu Page
 icon will appear at the bottom right of the content thumbnail. The icon will be shown only for the content that is currently being requested for proofing, and will disappear when the request period ends.
- Content information page

It will be displayed when there is any request that is currently within the available proofing period.

When the available proofing period has ended or the request has been removed, it will be displayed.
*The icon will not be displayed for the content that has not been requested for proofing.
Close
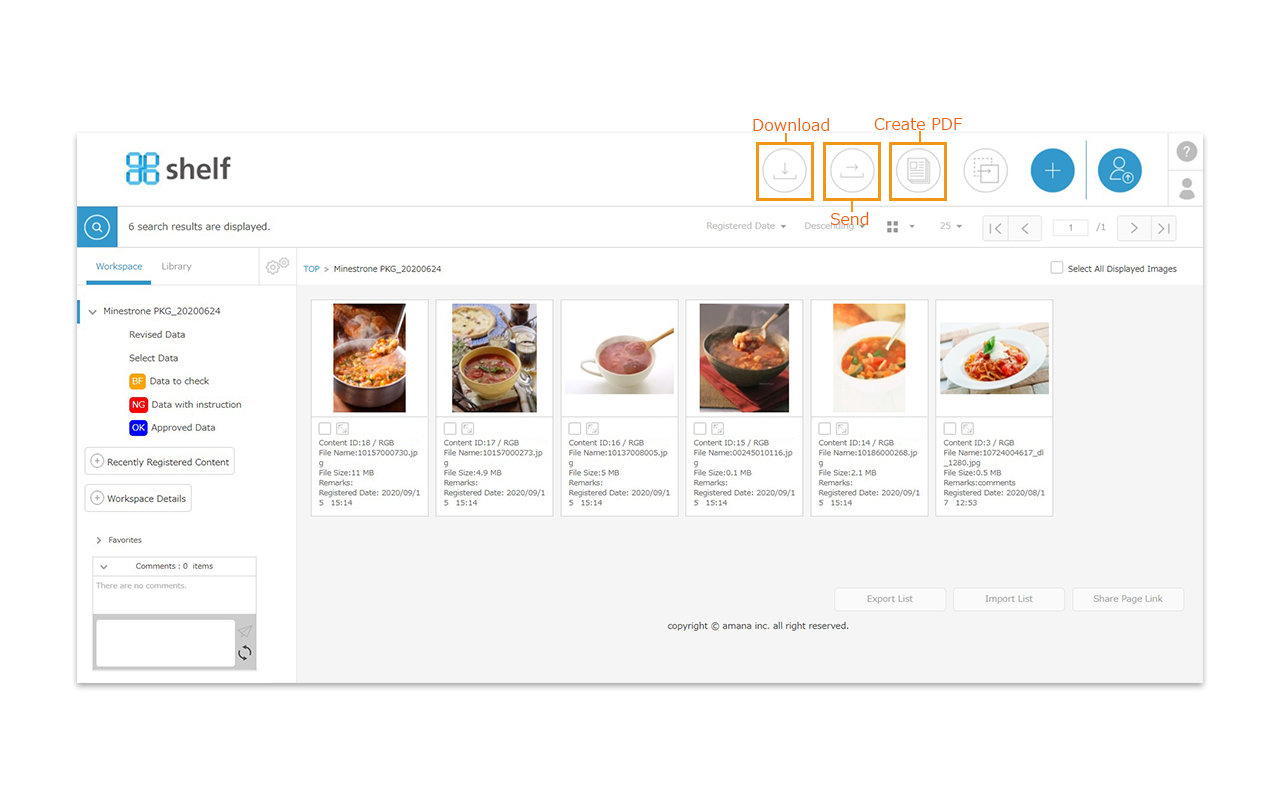
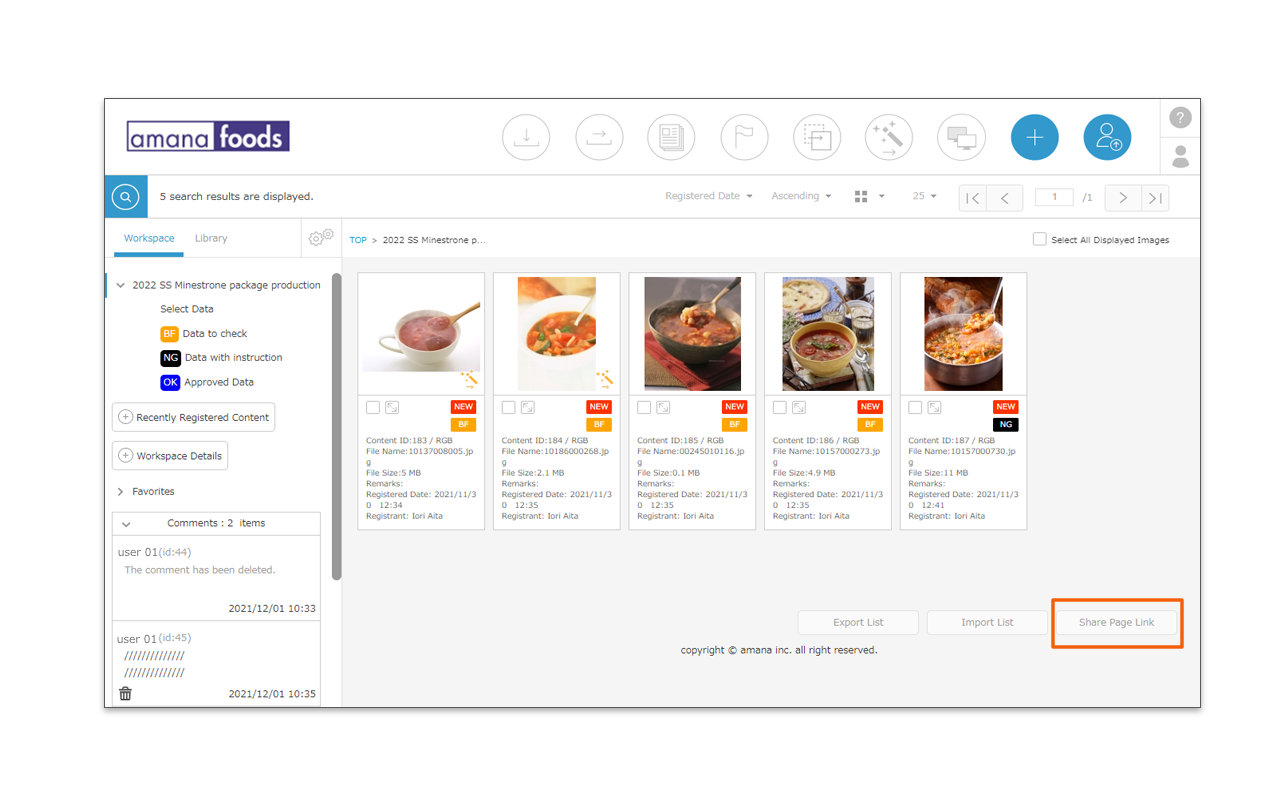
Downloading/Sending/Creating PDFs
Print
Downloading/Sending/Creating PDFs
Downloading, sending and creating PDFs are the same operation as Library.
For instructions on how to operate, please click on the links below.
-
When using workspace, the fields required for download/send/Create PDF are as follows.
<Download>
– Data Format Option
Master/Generate JPEG *Only for sites that have been set up.
<Send>
– Language Setting
– Destination Email Address
– Confirmation Email
– Subject
– Text
– Data Format Option
Master/Generate JPEG *Only for sites that have been set up.
<Create PDF>
– Order
It can also be downloaded,sent and create PDF from the content information page. Click the button to download/send the content.
* Users without the relevant permissions cannot perform this action. For more information please contact your site administrator.
Close