Proofing Request to Non-shelf Users

Through proofing requests, it is possible to allow non-Shelf third-party users to proof the content. Third-party users will only be able to view the proofing screen, and will not be able to see the contents of the site. Third-party users will only be able to view the content that is selected, will not be able to see any other content on the site.
You can select “Proofing Mode” in which the requested third party can enter comments and proofread, or “View Mode” in which you can only view.
【Request Proofing】
- Check the content you want to request for proofing. Then, select the content by clicking Proofing Request icon in the header area or dragging and dropping the thumbnail to Proofing Request icon. You can also select the content by clicking [Proofing Request] icon in the content information page.
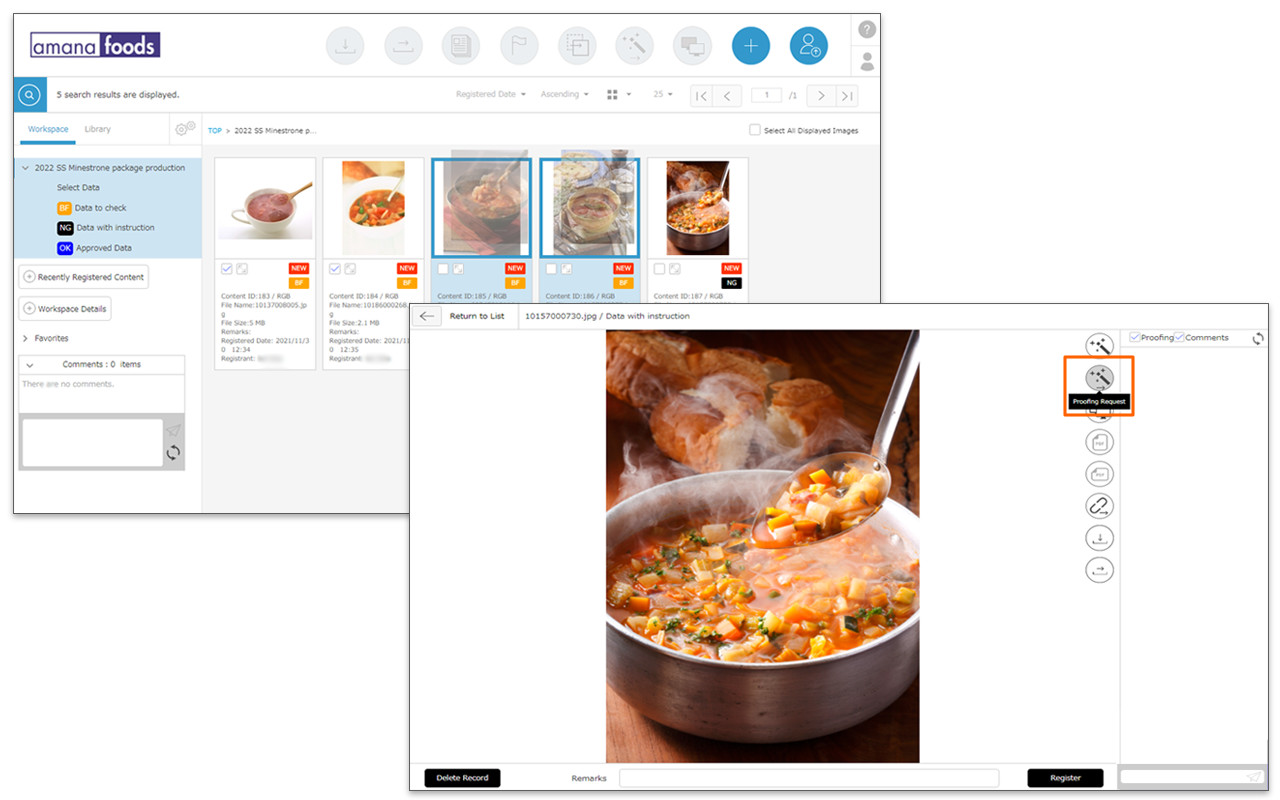
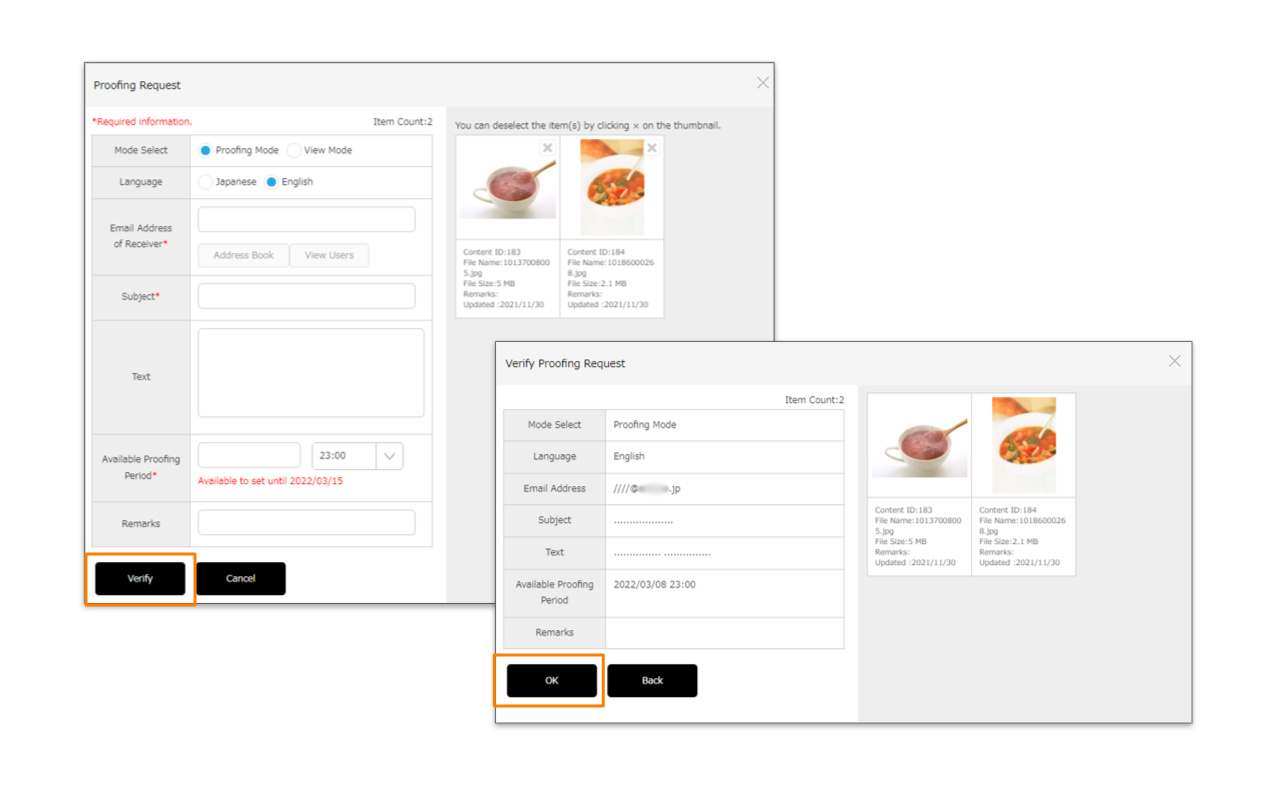
- When the proofing request window opens, enter the required fields.
- Select Mode
Select the operation that can be performed by the recipient of proofing request.
Proofing Mode: The proofing screen is shown. Both proofing and comments are possible.
View Mode: Cannot proof or comment, can only view the contents. - Language
Select language from Japanese/English. The notification containing the upload URL will be sent to the requestee in the selected language. - Requestee Email Address
Enter the destination email address. If you want to enter multiple addresses, separate these with spaces or commas. - Subject, Text
Text entered here will appear as is in the subject line and body of the email respectively. - Available Proofing Period
Set the deadline for the proofing. You cannot set a date and time beyond the expiration date of workspace.
*The maximum number of days that can be specified for the proofing/viewing request can be set. Please refer to Create Workspace for the details.
- Select Mode
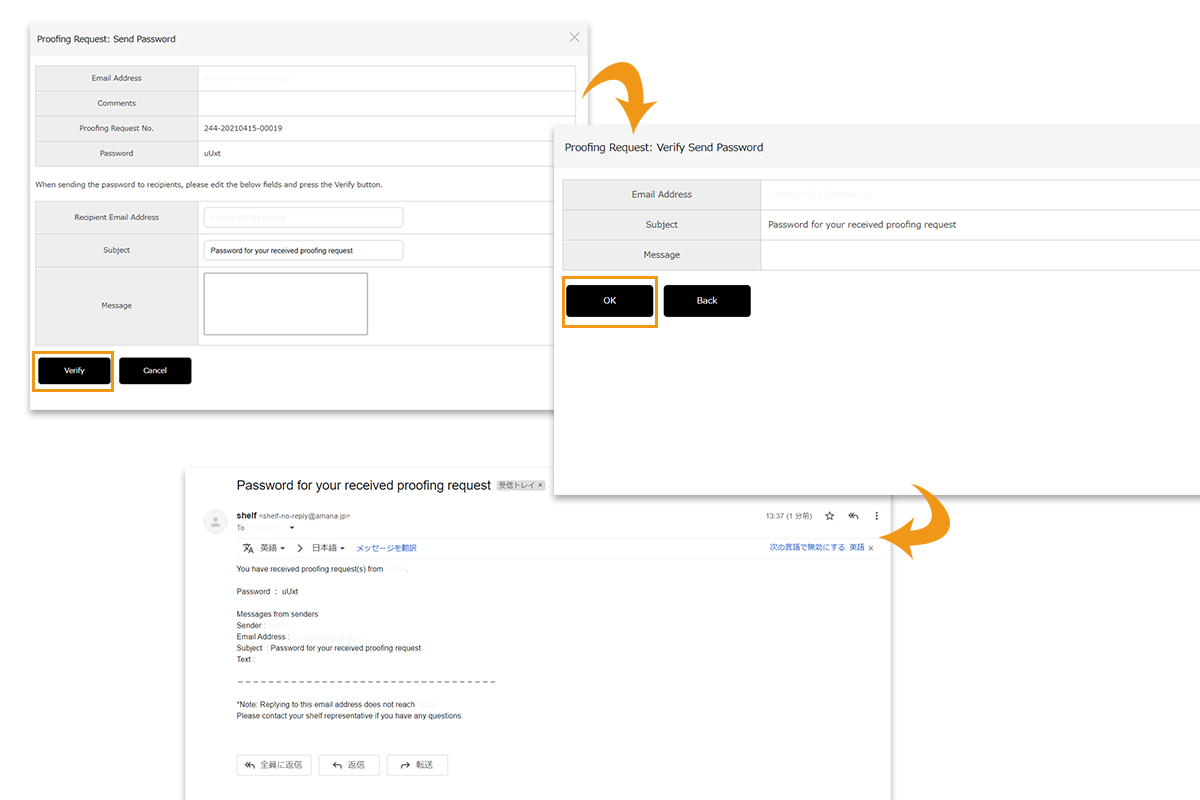
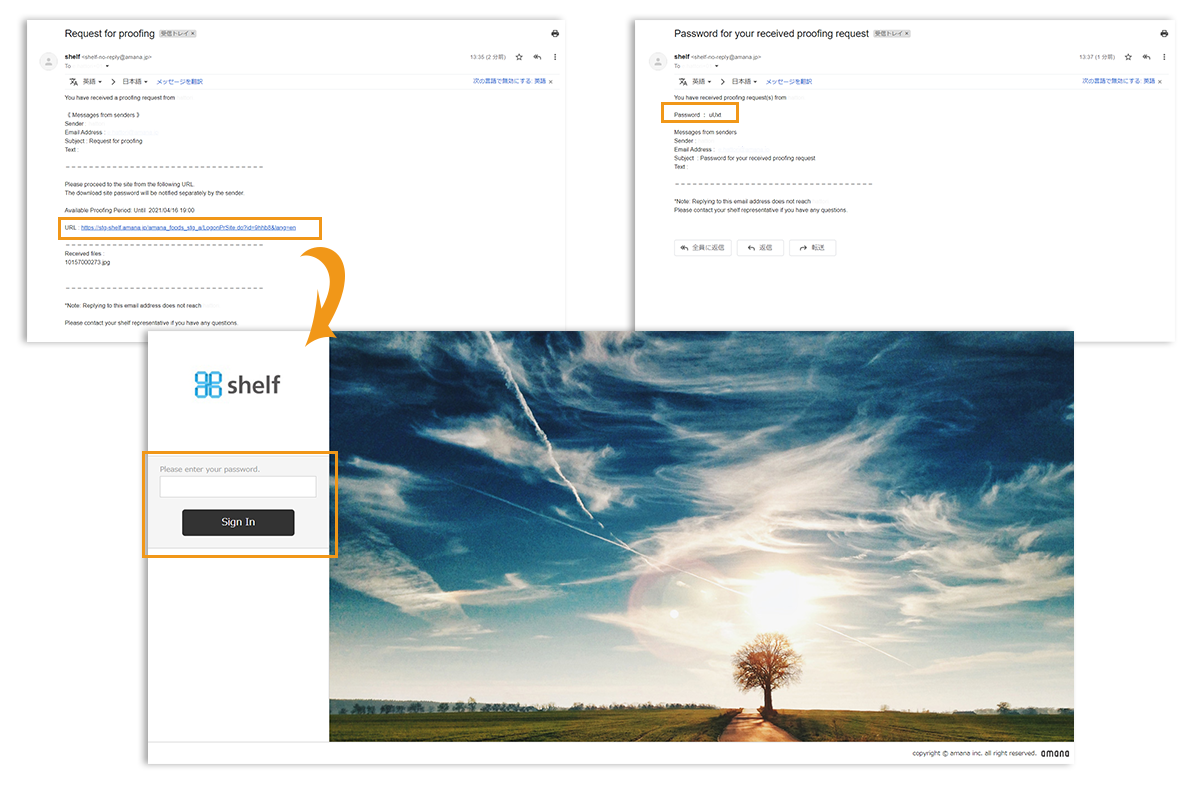
- Click Verify, then OK to send an email notification to the requestee.
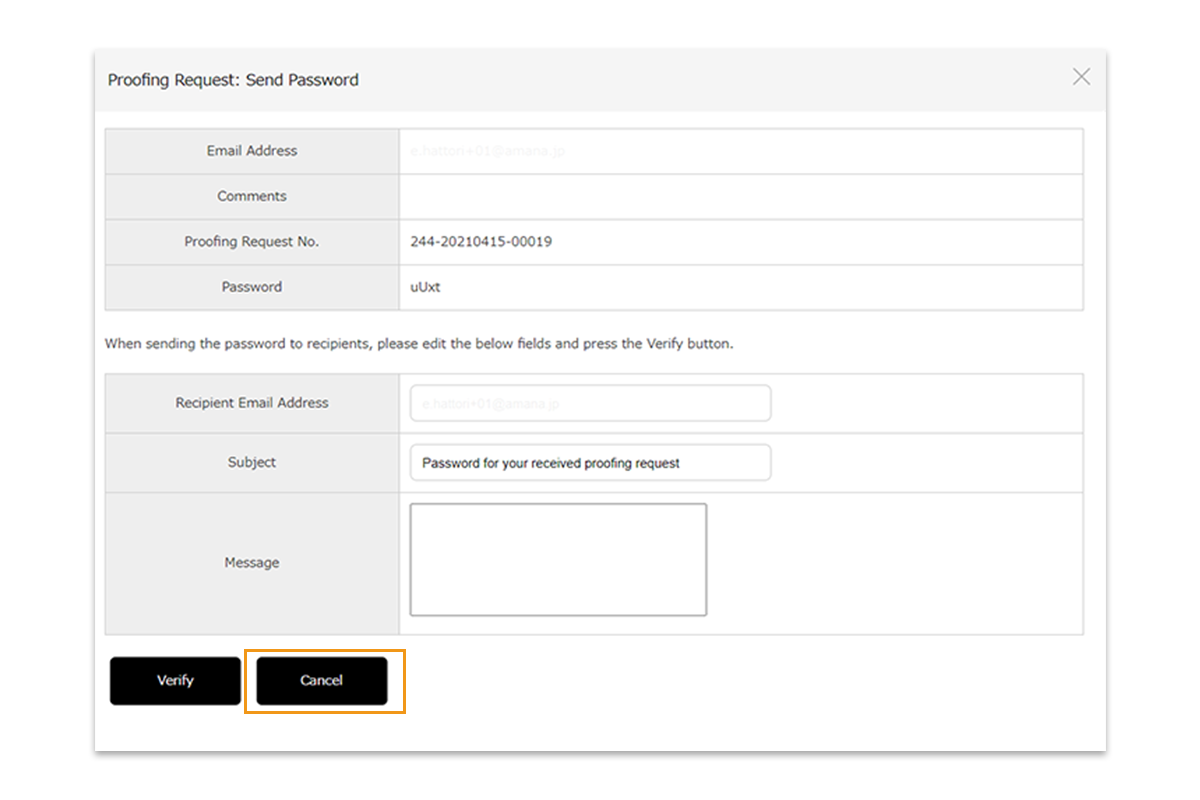
- Following this, the Send Password window will appear showing the password to be sent which will be required to access the registration page. Confirm the email addresses and the subjecy are correct, and click Verify, then OK to send this password to the recipient(s).
If you do not want to send a password notification e-mail, click [Cancel].
*Confirmation email sent to the operator will be in Japanese if the operator is logged in to a Japanese site, and in English if the operator is logged in to a site in another language.
【Proofing Registration/Viewing from Request Emails】
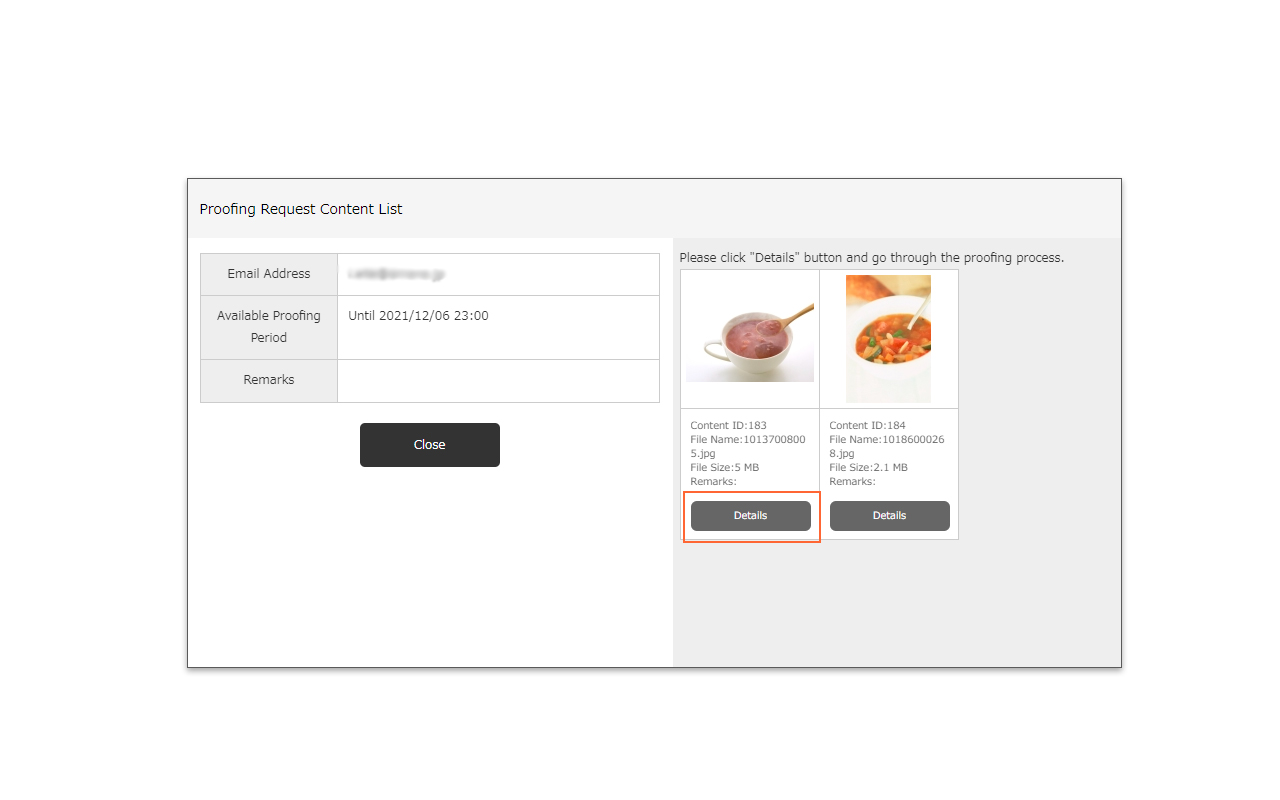
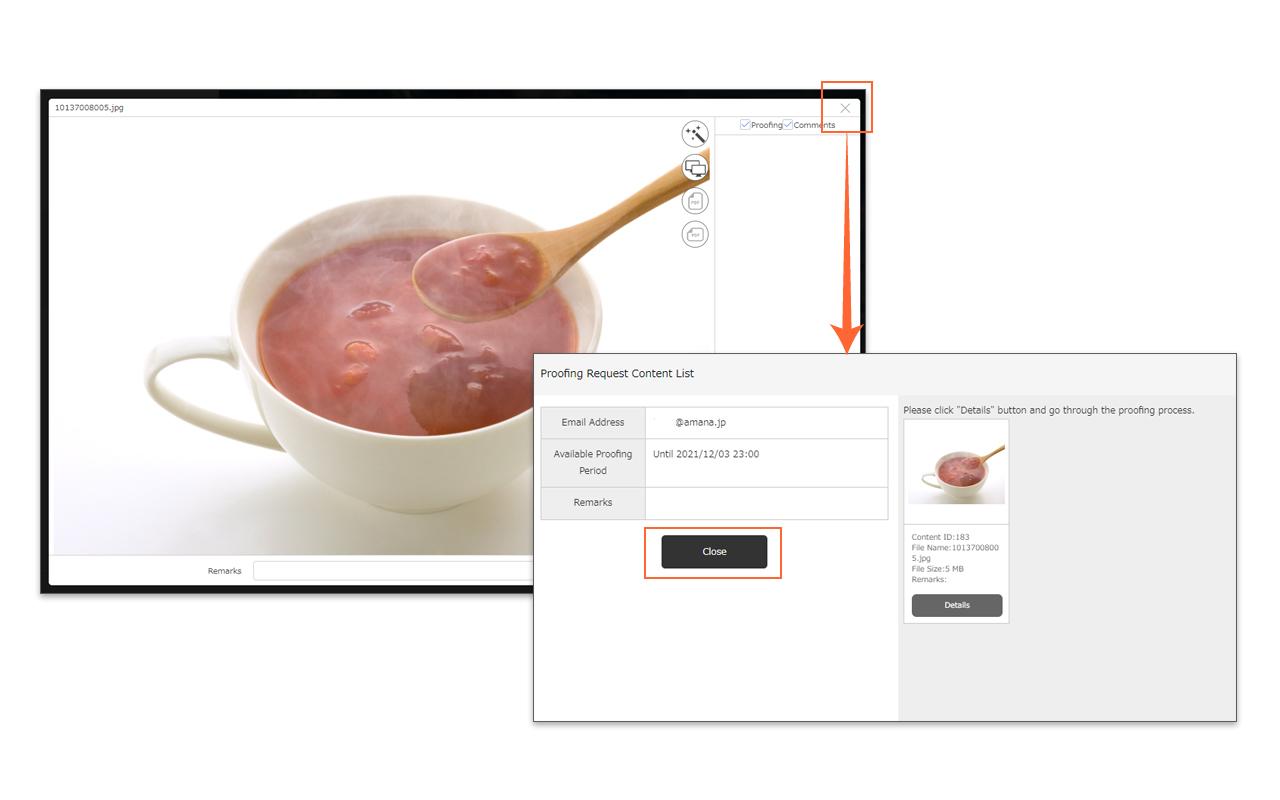
- Clicking on the URL will take you to the password prompt page. Enter the password which was provided to log in, and the proofing request content list will be opened.
-
- *The login will be disabled after the available proofing period is expired or the proofing/viewing request is removed.
- Click [Details] or [View] button that you find below the thumbnail of the content to open the content page.
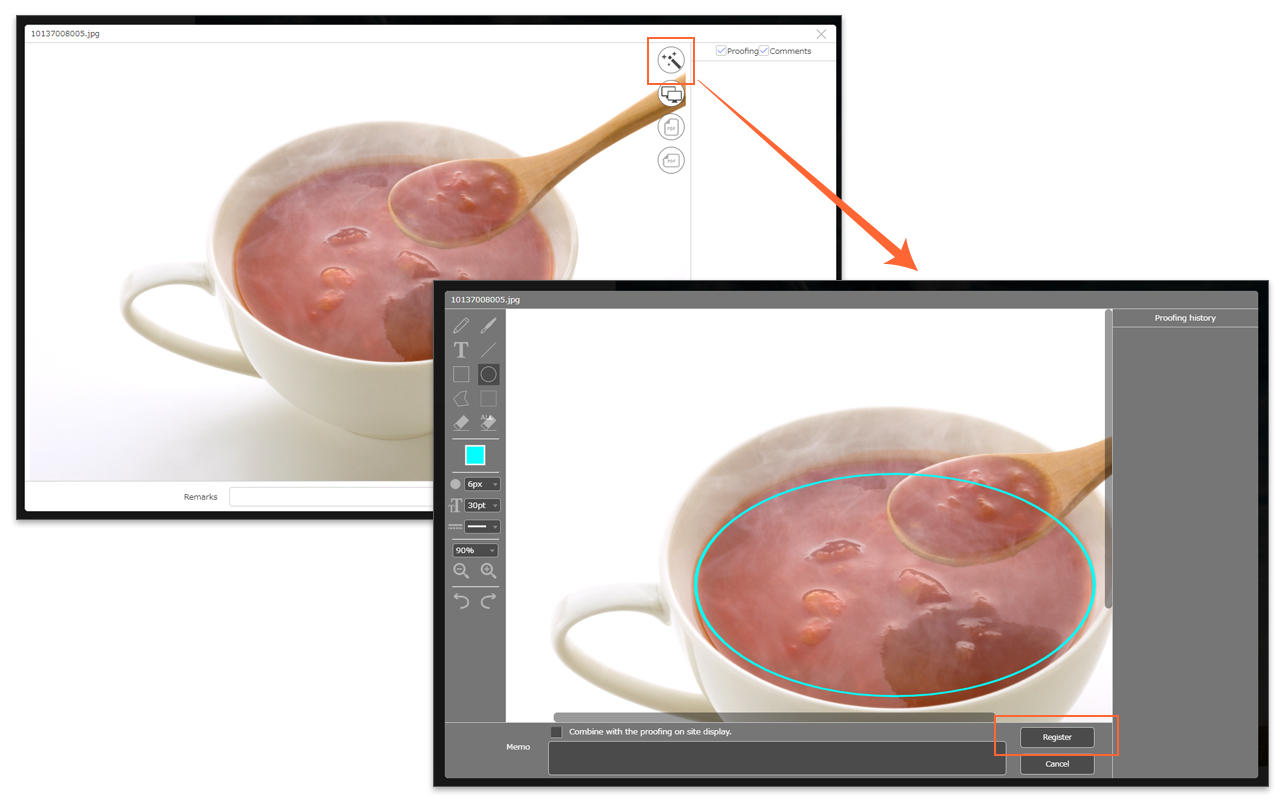
- In proofing mode, Click
 icon to register proofing on the content information page. Once the registration is completed, click [Register] button. For more details about the proofing, refer to Proofing page.
In the content information page, it also shows the proofs and comments registered by other users.
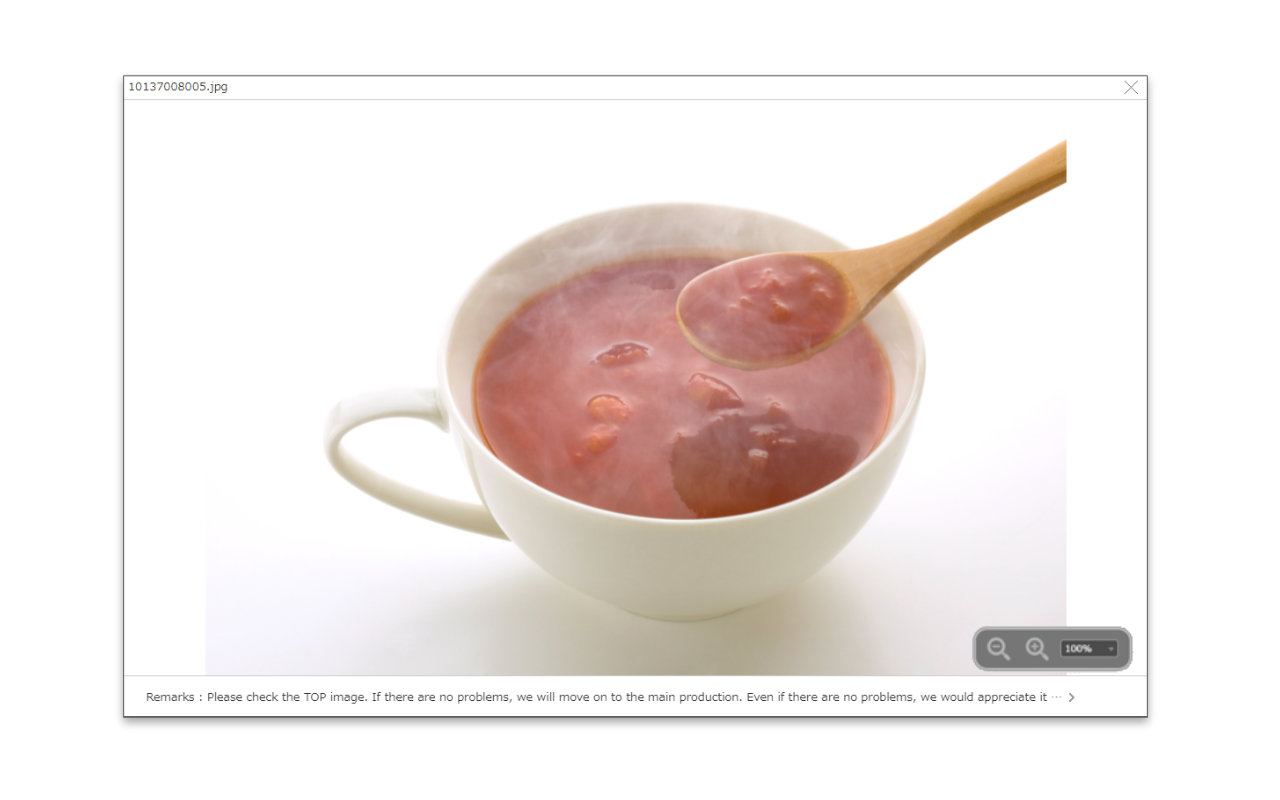
The remarks will be visible if it is noted. Click on “>” to expand it and see the full text. Also, mouse over the screen control panel operate it and you can change the display zoom size.
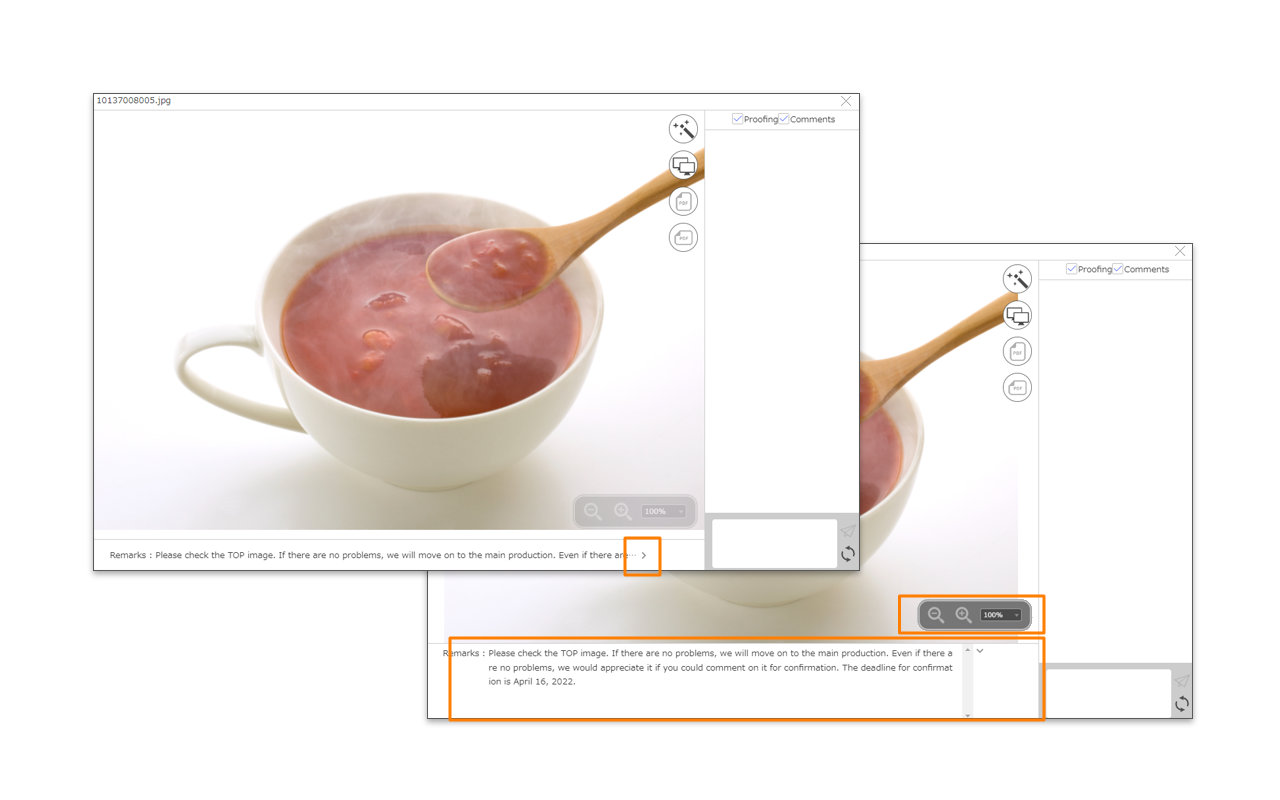
In viewing mode, you can only check the contents and remarks, not proof. Mouse over the screen control panel operate it and you can change the display zoom size.
- Close the content details screen and click [Close] button in the Proofing Request Content List.
*Registration of proofing by non-shelf users is highlighted in an orange frame when you select any proofing history in the proofing history column. Also, an email address will be displayed in the registrant user name field.

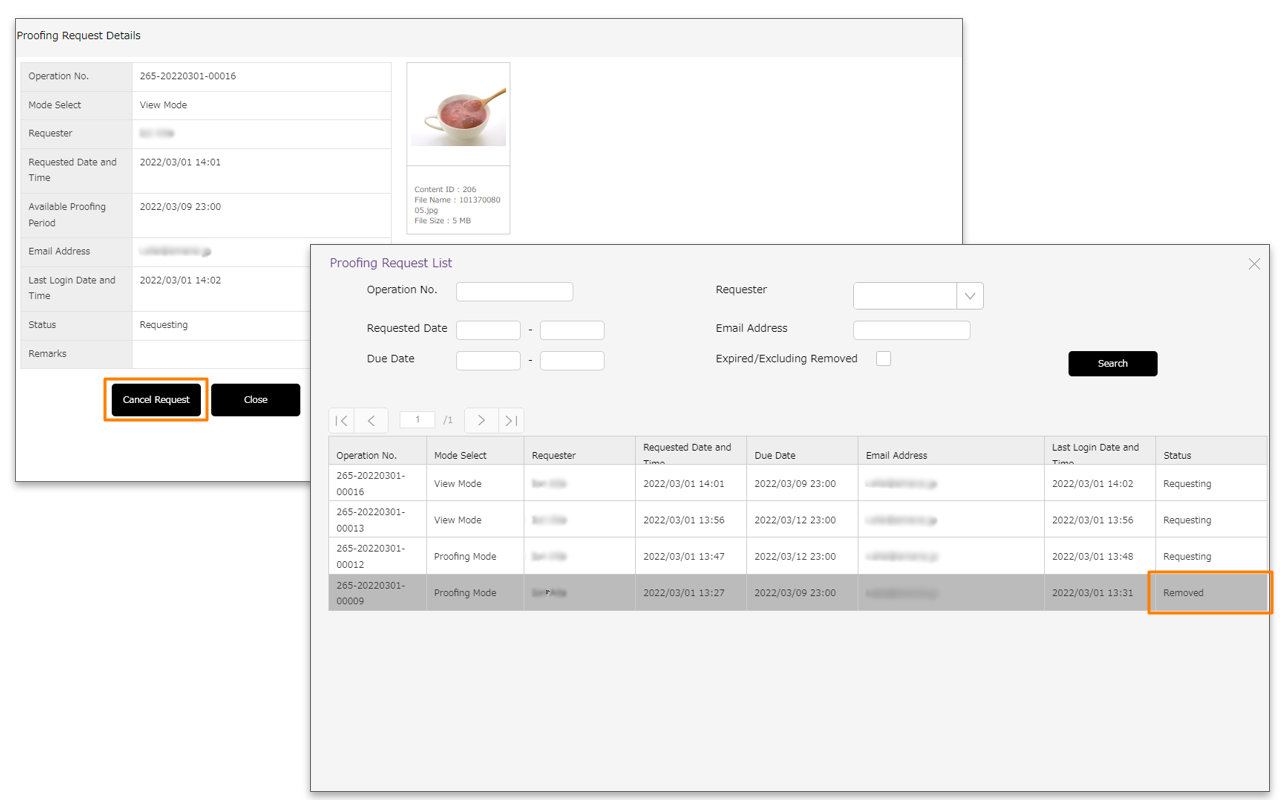
【Proofing Request History】
The history of proofing/viewing requests can be managed in the proofing request list. On this page, you can cancel the proofing/viewing request that you are currently requesting, as well as check the history such as removed and expired. Only registered workspace users can view the proofing request list. The requested third party user cannot view it.
- You can see the proofing request list in two different ways as below.
- To operate via Content Information Page
Click [Requesting] icon in the content information page, and then the proofing Request List will be displayed.

- To operate via Content Menu Page
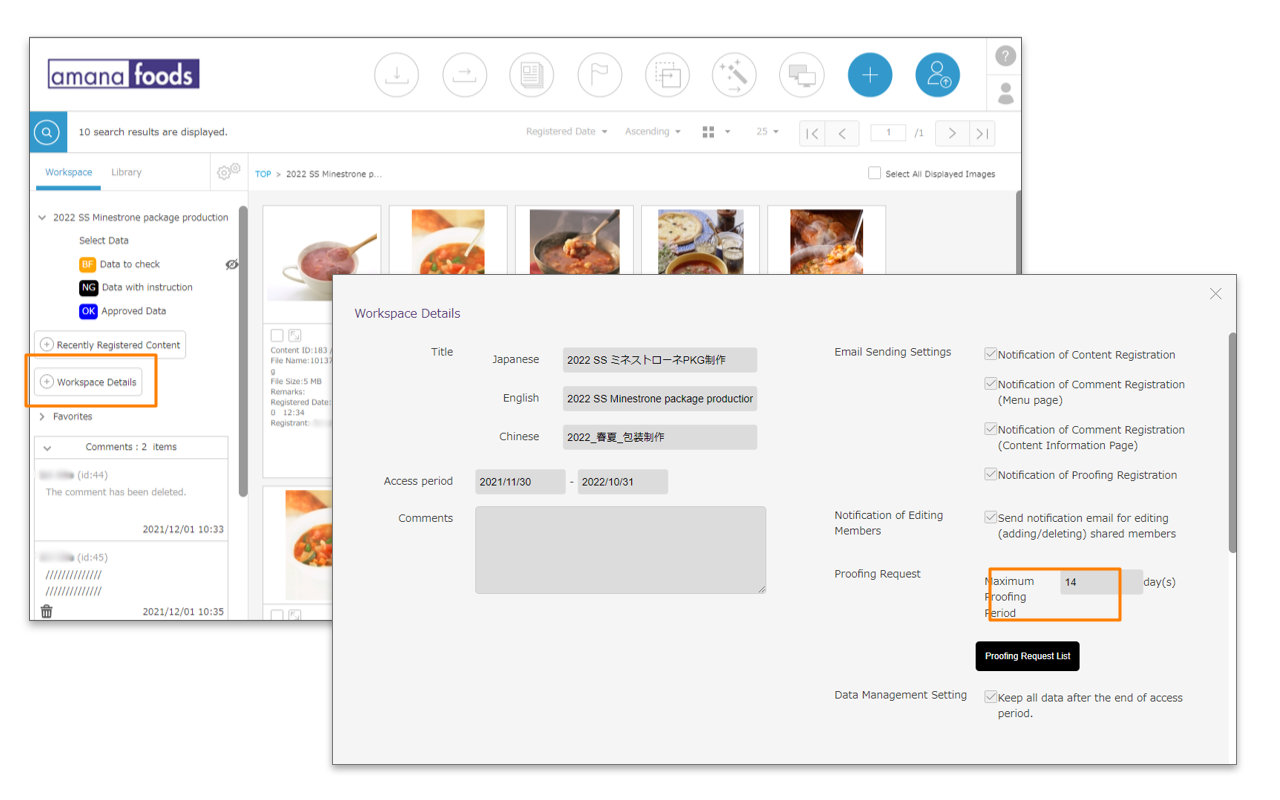
Click [Workspace Details] from the left side of the content menu page, and the workspace details window will be opened. By clicking [Proofing Request List] button on the workspace details, the proofing request list will be displayed.
- Click on the line that contains the request you want to see details, the proofing request details will be shown.
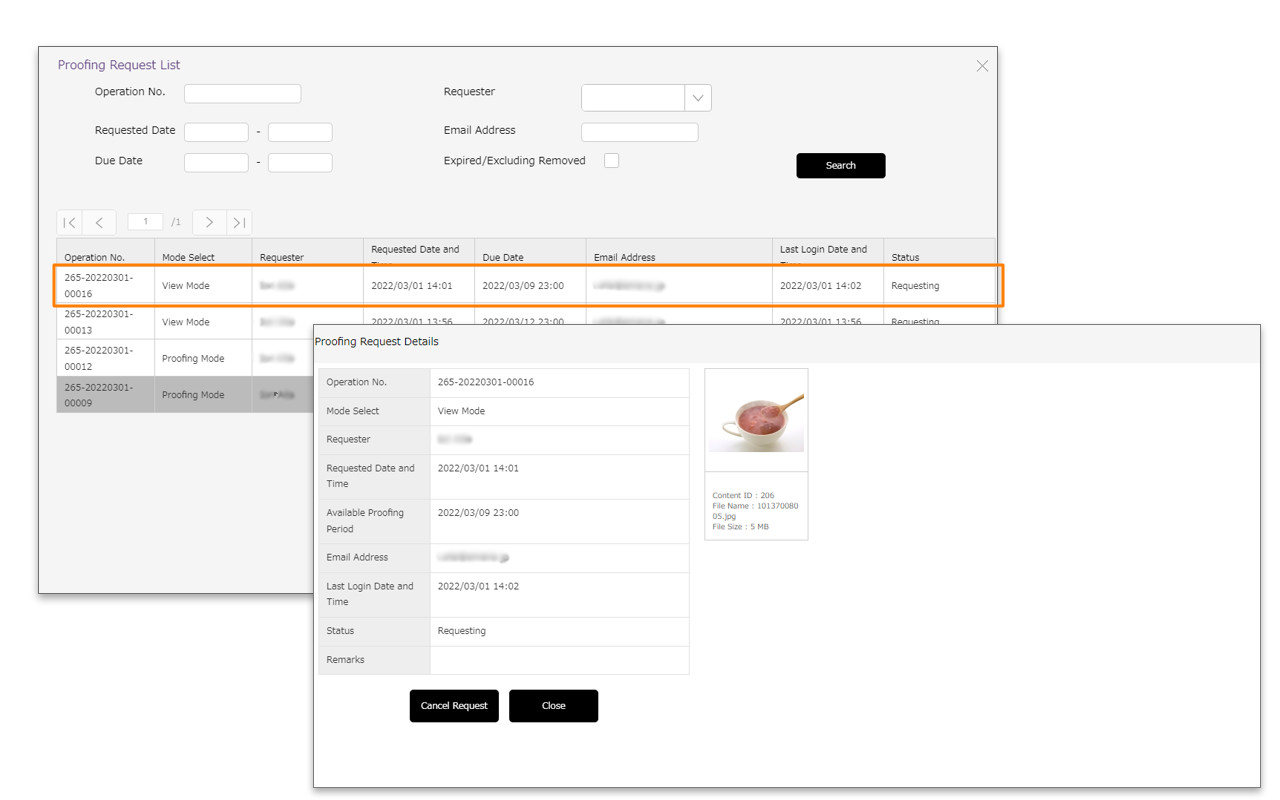
To cancel the proofing request, click [Cancel Request] in the proofing request details.
【Icon display for proofing request】
The content that has been requested for proofing will have a status icon displayed in the following two areas.
- Content Menu Page
 icon will appear at the bottom right of the content thumbnail. The icon will be shown only for the content that is currently being requested for proofing, and will disappear when the request period ends.
 - Content information page

It will be displayed when there is any request that is currently within the available proofing period.

When the available proofing period has ended or the request has been removed, it will be displayed.
*The icon will not be displayed for the content that has not been requested for proofing.