Registering Content
![]()
You can upload image and video files, documents, etc., as content to a library menuregardless of file format.
For a list of file types for which thumbnails will be automatically generated, please see Automatic Thumbnail Generation Formats.
Registering Content
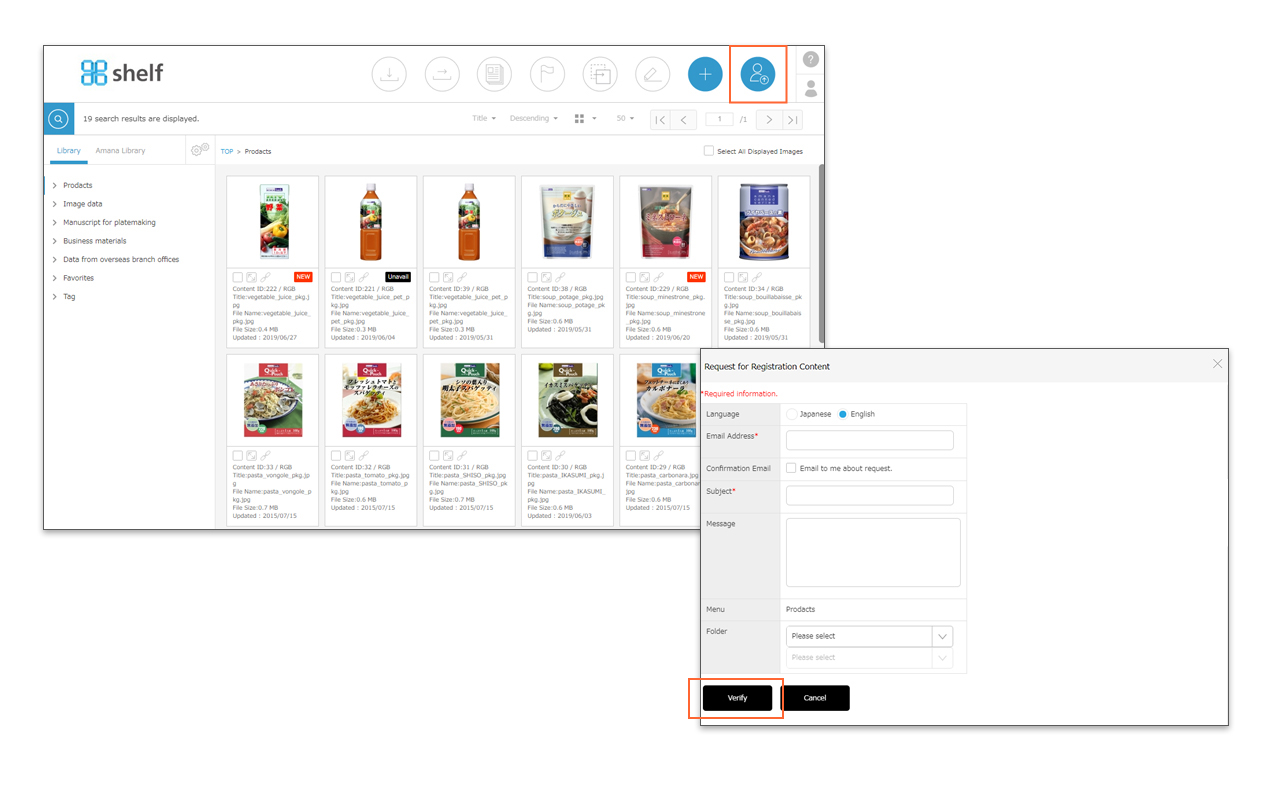
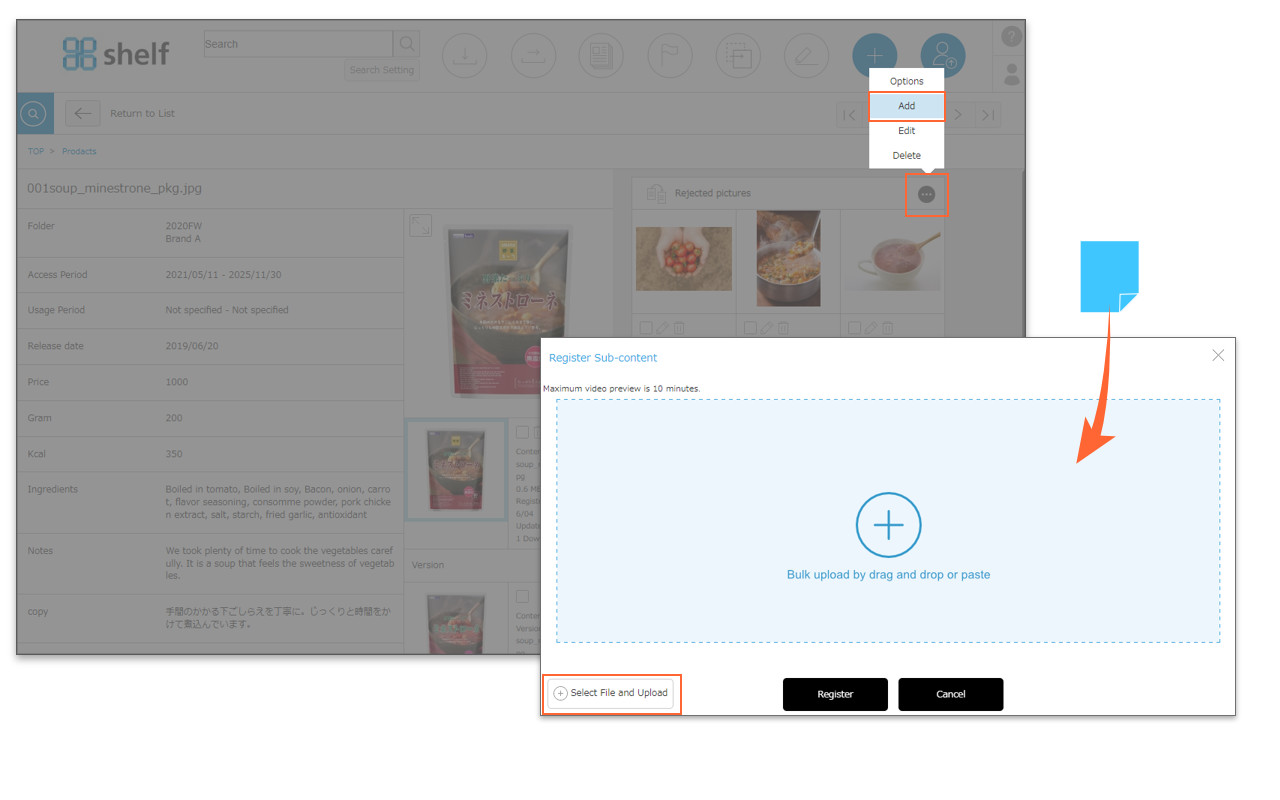
- Select the folder to register the content, and click the Register Content icon
 in the header.
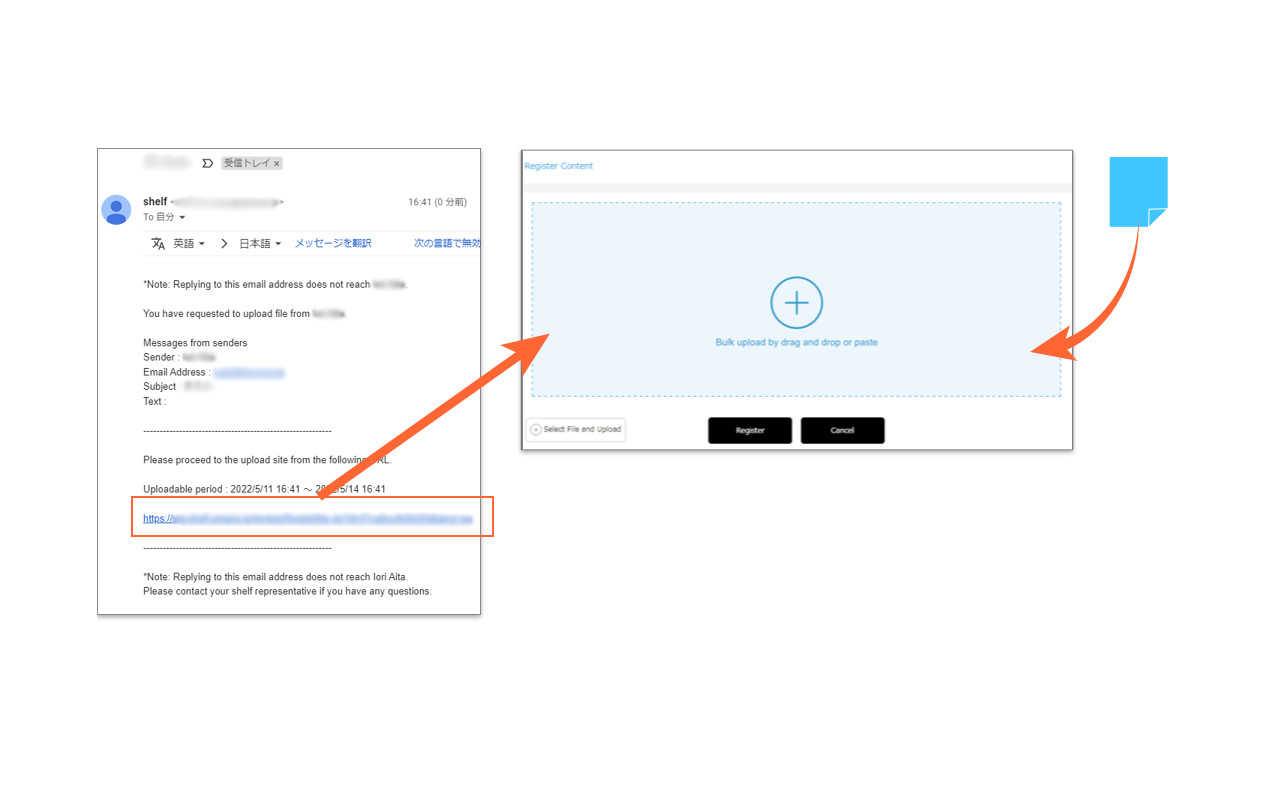
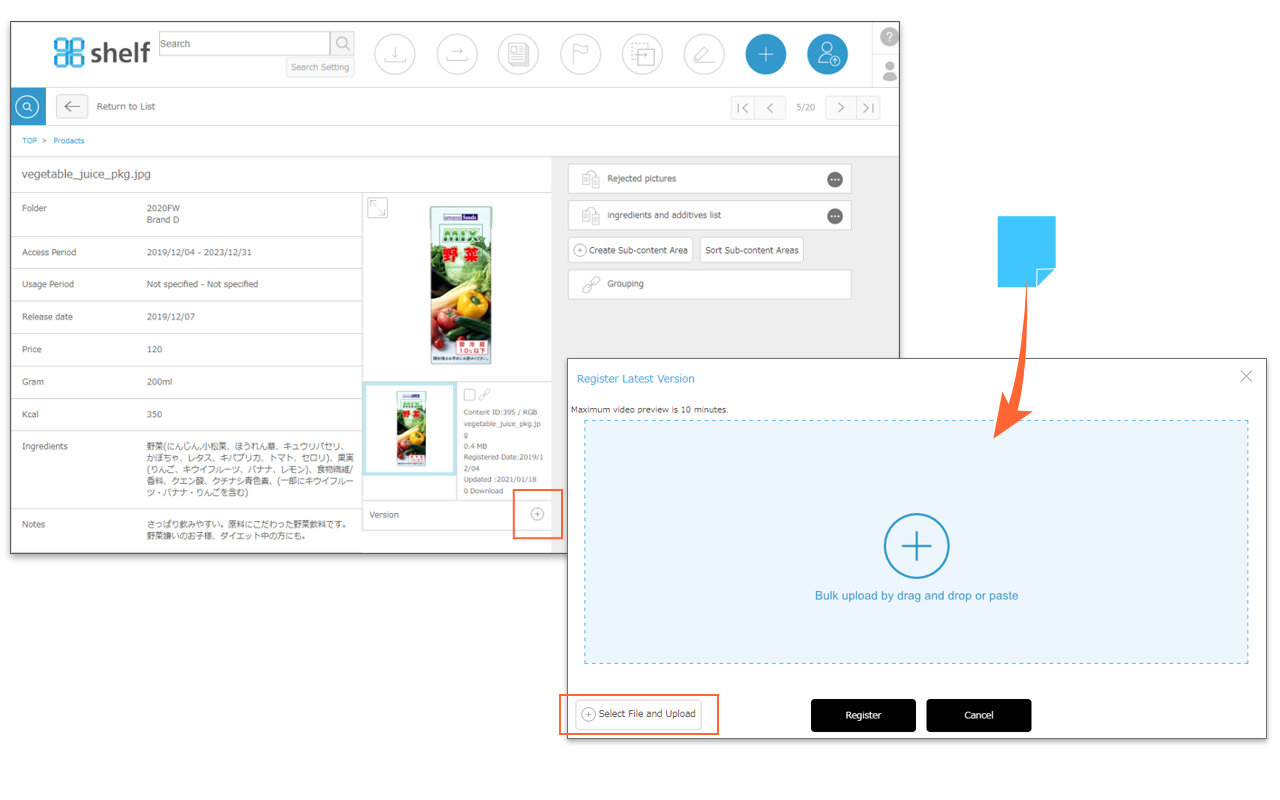
- Drag and drop or copy and paste the content you want to register into the registration area which appears.
Alternatively, you can select the content by clicking [Select File and Upload] button at the bottom of the registration area.
* The limit on content which can be registered at one time is 150 items, or a total size of 4GB(Depending on the site being used the upper limit may be set lower than this).
_EN.jpg)
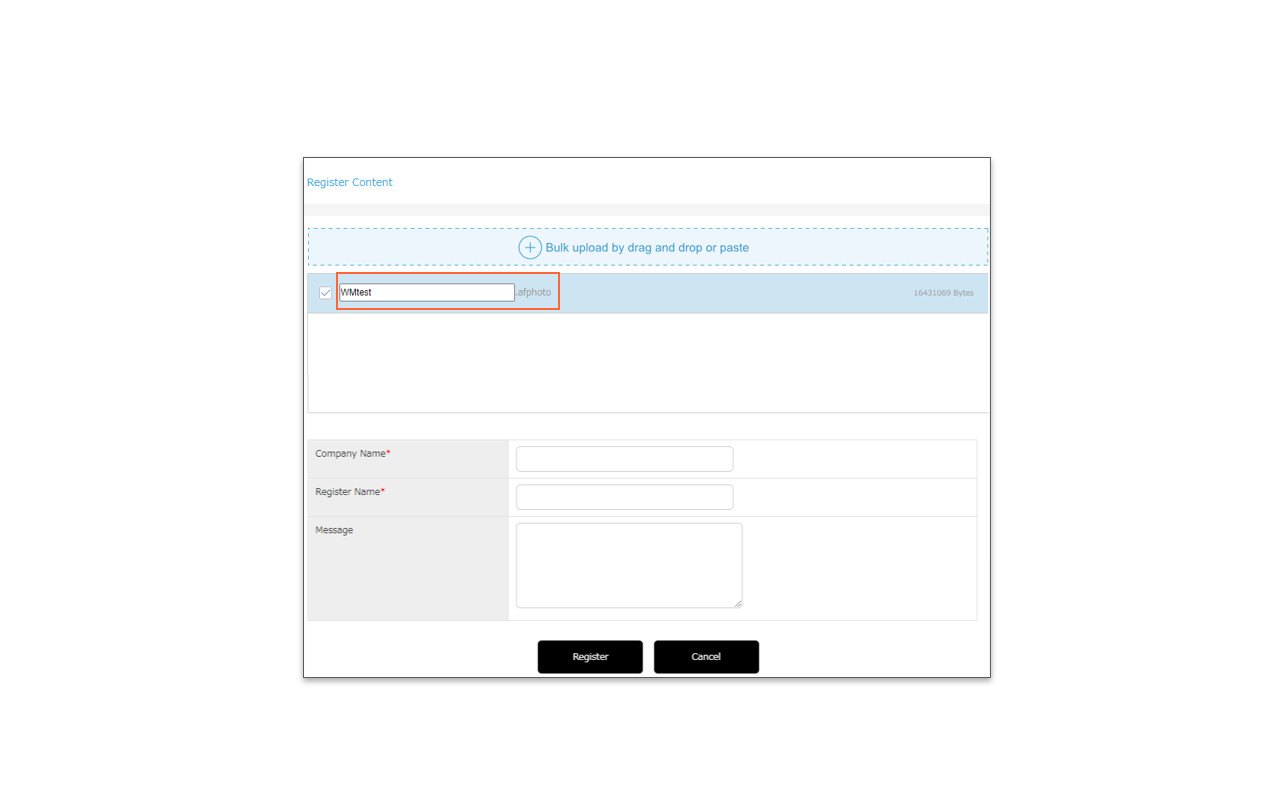
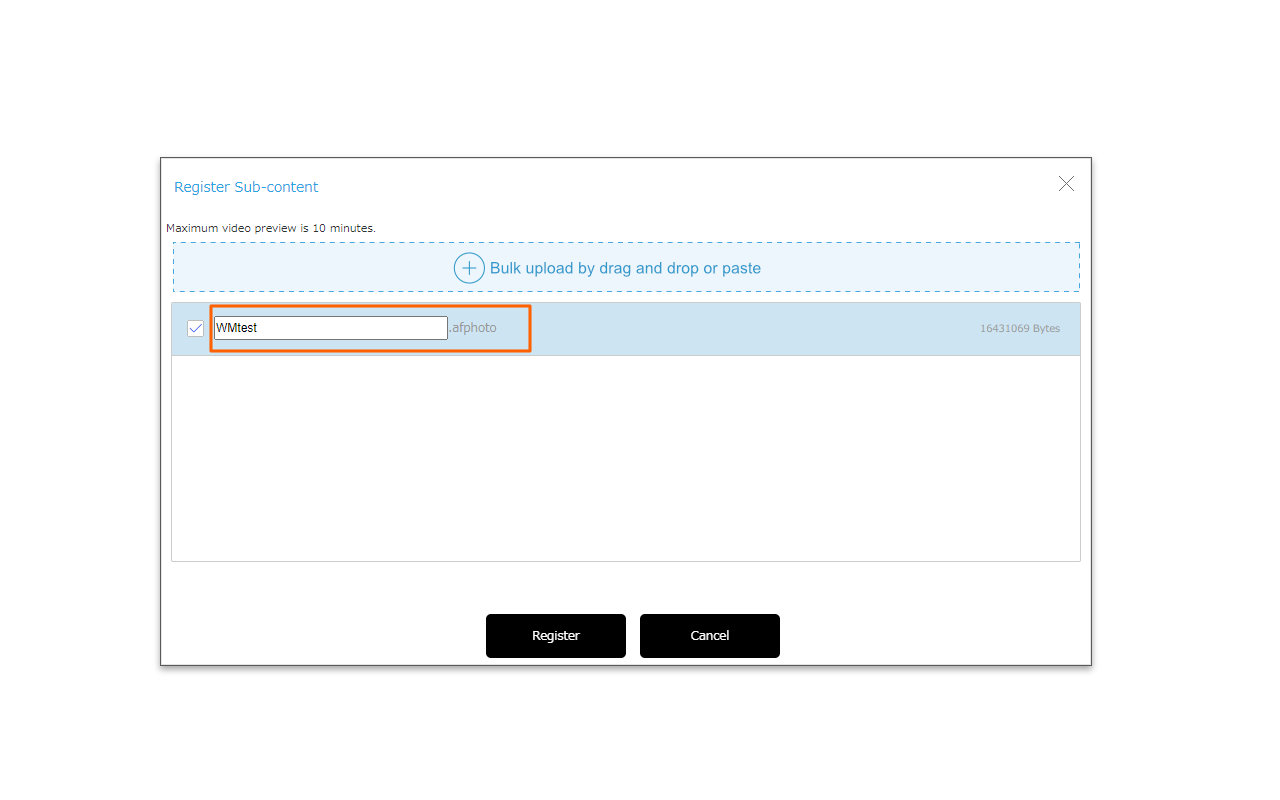
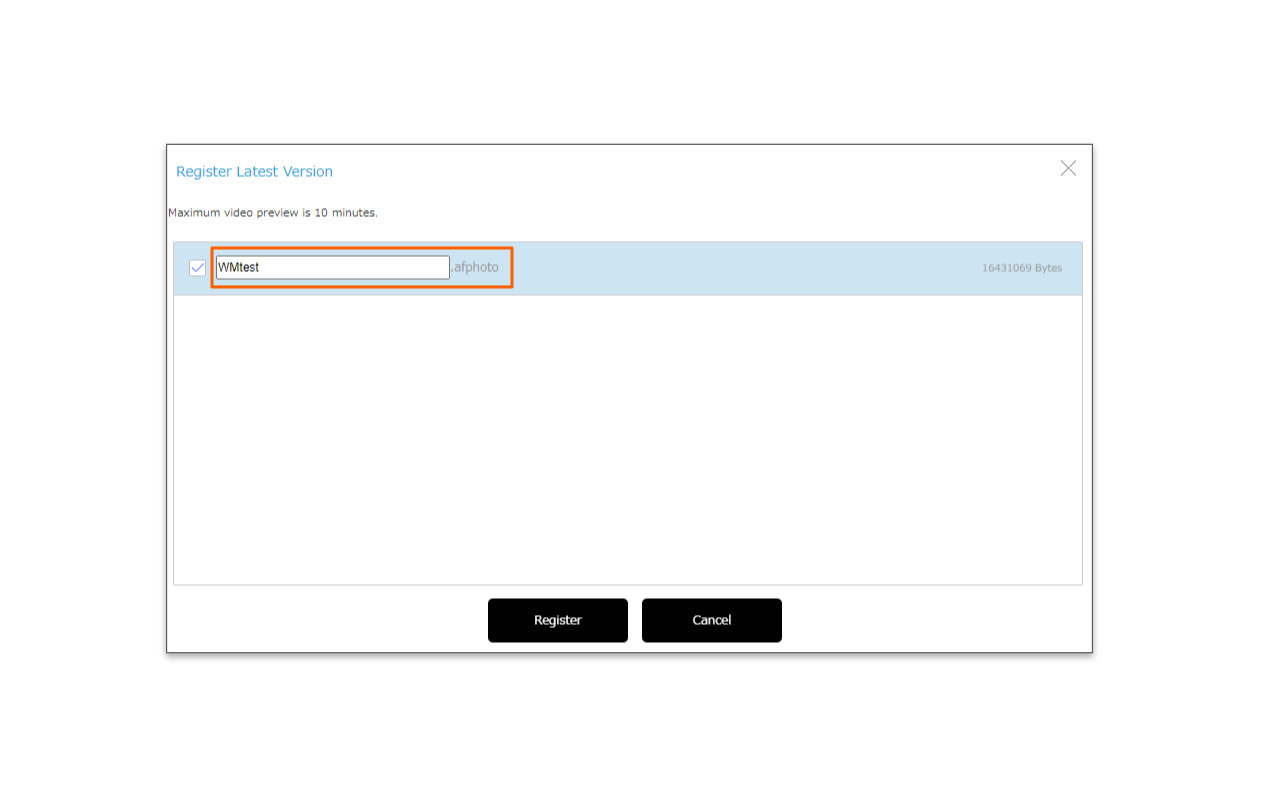
- The file name will be displayed in the contents registration area. If you want to change the file name of the data to be registered, click on the file name and rename it.
*Registration from “Select File and Upload” does not support renaming.
*In Windows, if the file name is too long or contains forbidden characters, it may cause an error when downloading. Please refer here for details.
_EN.jpg)
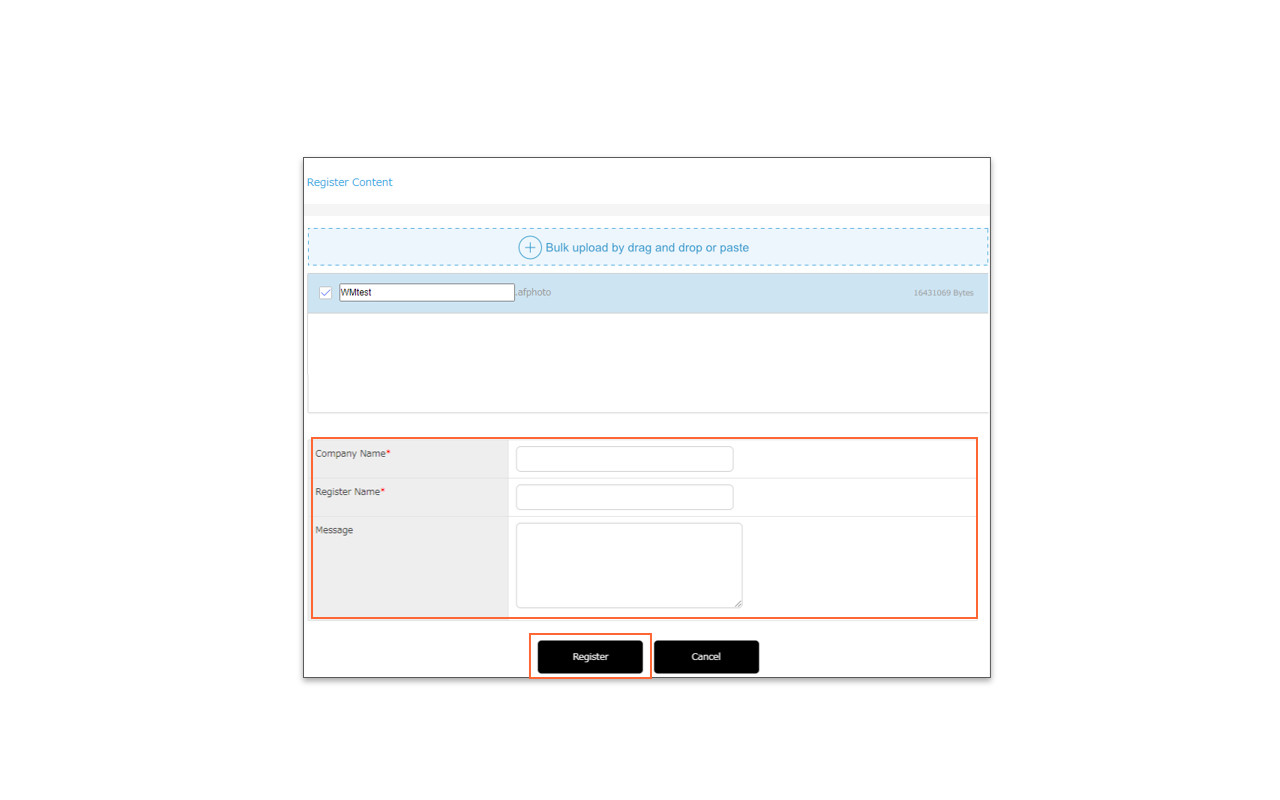
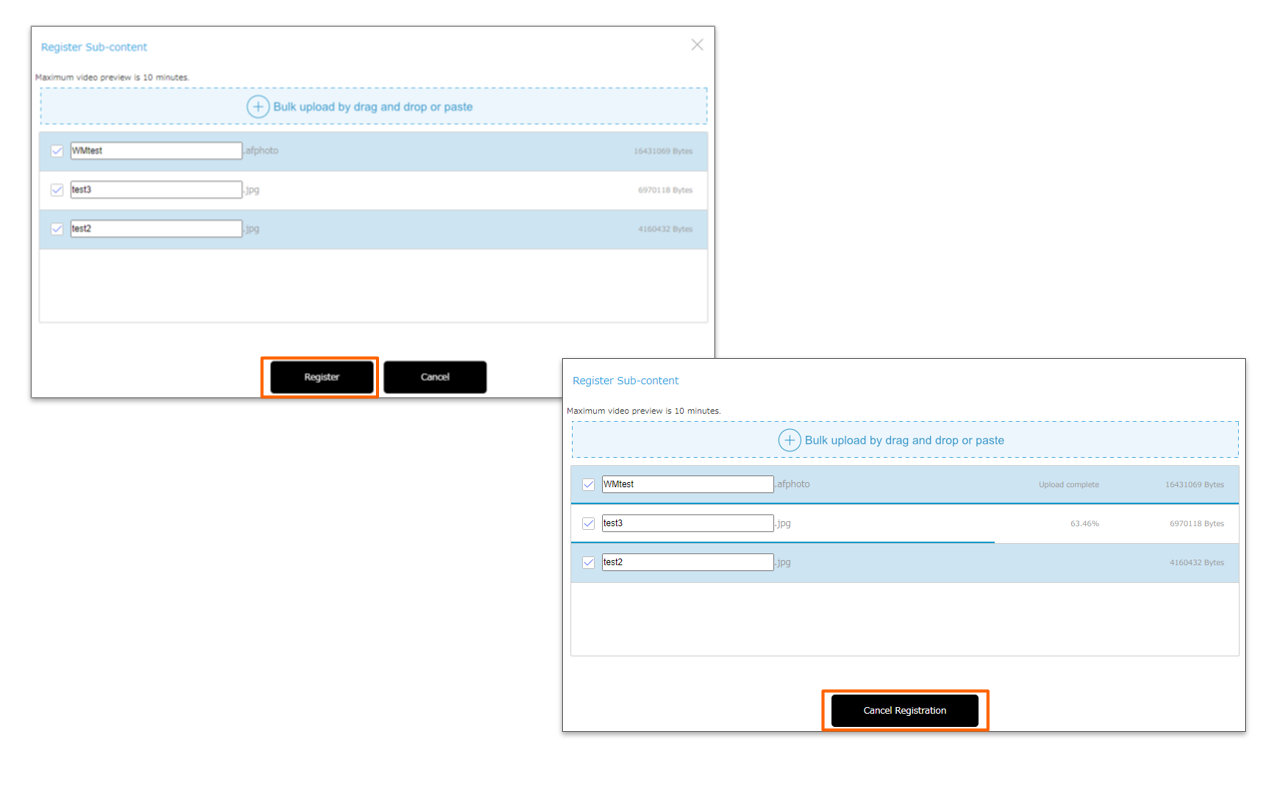
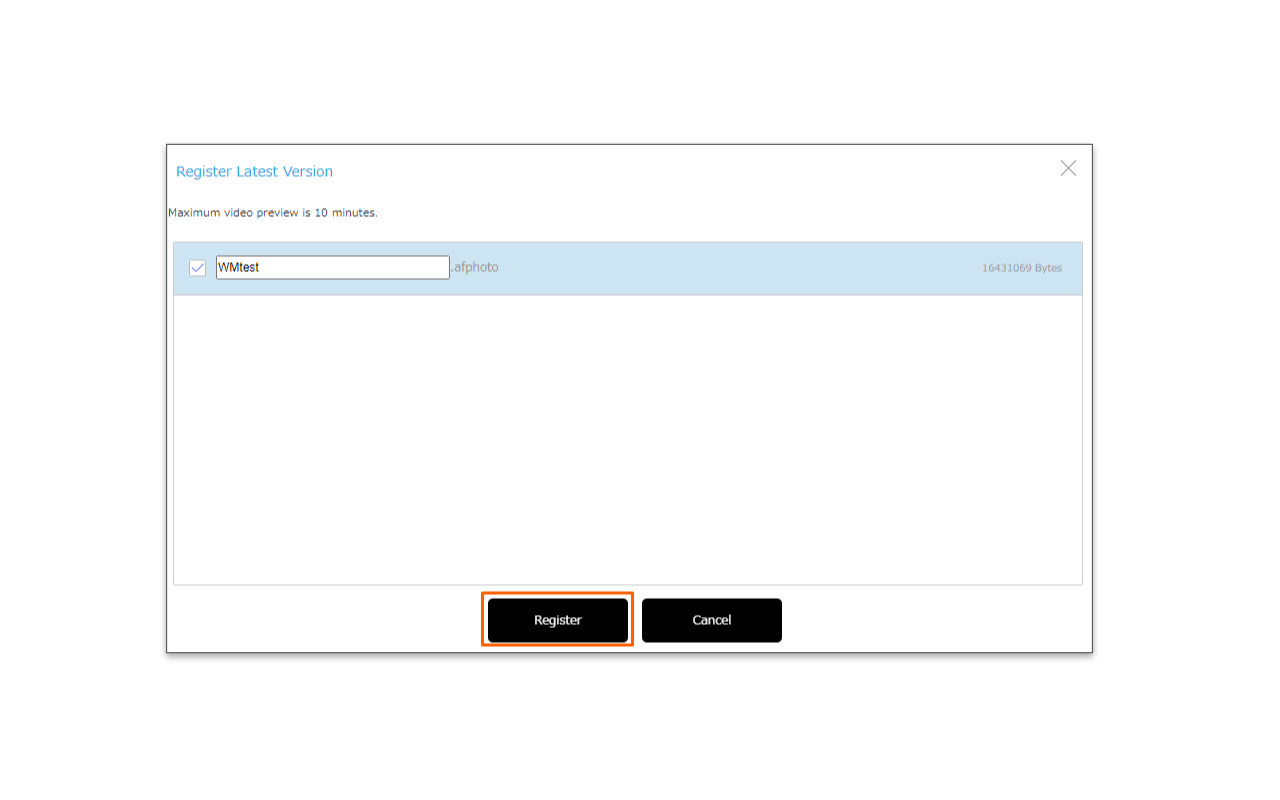
- Click Register to begin registering the content.
A progress bar showing % complete will appear for each item of content. If Cancel Registration is clicked during this process, only files which have 100% completed uploading will be registered to the site.
_EN.jpg)
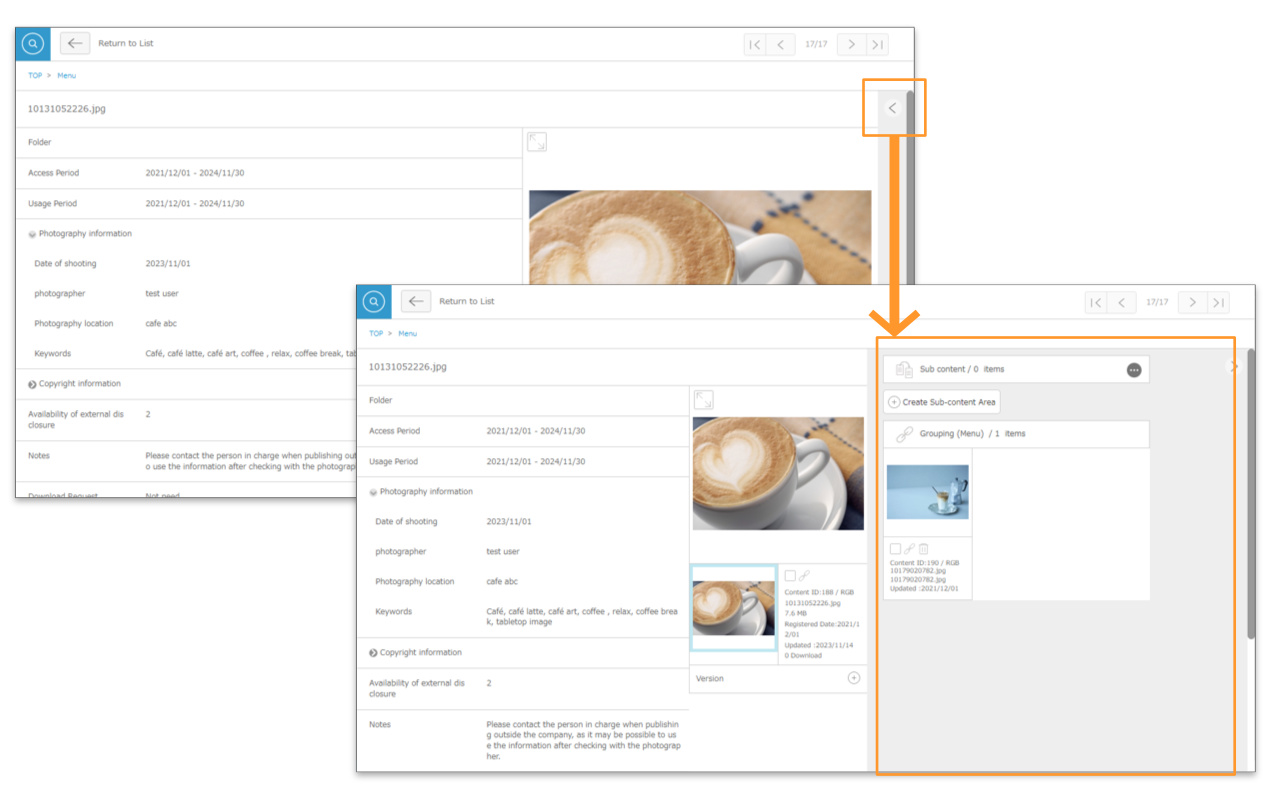
- Once the content has been registered, the below buttons will appear, allowing you to continue or edit meta information as required.
- Recently Registered Content
Will take you to a list of recently registered content. - Edit * For single item registration.
Will open an edit window which will allow you to edit the record’s meta information. - Edit Sequentially * For multiple item registration.
Allows you to sequentially edit the newly registered contents’ meta information. - Bulk Edit * For multiple item registration.
Allows you to edit all the newly registered contents’ meta information at once. - Close
Finishes registration without editing meta information.
- Recently Registered Content
_EN.jpg)
* When content is initially registered without being edited, it will be under “temporary registration” status (flagged as “Temp”). Until this content is officially registered on the content’s meta information editing page, it will not be visible by users other than the user who registered it, and users with Site Manager.
For more information, please see Content Statuses.
*New content cannot be registered in Favorites menus/folders or any Amana Library menus.
* Users without the relevant permissions cannot perform this action. For more information please contact your site administrator.